IV.
OPERATING SYSTEMS
4.4C
OPERATING SYSTEMS CONTINUED
C. HYDRAULIC SYSTEM
HYDRAULIC TREAD ADJUST–
To adjust the tread width hydrauli-
cally (if equipped) follow the instructions below:
1. Survey the surroundings and allow yourself enough room to adjust the
tread in either forward or reverse.
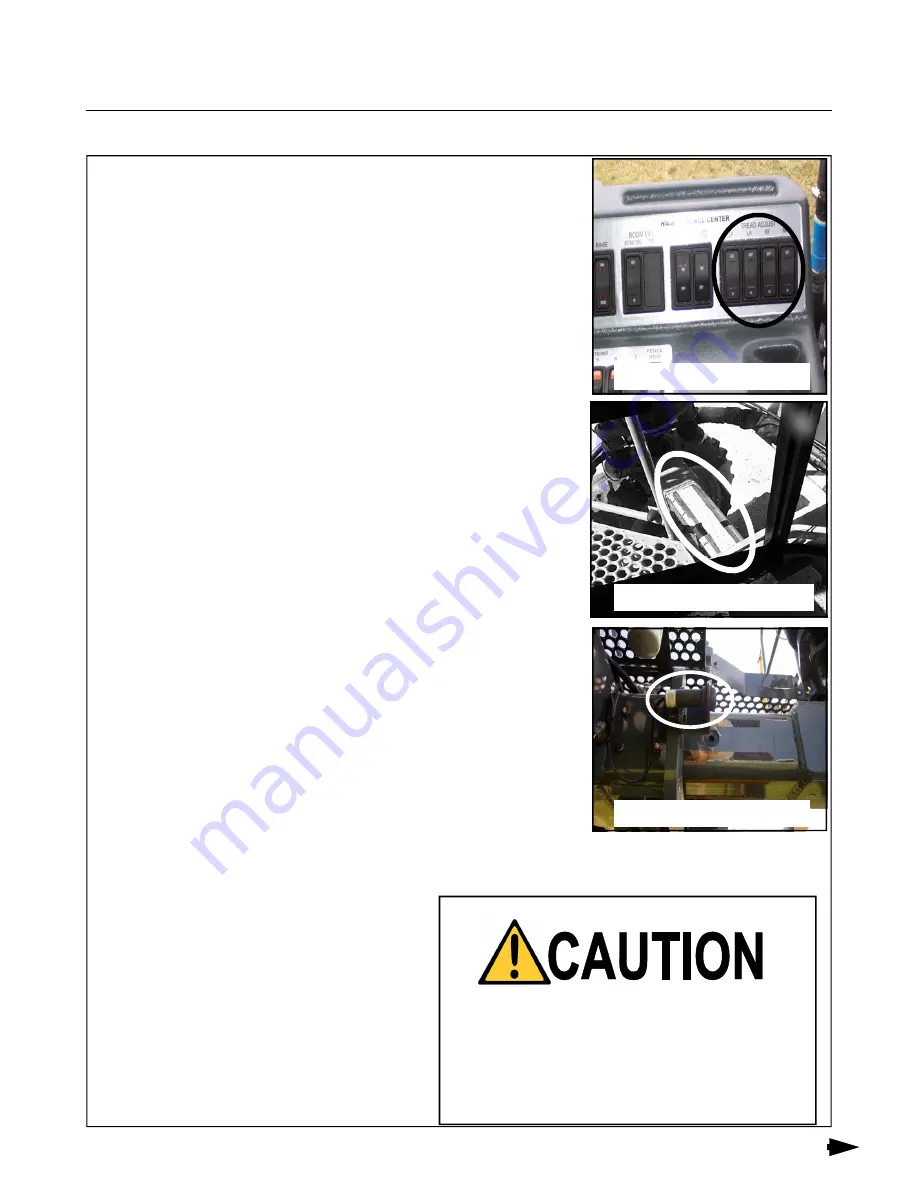
2. Locate the tread adjustment switches on the rear of the right hand
console (fig. 4.4C-1). They are marked LF (left front), LR (left rear), RF
(right front), and RR (right rear). The legs may be moved in or out on
each side independently*. While driving between one and two mph,
press and hold the desired switches to move the tread in the desired
direction. Pressing the top of the any switch will move that leg OUT
and pressing the bottom of any switch will move that leg IN.
3. Observe the tread width on each leg. Front legs use indicator decals
(fig. 4.4C-2) while the rear legs use electronic sensors and the MDM
in the cab (fig. 4.4C-3) . Release the switch when the tread indicator
reaches the desired tread marking.
4. After adjustment is complete, all four tread width indicators should
have identical readings.
5. To recalibrate toe-in: while driving forward slowly, turn the steering
wheel all the way one way until both steering cylinders bottom out;
continue turning the wheel a little more to let fluid bypass the cylinder.
Then turn the steering wheel all the way the other way and repeat the
process. When wheels are then straightened, steering cylinders
should be re-centered and correct toe-in should be obtained. This is
referred to as “phasing”. (see Section G of Service and Maintenance)
* When a significant adjustment is being made, it is
recommended that you adjust one leg at a time and
do the adjustment in smaller increments. Binding
may occur if a larger adjustment is made all at
once, especially if adjusting one leg at a time.
Never adjust the hydraulic tread on a public
roadway. Make sure the sprayer is on level
ground where there are no ditches or valleys to
interfere when you perform the adjustment.
FIG. 4.4C-1
FIG. 4.4C-2
FIG. 4.4C-3
Summary of Contents for STS 10
Page 119: ...9 9 IX TROUBLE SHOOTING NOTES...
Page 127: ...NOTES NOTES...

