


SECTION 10 –
MISCELLANEOUS
10-8
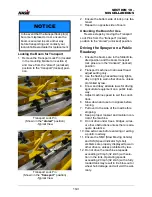
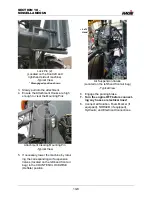
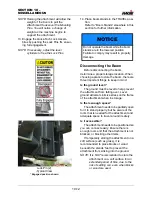
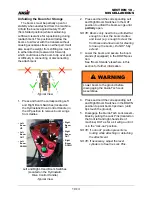
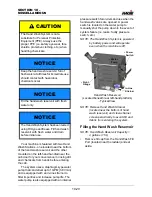
3. Slowly pull into the attachment.
4. Ensure the Attachment Hooks are high
enough to clear the Mounting Pins.
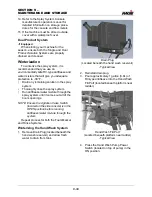
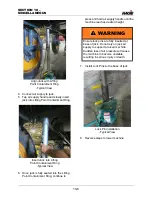
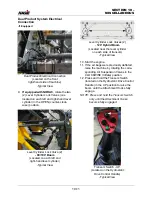
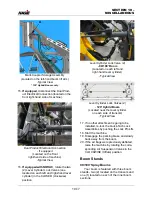
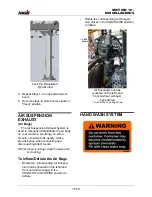
5. If necessary, lower the machine by rotat-
ing the corresponding Air Suspension
Valves (located on the left-hand front air
bag) in the COUNTER-CLOCKWISE
(Deflate) position.
6. Engage the parking brake.
7. Turn the engine OFF before connect-
ing any hoses or electrical lines!
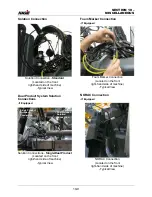
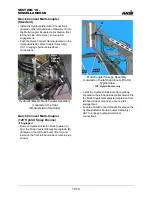
8. Connect all Solution, Foam Marker (if
equipped), NORAC® (if equipped),
Hydraulic, and Electrical Connections.
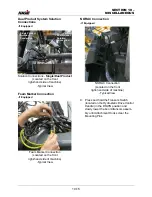
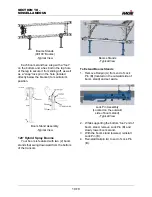
Lock Pin (2)
(Located on the front left and
right-hand side of machine)
-Typical View
* Disengaged position shown
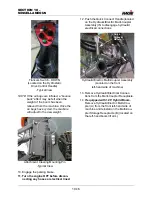
Attachment Clearing Mounting Pin
-Typical View
Air Suspension Valves
(Located on the left-hand front air bag)
-Typical View
• Left-
Hand
• Right-
Hand
Summary of Contents for STS/DPS Series
Page 2: ...5 DASH AUTO...
Page 5: ...Troubleshooting 10 38...
Page 52: ...SECTION 2 SAFETY AND PRECAUTIONS 2 15 650210 Located on each NORAC sensor...
Page 380: ...NOTES 5 DASH AUTO...
Page 381: ...NOTES 5 DASH AUTO...
Page 382: ...NOTES 5 DASH AUTO...


