


7-46
SECTION 7 –
SPRAY SYSTEMS
To Drain the Solution Tank
1. Loosen the metal valve clamp and
remove Drain Valve Plug (located on the
end of the Solution Tank Drain Valve
Assembly).
2. Attach an operator-supplied hose to the
end of the Solution Tank Drain Valve
Assembly (where Drain Valve Plug was
previously removed).
3. Turn the Solution Tank Drain Valve in
the OPEN (counter-clockwise) position
and allow solution to drain into an appro-
priate container for storage.
NOTE: Always ensure that storage
containers and clearly marked with
what type of chemical is being stored.
4.
When finished draining the solution
tank
, turn the Solution Tank Drain Valve
in the CLOSE (clockwise) position.
5. Remove hose from the Solution Tank
Drain Valve Assembly.
6. Tighten metal valve clamp.
RINSE SYSTEM
Operate the Rinse System on your
machine to flush the spray system (solution
tank, booms, nozzles, and solution pump)
with fresh water.
NOTE: Ensure the solution tank is
completely empty before activating
the Rinse System.
Refer to the chemical manufacturer’s
information for types of cleaning solution
combinations (water, cleaning agents, etc.)
Step 1 - Rinsing the Solution
Tank
NOTICE
When draining large volumes from the
solution tank, it is recommended to
pump off with the solution pump through
the front quick coupler.
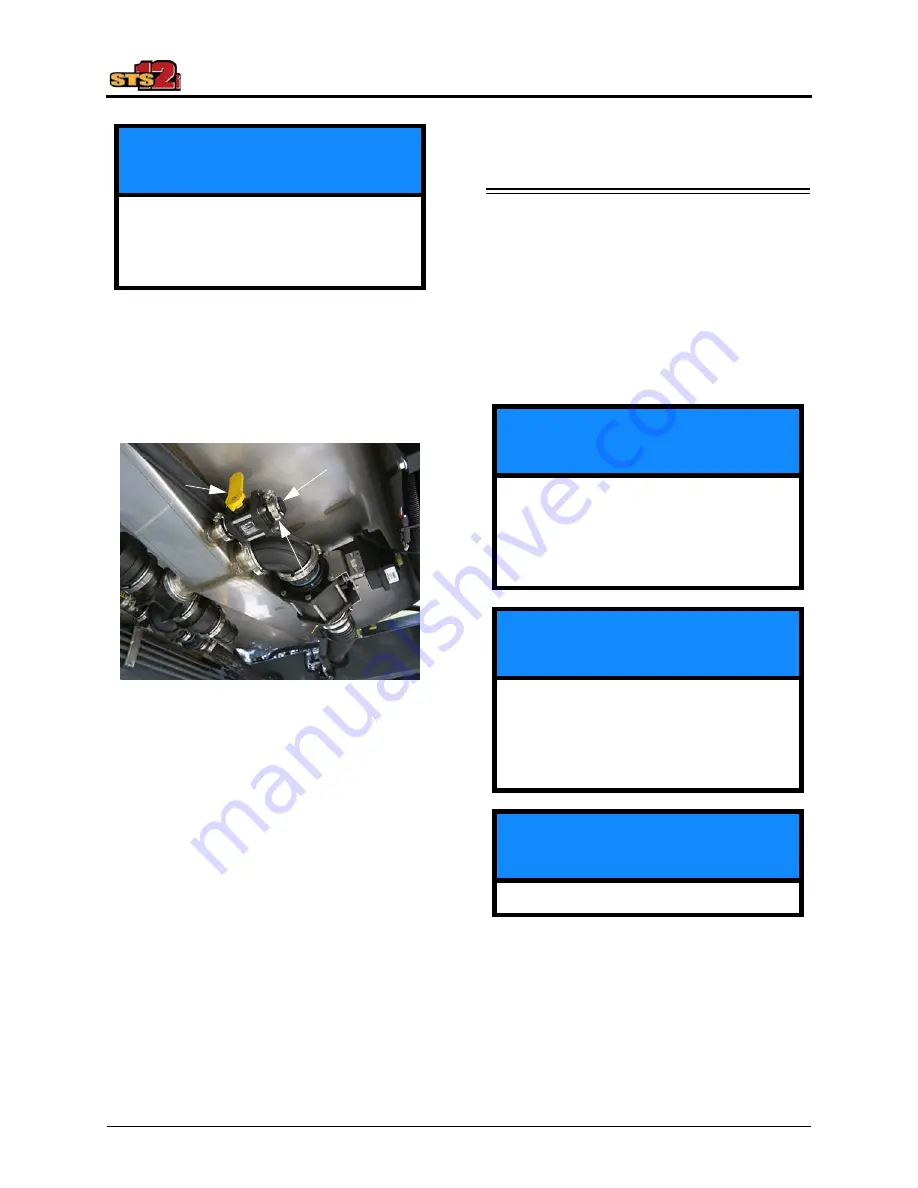
Solution Tank Drain Valve Assembly
(Located beneath the solution
tank on underside of machine)
-Typical View
• Drain Valve
Plug
• Metal Valve
Clamp
• Solution
Tank Drain
Valve
NOTICE
Select a safe area to rinse the spray
system and clean the sprayer where
chemicals will not drift off to contaminate
people, animals, vegetation, or water
supply.
NOTICE
Never attempt to operate the Rinse
System without fresh water in the rinse
tank. Failure to comply will result in
equipment damage and will void the
warranty.
NOTICE
Fill rinse tank with fresh water only.
Summary of Contents for STS12i Combo
Page 276: ......


