background image


Page 89 


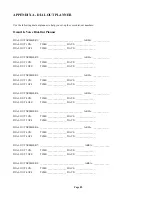
APPENDIX A - DIAL OUT PLANNER 


Use the following dial-out planner to help you set-up the voice dial-out numbers: 

 
Omni IIe Voice Dial-Out Planner 


DIAL OUT NUMBER 1:  __________________________________   AREA:  _____________ 

DIAL OUT 1 ON: 

TIME: _______________  DAYS:  _______________ 

DIAL OUT 1 OFF: 

TIME: _______________  DAYS:  _______________ 


DIAL OUT NUMBER 2:  __________________________________   AREA:  _____________ 

DIAL OUT 2 ON: 

TIME: _______________  DAYS:  _______________ 

DIAL OUT 2 OFF: 

TIME: _______________  DAYS:  _______________ 


DIAL OUT NUMBER 3:  __________________________________   AREA:  _____________ 

DIAL OUT 3 ON: 

TIME: _______________  DAYS:  _______________ 

DIAL OUT 3 OFF: 

TIME: _______________  DAYS:  _______________ 


DIAL OUT NUMBER 4:  __________________________________   AREA:  _____________ 

DIAL OUT 4 ON: 

TIME: _______________  DAYS:  _______________ 

DIAL OUT 4 OFF: 

TIME: _______________  DAYS:  _______________ 


DIAL OUT NUMBER 5:  __________________________________   AREA:  _____________ 

DIAL OUT 5 ON: 

TIME: _______________  DAYS:  _______________ 

DIAL OUT 5 OFF: 

TIME: _______________  DAYS:  _______________ 


DIAL OUT NUMBER 6:  __________________________________   AREA:  _____________ 

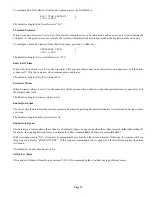
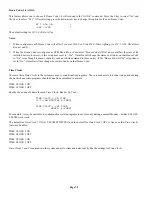
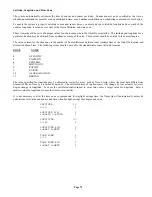
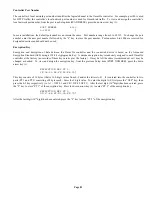
DIAL OUT 6 ON: 

TIME: _______________  DAYS:  _______________ 

DIAL OUT 6 OFF: 

TIME: _______________  DAYS:  _______________ 


DIAL OUT NUMBER 7:  ___________________________________  AREA:  _____________ 

DIAL OUT 7 ON: 

TIME: _______________  DAYS:  _______________ 

DIAL OUT 7 OFF: 

TIME: _______________  DAYS:  _______________ 


DIAL OUT NUMBER 8:  ___________________________________  AREA:  _____________ 

DIAL OUT 8 ON: 

TIME: _______________  DAYS:  _______________ 

DIAL OUT 8 OFF: 

TIME: _______________  DAYS:  _______________ 


Summary of Contents for OMNI IIe

Page 1: ...HOME AUTOMATION INC Owner s Manual Includes the SIA CP 01 Control Panel Standard Features for False Alarm Reduction Document Number 20R00 50 Rev 3 2 August 2009 ...

Page 2: ...Copyright 2001 2009 Home Automation Inc All Rights Reserved ...

Page 3: ...ming the Security System 6 Using Shortcut Keys 7 Quick Arm 7 What Happens When You Arm the Security System 8 Exit Error 8 Bypassing Zones 9 Auto Bypass 9 Restoring Zones 9 What To Do When You Come Home 10 What Happens When the Alarm is Activated 10 Burglar Alarm Activated 10 Fire Alarm Activated 11 Gas Alarm Activated 11 Emergency Keys 11 Police Emergency 12 Fire Emergency 12 Auxiliary Emergency 1...

Page 4: ...B Units 23 Controlling Vizia RF Z Wave 24 Controlling a Room of Vizia RF Z Wave Lighting 24 Controlling Individual Lighting Loads in an Vizia RF Z Wave Room 24 Controlling CentraLite Units 25 Controlling RadioRA Units 25 Controlling ALC or X 10 Units 26 Ramp Command ALC 26 Controlling Compose Units 27 Scene Command Compose 27 Timed Commands 27 Status of a Unit 28 Internal Flags 28 Controlling Outp...

Page 5: ...r Message 43 Say Message 43 Phone Message 44 Send Message Pro Link 44 TELEPHONE CONTROL 45 Telephone Interface 45 In House Phones 45 Remote Phones 45 Phone Access Denied Remote Lockout 46 Alternate Method 46 Main Menu 46 1 Control 47 2 Security 47 GOTO Area 47 3 Button 47 4 All 47 5 Temperature 47 6 Status 48 7 Events 48 8 Phone 49 9 Good Bye 49 Panic Button over the Phone 49 Emergency Dial Out 50...

Page 6: ...itch Press Event Buttons 61 Security Mode Event Buttons 62 Zone Event Buttons 63 All On Off Event Buttons 63 UPB Link Event Buttons 64 Alarm Event Buttons 64 X 10 Event Buttons 64 Miscellaneous Event Buttons 65 Message Event Buttons Pro Link 65 Switch Press Event Buttons CentraLite 66 Edit Program Command 66 Program Control Commands 66 Unit Toggle Command 67 UPB Blink Command 67 Timed Level Comman...

Page 7: ...imeter Chime 75 Enable Quick Arm 75 Enable Auto Bypass 75 All On For Alarm 75 Beep On Trouble 76 Set up Miscellaneous 76 High Security Mode 76 Announce Alarms 76 Enable Freeze Alarm 76 Flash For Alarm 76 Console 1 8 Audible Exit Delay 77 House Codes 1 4 Format 77 House Codes 1 4 All Off 77 Time Clocks 78 Latitude Longitude and Time Zone 79 Daylight Savings 80 Controller IP Address 80 Controller Po...

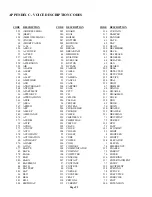
Page 8: ...NG 86 FEDERAL COMMUNICATION COMMISSION NOTICE 87 CANADIAN INDUSTRY CANADA NOTICE 88 APPENDIX A DIAL OUT PLANNER 89 INSTRUCTIONS TO CALLED PARTY 90 APPENDIX B TEXT DESCRIPTION CHARACTER CODES 91 APPENDIX C VOICE DESCRIPTION CODES 92 APPENDIX D FIRMWARE UPDATES 96 ...

Page 9: ...en the hours of 9 00 AM and 5 00 PM Central Time Monday Friday We will be happy to assist you When calling please have the model and serial number of your unit which can be found on the inside of the controller For your convenience we suggest that you record this information MODEL NUMBER ________________________ SERIAL NUMBER ________________________ Underwriter s Laboratories UL Listing The 20A00...

Page 10: ...y system in the Day mode In the Day mode the perimeter zones doors and windows are protected however the interior zones are not armed so that you may move about freely inside In this mode there is an entry delay on entry exit zones 3 NIGHT The NIGHT key is used to arm the security system in the Night mode In the Night mode the doors windows and non sleeping area motion detectors are armed In this ...

Page 11: ...digits and will prompt you to reenter the number 12 KEY The Key is used to enter or confirm a selection It may also be used to display a menu or to offer you additional choices Normal Top Level Display In its normal state the console display will show the day date and time on the top line and the system status on the bottom line If all doors windows sensors etc are closed no zones are bypassed and...

Page 12: ... 8 MESSAGE 9 SETUP Menu 1 Selects Control functions for controlling lights and appliances Menu 2 Selects Security functions arming disarming bypassing and restoring Menu 3 Allows a Button macro to be activated Menu 4 Selects All Lights On All Units Off commands and Leviton Scene Control commands Menu 5 Allows Temperature control for Thermostats and Energy Saver Modules Menu 6 Allows various status...

Page 13: ...that you would like to have protected separately from your home or maybe you have a business and would like to protect an inventory stockroom separately from the offices in your building The console in each area acts as if it were controlling its own Omni IIe system Each area is assigned by your installer a group of zones control units macro buttons messages and thermostats These items can only be...

Page 14: ... digit again Practice disarming your system until you are comfortable with this procedure NOTES Panic Tamper and Fire zones are always armed as are the Emergency buttons on the console In the event that the alarm has been activated the menu keys and the arrow keys are locked out You must silence the alarm using the OFF DAY NIGHT or AWAY keys Arming the Security System Now that you know how to disa...

Page 15: ...try Exit zones Use this mode when you are leaving for a period of days 5 DAY INST DAY INSTANT Functions same as Day mode however there is no Entry Delay on any of the security zones There will be an instant alarm if any of the zones are violated while in this mode 6 NIGHT DLY NIGHT DELAY Functions same as Night mode however there is an Entry Delay on the Entry Exit zones Use this mode if you are g...

Page 16: ...t without causing an alarm The exit time will only be restarted once within a given arming period If Unvacated Premises is enabled if no exit zone is violated during the exit delay i e the premises was not vacated the system will automatically arm to Day mode at the expiration of the exit delay NOTE In Commercial Burglar Alarm Applications for UL Certified Systems a Ring back indication and Bell t...

Page 17: ...re the system is armed in any mode The bypass will only take place if the zone is not ready i e open when the exit delay is over and the system is actually armed When a zone is Auto Bypassed it will be automatically restored once it is secure i e closed or the next time you arm or disarm the system The auto bypass is recorded in the event log as ZONE NAME BYPASSED To prevent any zone from being by...

Page 18: ...ed to come on will do so The Flash For Alarm Unit Number begins to flash on and off The system waits the Outside Siren Delay 0 60 seconds then activates the sounder If enabled the system waits the Dial Out Delay 15 45 seconds and then if programmed the in house phones are seized disconnected and the Omni IIe begins to dial out There is a communicator delay Dial Out Delay of 30 seconds in this cont...

Page 19: ...alarm is activated the alarm responds exactly as described under Burglar Alarm Activated except The console display reads GAS ALARM ZONE NAME TRIPPED The sounder will pulse on off on then an extended off period to distinguish it from the burglar or fire alarm The gas alarm takes priority over the burglar alarm however if a fire alarm is already active it will not override the fire alarm NOTE To re...

Page 20: ...r your duress code or a Duress zone is tripped the system performs a silent dial out as follows No alarms lights or console beepers are activated The system does not display the duress alarm The system waits the Dial Out Delay and then begins to dial out If you are having your system monitored the central station will be sent a code representing a silent alarm duress Alarm Reset The alarm system w...

Page 21: ... NOW or HAD TRBL Indicated if the digital communicator not the voice dialer was unable to make contact with the Central Station after trying both numbers multiple times If this happens there could be a problem with the system central station or the phone line Call your installer for service FUSE TRBL NOW or HAD TRBL Indicated when the solid state fuse that protects the Auxiliary power supply opens...

Page 22: ...armed in different security modes at the same time Each area will have its own console that will control that area independently from the other When disarming the security system or arming the security system in any mode the system will automatically control all security functions in the area of that console if your code is valid for that area If you have a Master code your code is valid in any ar...

Page 23: ...n Area 2 from a console in Area 1 or viceversa it is first necessary to go to that area GOTO Area From the security menu press the GOTO key on the console keypad AREA ENTER AREA The Area number can be entered followed by the key or use the arrow keys to scroll through a list of areas Once the area is selected you are prompted to enter your code GOTO AREA 2 ENTER CODE The console AREA 1 will now be...

Page 24: ...detectors as recommended by the manufacturer Be ready to silence the alarm system as soon as it sounds 5 From the top level display or from the main menu press the 6 key then the 4 key The Battery reading should be over 200 See Status Test 6 Pick up an inside phone and press the key When the menu is spoken press 8 Then 3 The Omni IIe should say ADDRESS IS and play your name and address If it does ...

Page 25: ...d relays on a LiteJet and Elegance lighting system RadioRA switches and dimmers on a Lutron RadioRA lighting system ALC switch modules for lights and appliances X 10 compatible modules X 10 X 10 Pro Leviton PCS ACT Lightolier etc for lights and small appliances HAI Communicating Thermostats for controlling Heating Ventilation and Air Conditioning Systems Programmable Energy Saver Modules PESM for ...

Page 26: ...gured to use the HLC format consists of 2 rooms with up to 8 HLC devices in each room Omni IIe supports up to 8 rooms of HLC lighting Omni IIe can control up to 64 HLC devices HAI manufactured UPB devices collectively referred to as HLC devices can be configured using an Omni console or OmniTouch touchscreen connected to the Omni IIe controller Other UPB devices may be used in the HLC structure bu...

Page 27: ... lights in the room are turned on When the room is turned off the LED indicator behind the respective button is turned off and all of the lights in the room are turned off If a lighting load in the respective room is turned on the LED indicator behind the button is illuminated When all lighting loads in the respective room are turned off the LED indicator behind the button is turned off When used ...

Page 28: ...o CentraLite the Omni IIe controller can Send commands on off and level to individual loads and relays Receive status on and off from individual loads and relays Execute scene commands on and off to control lighting scenes Receive commands when buttons are pressed on a CentraLite keypad About Lutron RadioRA Lutron RadioRA uses wireless communication technology to control lighting Each Switch or Di...

Page 29: ...umber so that the Omni IIe can control the modules individually When a module hears a command from the Omni IIe for its house code and unit number it executes the command There are 3 different X 10 formats Standard X 10 Preset Dim Extended X 10 Extended Level and Compose Any module that is X 10 Compatible will work with the Omni IIe The modules come in various types House Codes Omni IIe can contro...

Page 30: ...emperature or message number you can press the down arrow key to display its name then use the up and down arrow keys to scroll through the list of other names This is true when entering commands and programming on the console Only named items are displayed on an OmniTouch touchscreen Controlling Units The control menu is used when controlling lights and appliances To enter the control menu from t...

Page 31: ...Ie controller 3 Press the pushbutton on the HAI UPB 6 Button Room Controller five 5 times quickly 4 Each UPB Wall Switch Dimmer will flash its lighting load one time to indicate that the new level has been configured Controlling Individual Lighting Loads in an HLC Room or UPB Units To control individual lighting loads in a room use the down arrow key to scroll through the list of units When the un...

Page 32: ...ess 5 D to set all of the lighting loads in the selected room to their preset levels for Scene D 6 SET is not used with Vizia RF Z Wave lighting Press STA to view the current status of the room Controlling Individual Lighting Loads in an Vizia RF Z Wave Room To control individual lighting loads in a room use the down arrow key to scroll through the list of units When the unit is displayed press th...

Page 33: ...ontrolling RadioRA Units Entry Lights 0 OFF 1 ON 2 DIM 3 BRT Entry Lights 4 LVL 5 RMP 9 TIM STA Press 0 OFF to turn the selected unit off Press 1 ON to turn the selected unit on 2 DIM does not affect RadioRA units 3 BRT does not affect RadioRA units Press 4 LVL to set the desired lighting level of the selected unit 0 100 5 RMP does not affect RadioRA units Press 9 TIM to time the selected unit On ...

Page 34: ...en ALC Switch Modules are being used it is possible to ramp the lighting level of an ALC Dimmer Switch to a new level at a selectable ramp rate Only ALC Dimmer Switches respond to the Ramp command Press the 5 RAMP key to select the ramp command The keypad will then prompt you for the desired ramp rate ENTER RATE MINUTES 1 99 H M S The rate specifies the time it takes the switch to go from full off...

Page 35: ...selected group to a predefined scene enter the Scene number 2 13 which corresponds to Scene A L respectively followed by the key All lights that are part of the selected group are set to the predefined lighting levels for the selected Scene Timed Commands The timed commands allow a units to be turned on or off for a specified period of time The unit may be turned On for 1 99 minutes or seconds or ...

Page 36: ... 1 the When Unit On macro will now execute This will allow you to execute a command when the Flag is incremented counting up from zero The Set command is used to set the counter to a value from 0 to 255 No macros are executed when the counter is set to zero or when the counter is changed from zero using the set command This allows a counter to be reset without executing macros or programs associat...

Page 37: ... All Off For example WHEN ALL ON PHANTOM BUTTON 16 ON WHEN ALL OFF PHANTOM BUTTON 17 ON This All On Off menu is also used to control Leviton Scenes RadioRA Phantom Buttons UPB Links and CentraLite Scenes From the top level display or from the main menu press the 4 ALL key on the console keypad ALL 0 OFF 1 ON 2 SCN 3 LINK ALL 4 PHANTOM 5 CENLIT All Lights On At the ALL prompt press the 1 LIGHTS ON ...

Page 38: ... X 12 X X X X 13 X X X X 14 X X X X 15 X X X X UNIT NUMBERS 16 X X X X X Corresponds to the unit numbers in a Scene Scene Commands Scene Commands are used to Set Scenes issue a Scene On command and issue a Scene Off command To issue Scene Commands press the 2 SCENE key You are prompted to enter a Scene number ENTER SCENE 1 64 Enter the Scene number 1 64 followed be the key SCENE 1 0 OFF 1 ON 2 SET...

Page 39: ...at have the same Link to go to their preset light levels at their preset fade rates For instance in our All On and All Off example when Link 50 On is transmitted by Omni IIe each UPB Wall Switch with Link 50 will go to 100 to achieve the All On effect Other Link On activate commands may be transmitted that cause Wall Switch 1 to go to a desired level at a specified fade rate and Wall Switch 2 to g...

Page 40: ...ue CentraLite Scenes commands from the top level display or from the main menu press the 4 ALL key on the console keypad and then press the 5 CENLIT key You are prompted to enter a Scene 1 255 ENTER SCENE 1 255 Enter the CentraLite Scene number 1 255 followed be the key CENLIT SCENE 1 0 OFF 1 ON When a CentraLite Scene is turned on all of the devices that are pre programmed for that scene will go ...

Page 41: ...des energy savings comfort and convenience by setting the HVAC system s to the proper temperature based on whether you are home asleep away or vacation The temperature can be reported as well as controlled over any telephone A freeze alarm feature will cause a dial out if the temperature falls below a preset level The HAI Communicating Thermostats are digital heating and cooling thermostats that c...

Page 42: ...airs TEMP ENTER TEMPERATURE Enter the desired temperature then press the key The fan control on a thermostat may be switched between on and auto by selecting 4 FAN from the temperature menu Upstairs FAN 0 AUTO 1 ON Thermostats may be switched between hold mode and the normal run mode While in hold mode the thermostat does not respond to scheduled temperature changes but instead maintains the tempe...

Page 43: ...e are three temperatures associated with each PESM Temperature this is the air temperature read by the PESM Heat temperature the air temperature will be allowed to fall to this temperature when the energy saver is on Cool temperature the air temperature will be allowed to rise to this temperature when the energy saver is on The following control actions are allowed on PESMs Turn Energy Saver On an...

Page 44: ...mperatures press the key prior to entering the temperature to make the number negative The Celsius temperature may also be specified in 0 5 degree steps if three numeric digits are entered The third digit adds a 5 to the first two digits if it is any thing other than zero Enter a leading zero if necessary In additions to setpoint changes an energy saver may be turned On or Off It may also be turne...

Page 45: ... used to activate programs for controlling temperatures indoors and in attics garages greenhouses basements wine cellars coolers and freezers The temperature can be displayed on the console or spoken over the telephone It can also report log alert or generate an alarm if the temperature reaches freeze conditions or if the temperature goes above the high setpoint or drops below the low setpoint pro...

Page 46: ...0 100 the low humidity setting and high humidity setting can be viewed and modified using the temperature menu To enter the temperature menu from the top level display or from the main menu press the 5 TEMP key The humidity zone can be specified by entering the zone number followed by the key or by pressing the arrow keys to scroll through the list of temperature and humidity zones Press the key w...

Page 47: ...oftware and then download the information to the Omni IIe controller Configuring HLC Devices using an Omni Console To configure HLC devices from an Omni console use the Status menu To enter the Status menu from the top level display or the main menu press the 6 STATUS key on the console keypad STATUS 1 CTRL 2 ZONE 3 SUN Press 1 CTRL to view the current status of each unit and to configure the HLC ...

Page 48: ...ast 3 seconds Note When Omni IIe finishes configuring the device it will automatically exit Setup mode and return to normal operation 2 ZONE The Zone Status menu allows you to view and scroll through the status of each zone input To enter the Zone menu from the Status menu press the 2 ZONE key on the console keypad The system will display Front Door SECURE ZONE 1 You may enter a zone number to sta...

Page 49: ...ould be changing only by two or three counts from its average steady reading When a door or window is opened the reading will go up to a value that represents that zone is open This feature can be used to monitor the quality of the zone wiring and contacts If the numbers begin to deviate from their original values when the system was new wiring problems that will eventually lead to trouble or fals...

Page 50: ...w keys may be used to scroll through the event log starting with the most recent event Each event log entry displays the time and date on the top line and a description of the event on the bottom line 7 15 PM 5 8 USER NAME AWAY For trouble conditions the event log will show the zone name or specific trouble condition and TROUBLE 10 59 AM 5 8 BATTERY TROUBLE For trouble restorations the event log w...

Page 51: ...eared by a program Log Message The 2 LOG key allows you to store the selected text message s in the Event Log This can be a helpful to keep track of the times and dates of events and occurrences You may enter the message number followed by the key to log that message or simply press the down arrow key to scroll through a list of messages Press the key to log the selected message Clear Message The ...

Page 52: ...arriage returns and line feed characters are not automatically appended to the end To send ASCII control as part of the message use the caret character in the message This character specifics that the next character is to be interpreted as an ASCII control character such as M to represent a carriage return Other useful sequences would be J for a line feed character and G for a bell character To in...

Page 53: ... when the Omni IIe picks up or hangs up This is normal To access your Omni IIe from an in house phone Pick up the receiver of any Touch Tone phone in your house Pause for just a moment about a second then press the key on the phone You will hear the voice read the menu which tells you what commands are available over the telephone NOTE If your system is in High Security Mode you must also enter yo...

Page 54: ...L 5 TEMPERATURE 6 STATUS 7 EVENT 8 PHONE 9 GOOD BYE CANCEL 0 REPEAT This means that you press 1 for Control functions 2 for Security 3 for Button etc Pressing one of the keys on the phone will move you to another menu These menus are the same as the menus on the console Words in brackets are only spoken if that feature is in use You do not have to wait for the Omni IIe to finish talking Once you a...

Page 55: ...ea Press the key to GOTO a different area The Omni IIe will say GOTO AREA ENTER AREA THEN ENTER CODE CANCEL WELCOME TO OMNI AREA 2 3 Button Press 3 from the MAIN MENU to get to the BUTTON menu If button voice descriptions have been programmed after a three second delay the system will begin reading from the list of buttons Omni IIe will say the button number then its description User buttons 1 64 ...

Page 56: ...E IS TEMP PLEASE CHOOSE 0 OFF 1 ON 2 HEAT SETTING 3 COOL SETTING 9 TIMED STATUS CANCEL If the STATUS key is selected Omni IIe will read the current status of the PESM For instance ENERGY SAVER IS ON OFF TEMPERATURE IS 80 HEAT SETTING IS 60 COOL SETTING IS 75 6 Status Press 6 from the MAIN MENU to get to the STATUS menu From the Status menu Omni IIe will report the Security Mode for the current Are...

Page 57: ...n house phone the dial tone will return From a remote phone you will hear a click as the Omni IIe hangs up It is recommended that you press 9 to terminate a remote call If you don t the Omni IIe will hang up anyway after about 15 seconds Panic Button over the Phone On an in house phone only you can activate the Police Emergency keys by picking up the phone and pressing the key 6 times This activat...

Page 58: ...unds at the premises If the digital communicator is unable to successfully communicate with the central station the console will display a Communicator Trouble condition Voice Dialer In UL Listed Installations the Voice Dialer is supplementary to the Digital Dialer described above The voice dial out feature of the Omni IIe is a sophisticated system that can notify you at the office on vacation on ...

Page 59: ...the digits on the keypad of a Touch Tone phone The Omni IIe will stop talking when it hears any digit from a touch tone phone When it is saying the address the Omni IIe completes the entire address before it stops talking If you enter the correct Master or Manager code you will then be logged in a remote phone access is logged in the event log and further dial outs are canceled You will hear the s...

Page 60: ...be assigned or changed via PC Access although the IP address and port number may be viewed via PC Access See Set Up Miscellaneous Omni IIe Ethernet Connections Use a standard network cable to connect the controller to a hub switch or router Use a network crossover cable when connecting the controller directly to the NIC card on a computer When connected to a switch or router port forwarding must b...

Page 61: ... DNS provider runs on a PC on your local network and is used to automatically update your Dynamic DNS provider with your current IP address Several router switch manufacturers have embedded a Dynamic DNS client into their router firmware These devices work with several of the Dynamic DNS providers including both free and commercial services These devices are especially beneficial because the route...

Page 62: ...troller on a local network using HAI PC Access under Configure Network enter the controller s IP address i e 10 0 0 230 To connect to an Omni IIe controller from the Internet using HAI PC Access under Configure Network enter the public IP address i e 134 42 112 8 ...

Page 63: ...de All other user should be assigned a security code with an authority level areas that can be accessed if area arming is being used and times in which the code is valid To set up a code from the Setup menu press the 1 CODES key Use the arrow keys to scroll through the codes CODE 2 0000 9999 0000 DISABLE The existing code number is not shown on the display To change the code enter a four digit num...

Page 64: ...ON OFF TIME 1 TIME 2 DAYS TIME 8 00 AM HHMM RISE AM SET PM To change days press the key then press the 2 DAYS key You will be prompted to enter the day s that the code will be valid Press 1 7 for Monday Sunday 0 for Never 8 for Weekdays and 9 for Weekends DAY S MTWTFSS 1 7 MON SUN 0 NEVER Duress Code If you are forced to disarm the system against your will by an intruder disarm it as you normally ...

Page 65: ... Security modes Off Day Night Away Vacation Day Instant and Night Delay and bypass and restore zones Buttons Events Messages Show Log Clear Say Phone and Send The Omni IIe executes programs Once at a certain time on a certain date One Time Program On a certain date every year Yearly Program Repeatedly Repeating Programs In response to an event Button Programs You can also specify 2 conditions in e...

Page 66: ...r a particular control unit number Menu 2 All Security related programs Menu 3 Programs for a particular macro button Menu 4 Programs for All On Off functions Menu 5 Programs for a particular Temperature zone Menu Displays every program Selecting the 1 CTRL or 5 TEMP key will prompt you to specify the desired unit or temperature zone These can be specified by entering the number followed by the ke...

Page 67: ...ss the key again to save the program or press the key to cancel edit of this program and return to reviewing the programs Press the 2 DELETE key to delete the selected program 3 Delete All Programs To delete All automation programs from the Set Up Program menu press the 3 DELETE key The display will prompt you to confirm the deletion DELETE ALL PROGRAMS 0 NO 1 YES Select 1 YES to delete all automa...

Page 68: ...ore or after the time of sunrise or sunset SUNSET 1 BEFORE 2 AFTER AT If the 1 BEFORE or 2 AFTER key is selected you will be prompted to select the amount of minutes ENTER OFFSET 0 120 MINUTES When entering a time of day AM PM must be specified for the time if the AM PM format is being used Otherwise the entered time should be 13 00 23 59 TIME 8 00 AM HHMM RISE AM SET PM Select 2 DATE DAY to enter...

Page 69: ...eypad When a button is pressed on a RadioRA Master Control When a button is pressed on a ALC 4 Button Scene Switch Module When a button is pressed on a CentraLite StarLite Keypad Press the 1 CTRL key to select the When Command for a control unit event UNIT ENTER UNIT The unit may be selected by entering the unit number followed by the key or by using the arrow keys to scroll through a list of unit...

Page 70: ...combination As each item is specified the menu is redisplayed with the updated event button description Press the key when done Selecting 1 DLY allows the user to specify whether the event button is activated at the start or end of the exit delay WHEN ACTIVATED 1 START EXIT 2 END EXIT When you specify that the event button is activated at the start of the delay by pressing the 1 START EXIT key the...

Page 71: ... The desired zone is then displayed and you are prompted to specify the state that activates the event button WHEN Front Door 0 SECURE 1 NOT RDY All On Off Event Buttons Pressing the 4 ALL key allows you to specify an event button activated by issuing an All On or an All Off command issuing a Leviton Scene command or issuing a UPB Link command You are first prompted to specify whether the event bu...

Page 72: ...o select from a list of alarm types ANY ALARM BURGLARY ALARM FIRE ALARM GAS ALARM AUXILIARY ALARM FREEZE ALARM WATER ALARM DURESS ALARM TEMPERATURE ALARM Press the key when the desired alarm type is shown You are then prompted to specify the area if area arming is being used AREA ENTER AREA 0 ALL T he area number should be entered followed by the key or the arrow keys may be used to scroll through...

Page 73: ... 6 is pressed on an OmniTouch with Video Message Event Buttons Pro Link Pressing the 8 MSG key allows you to select an event button from a list of the 64 text messages You are first prompted to select the message MESSAGE ENTER MESSAGE The message may be entered by entering the message number followed by the key or by using the arrow keys to scroll through the list of messages Pro Link also has the...

Page 74: ... 2 DIM 3 BRT Porch Light Unit Name 4 LVL 5 RMP 9 TIM STA If the selected unit is part of a House Code that is configured to use the Compose Format the second page of the menu is modified to allow Scene commands Consequentially the Level and Ramp Commands are removed from the menu Entry Lights Unit Name 4 SCN 9 TIM STA If the selected unit is not capable of dim and bright commands only a single men...

Page 75: ...g feature will simplify programming when using a button on a UPB Compose ALC or RadioRA keypad to toggle a light on and off with the push of a single button For example WHEN FRONT FOYER SW1 PRESSED FRONT FOYER TOGGLE UPB Blink Command Using HAI PC Access Software you can create programs to blink any UPB device If you are using HLC you can not blink an HLC room i e the 1st or 9th unit in an HLC hou...

Page 76: ...t the 4 ALL key to program All Lights On and All Units Off commands It is also used to program Leviton Scenes UPB Link RadioRA Phantom Button or CentraLite Scene ALL 0 OFF 1 ON 2 SCN 3 LINK ALL 4 PHANTOM 5 CENLIT If area arming is being used the display will then prompt you for the area to control Enter the area number followed by the key or use the arrow keys to scroll through a list of areas Pre...

Page 77: ...of events and occurrences The 3 CLEAR key allows you to clear the selected text message or all text messages from the console s display The 4 SAY key allows the controller to say the selected voice message over a speaker This voice message can be an audible reminder of special events and occasions i e Front Door Open when the front door is opened The 5 PHONE key allows the controller to call the s...

Page 78: ... condition for the program to be specified The condition is optional in all program lines This condition must be true when the program time or event occurs for the program to executed Note Two 2 conditions can be specified in each program line however when programming from the console only 1 condition can be selected If 2 conditions must be specified for a single program line it must be entered us...

Page 79: ...r ZONE ENTER ZONE Enter the zone number followed by the key or use the arrow keys to select the zone The zone will be displayed and you will be prompted for the state of the zone IF Front Door 0 SECURE 1 NOT RDY Program Time Clock Conditions Select the 9 TIME key to specify that the program should only execute if a specified Time Clock is either On or Off The display prompts you for the Time Clock...

Page 80: ...i IIe will allow local and remote telephone access as described in Telephone Control If set to Off the Omni IIe will not answer incoming calls ever and will not work on the in house phones Dial outs will still occur and the system will operate normally when the Omni IIe dials out If you do not have your Omni IIe connected to a phone line set Telephone Access to Off to keep the system from displayi...

Page 81: ...d enter your office number where you can be reached during working hours Enter the phone number the same way as described for My Phone Number You can cause the system to pause for two seconds between digits of the number by pressing the DAY key which puts a T in the number Multiple Ts for longer pauses are allowed You can also press the NIGHT key and the AWAY key for symbols to get through some ty...

Page 82: ...arm the alarm system after entering your home The Entry Delay only applies to the entry exit zone e g your entry doors If you or someone else come in through a window there will be no entry delay and the alarm will sound immediately When you come in through a door on an entry exit zone the other zones are delayed too This allows you to get to your phone or console to turn off the security system e...

Page 83: ...Perimeter Chime is set to Yes the console s will beep once when a window or any other perimeter zone is opened even if the alarm system is off The default setting for Perimeter Chime is Yes Enable Quick Arm The Quick Arm feature allows the security system to be armed by pressing the desired mode key twice instead of having to enter your code The default setting for Enable Quick Arm is No Enable Au...

Page 84: ...our Master or Manager code Your system was shipped from the factory with High Security Mode Off which allows you to view the event log and access the local phones without having to enter a code In most residential applications this is appropriate If you have a commercial installation or would like added protection from unauthorized access to the system you may wish to turn on High Security Mode An...

Page 85: ...the next House Code FORMAT NUMBER DESCRIPTION STANDARD 0 Preset Dim Command X 10 X 10 Pro Leviton PCS etc EXTENDED 1 Extended Code Level Command Leviton COMPOSE 2 Compose Mode Lightolier s Compose UPB 3 Universal Powerline Bus open format RADIO RA 4 Lutron RadioRA HAI LIGHTING 5 HAI Lighting Control HLC CENTRALITE 6 CentraLite Lighting VIZIA RF Z WAVE 7 Vizia RF Z Wave The default setting for HC 1...

Page 86: ...those units If the House Code All On setup item is set to No Omni IIe will not change the status of units on that House Code Time Clocks There are three Time Clocks in the system are used to conditionalize programs They are used solely to define time periods during the week when certain programs should be enabled or disabled to execute TIME CLOCK 1 ON TIME CLOCK 1 OFF Specify the on and off times ...

Page 87: ...standard time at the Omni IIe location and Greenwich Mean Time The following values should be used for the standard time zones in North America ZONE NAME 4 ATLANTIC 5 EASTERN 6 CENTRAL 7 MOUNTAIN 8 PACIFIC 9 YUKON 10 ALASKA HAWAII 11 BERING The value specified for longitude may be adjusted to correct for areas such as Nova Scotia where the local time differs from Greenwich Mean Time by a non hourl...

Page 88: ...ION 1 First Sunday 2 Second Sunday 3 Third Sunday 4 Fourth Sunday 5 Last Sunday 6 Next to Last Sunday 7 Third from Last Sunday Controller IP Address The controller s local network IP address is used to identify the Omni IIe controller on the network To view and assign the controller s local network IP address from the Set Up menu press the 6 MISC key Using the down arrow key scroll to the followin...

Page 89: ...on Standard AES using a 128 bit cryptographic key A unique encryption key is randomly assigned to each Omni IIe controller at the factory no records of these keys are kept at the factory It may be left the same recommended or it may be changed as desired To view and assign the encryption key from the previous Setup item PORT NUMBER press the down arrow key ENCRYPTION KEY PT 1 6F 1B 26 A2 FF D9 E4 ...

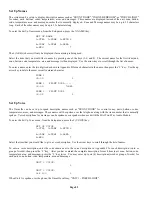
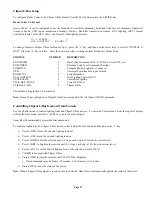
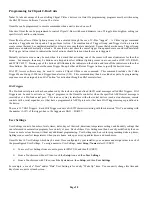
Page 90: ...ently entered character ZONE 1 00 95 ZONE 1 FRONT DOOR 00 95 DEL ZONE 1 FRONT DOOR 00 95 Set Up Voice The Omni IIe can be set up to speak descriptive names such as FRONT DOOR for control zones units buttons codes temperatures areas and messages These names will be spoken over the telephone along with the item number that is normally spoken Voice descriptions for messages can be spoken over a speak...

Page 91: ... THE JONES RESIDENCE 1234 JOHNSON STREET CORNER OF JOHNSON AND THIRD STREET The unit will beep after 8 seconds then play the address back to you If you are not happy with the sound re record by pressing 9 and the Master code If you would like to hear the address again press 8 for Play Address If you accidentally press 9 but have not entered your Master code and do not wish to record a new address ...

Page 92: ...ce To select a new Audio Source for the current Audio Zone press the Source button on the touchscreen interface Select the desired Audio Source from the Source list box Changing Audio Zone To select a new Audio Zone press the Zone button on the touchscreen interface Select the desired Audio Zone from the Zone list box Once selected you will be able to control that Audio Zone from the touchscreen i...

Page 93: ...Source Command allows you to create programs to select an Audio Source for the specified Audio Zone The Key Press Command allows you to create programs to simulate key presses as shown HAI Hi Fi Key Press Commands HAI Hi Fi Key Presses Power Volume up Volume down Mute Source Step Note The Volume up and Volume down will raise and lower the volume in the specified Audio Zone by 5 Example Programming...

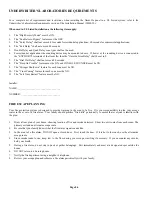
Page 94: ...ne must be NO 11 The Exit Time Restart feature must be NO Installer NAME __________________________________ NUMBER _______________________________ FIRE ESCAPE PLANNING Your fire protection system is designed to provide warning in the event of a fire It is your responsibility to plan your escape routes in the event of a fire alarm Your family should practice fire drills periodically to ensure that ...

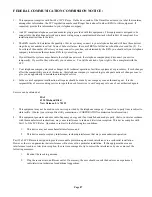
Page 95: ...te notice of changes so as to give you an opportunity to maintain uninterrupted service 6 In the event of equipment malfunction all repairs should be made by our company or an authorized agent It is the responsibility of users requiring service to report the need for service to our Company or to one of our authorized agents Service can be obtained at HAI 4330 Michoud Blvd New Orleans LA 70129 7 Th...

Page 96: ...und connections of the power utility telephone lines and internal metallic water pipe system if present are connected together This precaution may be particularly important in rural areas Caution Users should not attempt to make such connections themselves but should contact the appropriate electric inspection authority or electrician as appropriate Notice The Ringer Equivalence Number REN assigne...

Page 97: ...UMBER 4 __________________________________ AREA _____________ DIAL OUT 4 ON TIME _______________ DAYS _______________ DIAL OUT 4 OFF TIME _______________ DAYS _______________ DIAL OUT NUMBER 5 __________________________________ AREA _____________ DIAL OUT 5 ON TIME _______________ DAYS _______________ DIAL OUT 5 OFF TIME _______________ DAYS _______________ DIAL OUT NUMBER 6 ______________________...

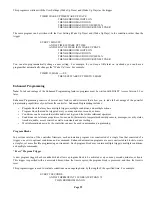
Page 98: ... This message will be repeated 2 times At any time during the message please dial my code which is __________________ If you make a mistake press then enter the code again This will stop the system from making any further calls The system will tell you what zone caused the alarm Press 9 The system will say Good bye and hang up Hang up then call me at _____________________ If no one answers please ...

Page 99: ... 22 23 SPACE 0 1 2 3 4 5 6 7 24 25 26 27 28 29 30 31 32 33 34 35 36 37 38 39 40 41 42 43 44 45 46 47 8 9 A B C D E F G H I J K L M N O 48 49 50 51 52 53 54 55 56 57 58 59 60 61 62 63 64 65 66 67 68 69 70 71 P Q R S T U V W X Y Z _ a b c d e f g 72 73 74 75 76 77 78 79 80 81 82 83 84 85 86 87 88 89 90 91 92 93 94 95 h i j k l m n o p q r s t u v w x y z à ß ...

Page 100: ...LL 202 CAMERA 53 CANCEL 293 CANS 294 CARPORT 203 CASE 204 CCTV 295 CD 205 CEILING 296 CELLAR 54 CENTER 297 CENTRAL 206 CHANDELIER 298 CHANGE 196 CHECK 299 CHILDREN S 300 CHRISTMAS 301 CIRCUIT 302 CLASS 303 CLOSE 304 CLOSED 55 CLOSET 56 CODE 305 COFFEE 306 COLD 307 COMFORT 308 COMMUNICATOR 309 COMPANY 194 COMPUTER 310 CONSOLE 207 CONTACT 57 CONTINUE 59 CONTROL 60 COOL 311 CORNER 312 COUNTER 313 CRA...

Page 101: ...SIDE 102 INSTANT 103 INTERIOR 382 INTERNET 227 INTRUSION 104 INVALID 105 IS 383 JACUZZI 384 JANUARY 385 JEWELRY 386 JULY 387 JUNE 388 KEEPER 389 KENNEL 390 KEY 106 KITCHEN 228 LAMP 391 LANAI 392 LAND 393 LANDSCAPE 394 LASER DISK 395 LAST 396 LAUNCH 397 LAUNDRY 398 LAWN 399 LEAK 400 LEAVE 107 LEFT 108 LEVEL 401 LIBRARY 402 LIFT 109 LIGHT 403 LIGHTING 404 LIGHTS 110 LISTEN 405 LIVE 111 LIVING 229 LO...

Page 102: ...COND 157 SECONDS 158 SECURE 159 SECURITY 485 SEND 241 SENSOR 486 SEPTEMBER 487 SERVICE 488 SET 160 SETTING 20 SEVEN 7 SEVENTEEN 21 SEVENTY 489 SEWING 490 SHADES 491 SHED 492 SHOCK 161 SHOP 493 SHOW 494 SHUTTERS 162 SIDE 163 SILENT 18 SIX 6 SIXTEEN 19 SIXTY 495 SKYLIGHT 496 SLIDING 497 SMART 242 SMOKE 498 SNOW 164 SOUTH 165 SPA 499 SPARE 500 SPOT 501 SPRING 243 SPRINKLER 502 STABLE 166 STAIRS 503 S...

Page 103: ...CR 537 VIDEO 538 VISITOR 539 VOLUME 540 WAITING CODE DESCRIPTION 541 WALK 542 WALKWAY 251 WAREHOUSE 543 WARNING 187 WATER 544 WEDNESDAY 28 WELCOME TO OMNI 545 WELCOME 188 WEST CODE DESCRIPTION 189 WINDOW 546 WINE 252 WING 547 WINTER 548 WOOD 549 WORK 253 YARD 550 YOU 190 ZONE ...

Page 104: ...ons between C Bus lighting devices and also provides a small amount of power to operate each C Bus lighting devices in your home Each switch or dimmer controls one lighting load in a Clipsal C Bus system They are used in place of standard light switches and allow local control as well as remote control from any of the Clipsal C Bus keypads an Omni IIe interface or via programming in the Omni IIe c...

Page 105: ...C BUS 9 Clipsal C Bus The default setting for HC 1 4 Format is 5 Note House Codes configured as Clipsal C Bus do not respond to the All On and All Off commands Controlling Clipsal C Bus from an Omni Console Use the Control menu to control lighting loads and Clipsal C Bus devices To enter the Control menu from the top level display or from the main menu press the 1 CTRL key on the console keypad Om...

Page 106: ...luded as part of a programming sequence or can be assigned to an HAI button for activation through an HAI user interface HAI Triggers The Pro Link serial protocol has been enhanced by the inclusion of predefined ASCII serial messages called HAI Triggers HAI Triggers can be used to activate or trigger programs in the Omni IIe controller when the specified ASCII serial message is received over a Pro...

Page 107: ...ultiple triggers multiple conditions and multiple actions Program block that can be triggered every so many minutes seconds or hours Conditions can be created that utilize and or not logic and that utilize relational operators Conditions can reference properties of zones units thermostats temperature humidity sensors messages security status time date audio access control as well as constants and ...

Page 108: ...messages as well as constants and user settings The condition can be evaluated by just about anything the HAI controller knows about a Units current state previous state timer and level b Security security mode current mode including exit delay arming code entry timer exit timer alarm status horn sounder status and digital communicator status for each security area c Zones loop reading current sta...

Page 109: ...lude Fan Cycle Mode Vacation Hold Humidity Display Humidity Setpoints Outdoor Temperature Occupancy Status Time and Date Energy Status Fan Cycle Mode In Fan Cycle mode on an Omnistat2 thermostat the fan is cycled on and off in 20 minute cycles to circulate the air The fan control may be switched between auto on and cycle by selecting 4 FAN from the temperature menu of the selected Omnistat2 thermo...

Page 110: ...n control or dehumidifier if applicable is activated Outdoor Temperature If your Omnistat2 is equipped with an external outdoor temperature sensor you can view the outdoor temperature from a console or touchscreen The outdoor temperature can also be used as a condition in an automation program Occupancy Status When the Program Mode of your Omnistat2 is configured for Occupancy the program setpoint...

Page 111: ...s can utilize either a standard credit card sized Access Control Card or the convenient Access Control Key Tag to access the system Each card is attached to a user code in the controller which can be managed with several privileges Users can be granted privileges based on time of day and day of week as well as any other desired events The HAI Access Control Card Reader can be used for Validating H...

Page 112: ... Access Control Card Reader is assigned to an Area When a valid card or key tag a card or key tag that is valid for the current time of day and day of week that is assigned for the respective reader and that has arming and disarming privileges for the respective reader is presented at the reader 3 times each presentation within 5 seconds of the previous presentation of the card the security system...

Page 113: ...s or Key Tags To enroll Access Control Cards or Key Tags from the Setup menu press the 1 CODES key Use the down arrow key to scroll to the Card Number menu item Access Control Cards or Key Tags can be enrolled into the system using one of the following methods Method A Typing in the ID Number of the Access Control Card or Key Tag a Enter the last 8 digits of the Access Control Card or Key Tag and ...

Page 114: ...sign Access Control Cards and Key Tags to Specific Access Control Readers Each Access Control Card or Key Tag can be assigned to 1 or more Access Control Readers When an Access Control Card or Key Tag is assigned to specific readers the user only has access at the assigned readers Users do not have access to any reader in which their Access Control Card or Key Tag is not assigned If a user present...

Page 115: ...e configured to allow the user to arm or disarm the security system at Access Control Readers that are configured for arming and disarming CARD 1 ARM DISARM 1 0 NO 1 YES When a valid card is first presented the Access Control Card Reader will beep once and all 9 LED indicators will illuminate the color of the current security arming state for that area LED indicators illuminate red The security sy...

Page 116: ......

Page 117: ......

Page 118: ...NOTE TO INSTALLER Following installation this manual shall be left for the homeowner s use HAI New Orleans LA U S A ...

Reviews: