background image


Page 2 


OVERALL DESCRIPTION 


Console Operation 

 
The console is designed with everything that is necessary for you to program and operate your OmniPro II control and security 
system.  Because we feel that it is very important for you to feel comfortable with the operation of your OmniPro II, we 
recommend that you start by becoming familiar with your console. 
 
The OFF (1), DAY (2), NIGHT (3), and AWAY (4) keys are called shortcut keys.  This means that you may press these keys to 
go directly to that function without having to go into one of the "hidden" menus. 
 

L

TEMP

SECURITY

MESSAGE

CANCEL

EVENTS

ALL

CONTROL

MENU

SETUP

AUX

POL

STATUS

FIRE

BUTTONS

O

MNI


1- ' OFF ' 

 
The ' OFF ' key is used to disarm (deactivate) the security system, reset emergency alarms, and silence all sirens and sounders.   
 

2- ' DAY ' 

 
The ' DAY ' key is used to arm the security system in the Day mode.  In the Day mode, the perimeter zones (doors and windows) 
are protected, however, the interior zones are not armed so that you may move about freely inside.  In this mode, there is an entry 
delay on entry-exit zones.  

 
3- ' NIGHT

 ' 


The ' NIGHT ' key is used to arm the security system in the Night mode.  In the Night mode, the doors, windows, and non-
sleeping area motion detectors are armed.  In this mode, there is no entry delay so the alarm will be activated immediately if any 
zone is violated. 


4- ' AWAY

 ' 


The ' AWAY ' key is used to arm the security system in the Away mode.  In the Away mode, all zones (doors, windows, motions, 
etc.) are armed.  There is an entry delay on entry-exit zones, so that you can disarm the system when you return through the door. 


5- Down Arrow


The Down Arrow key is used to scroll through menus and lists.  The down arrow is used to scroll down the list from first to last 
(for example, when the first program is being displayed, pressing the down arrow will cause the next program to be displayed). 

Summary of Contents for Omni Pro II

Page 1: ...HOME AUTOMATION INC Control Security System Owner s Manual Includes the SIA CP 01 Control Panel Standard Features for False Alarm Reduction Document Number 20R00 2 Rev 2 16 December 2007...

Page 2: ...Copyright 2001 2007 Home Automation Inc All Rights Reserved...

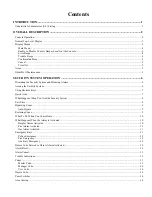
Page 3: ...ming the Security System 6 Using Shortcut Keys 7 Quick Arm 7 What Happens When You Arm the Security System 8 Exit Error 8 Bypassing Zones 9 Auto Bypass 9 Restoring Zones 9 What To Do When You Come Hom...

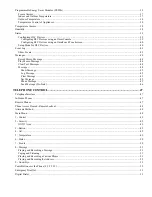
Page 4: ...Units 24 Controlling Vizia RF Z Wave 24 Controlling a Room of Vizia RF Z Wave Lighting 24 Controlling Individual Lighting Loads in an Vizia RF Z Wave Room 25 Controlling CentraLite Units 25 Controlli...

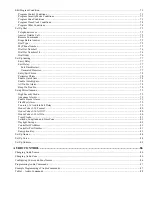
Page 5: ...essage 44 Clear Text Messages 44 Message 44 Show Message 45 Log Message 45 Clear Message 45 Say Message 45 Phone Message 45 Send Message Pro Link 46 TELEPHONE CONTROL 47 Telephone Interface 47 In Hous...

Page 6: ...grams When 63 Times Programs 63 Button and Event Programs 64 Control Unit Switch Press Event Buttons 64 Security Mode Event Buttons 65 Zone Event Buttons 66 All On Off Event Buttons 66 UPB Link Event...

Page 7: ...78 Enable Quick Arm 78 Enable Auto Bypass 78 All On For Alarm 78 Beep On Trouble 78 Set up Miscellaneous 79 High Security Mode 79 Announce Alarms 79 Enable Freeze Alarm 79 Flash For Alarm 79 Console 1...

Page 8: ...ING 89 FEDERAL COMMUNICATION COMMISSION NOTICE 90 CANADIAN INDUSTRY CANADA NOTICE 91 APPENDIX A DIAL OUT PLANNER 92 INSTRUCTIONS TO CALLED PARTY 93 APPENDIX B TEXT DESCRIPTION CHARACTER CODES 94 APPEN...

Page 9: ...een the hours of 9 00 AM and 5 00 PM Central Time Monday Friday We will be happy to assist you When calling please have the model and serial number of your unit which can be found on the inside of the...

Page 10: ...ty system in the Day mode In the Day mode the perimeter zones doors and windows are protected however the interior zones are not armed so that you may move about freely inside In this mode there is an...

Page 11: ...igits and will prompt you to reenter the number 12 KEY The Key is used to enter or confirm a selection It may also be used to display a menu or to offer you additional choices Normal Top Level Display...

Page 12: ...SAGE 9 SETUP Menu 1 Selects Control functions for controlling lights and appliances Menu 2 Selects Security functions arming disarming bypassing and restoring Menu 3 Allows a Button macro to be activa...

Page 13: ...op that you would like to have protected separately from your home or maybe you have a business and would like to protect an inventory stockroom separately from the offices in your building The consol...

Page 14: ...digit again Practice disarming your system until you are comfortable with this procedure NOTES Panic Tamper and Fire zones are always armed as are the Emergency buttons on the console In the event tha...

Page 15: ...y Exit zones Use this mode when you are leaving for a period of days 5 DAY INST DAY INSTANT Functions same as Day mode however there is no Entry Delay on any of the security zones There will be an ins...

Page 16: ...without causing an alarm The exit time will only be restarted once within a given arming period If Unvacated Premises is enabled if no exit zone is violated during the exit delay i e the premises was...

Page 17: ...re the system is armed in any mode The bypass will only take place if the zone is not ready i e open when the exit delay is over and the system is actually armed When a zone is Auto Bypassed it will b...

Page 18: ...to come on will do so The Flash For Alarm Unit Number begins to flash on and off The system waits the Outside Siren Delay 0 60 seconds then activates the sounder If enabled the system waits the Dial...

Page 19: ...larm is activated the alarm responds exactly as described under Burglar Alarm Activated except The console display reads GAS ALARM ZONE NAME TRIPPED The sounder will pulse on off on then an extended o...

Page 20: ...your duress code or a Duress zone is tripped the system performs a silent dial out as follows No alarms lights or console beepers are activated The system does not display the duress alarm The system...

Page 21: ...L NOW or HAD TRBL Indicated if the digital communicator not the voice dialer was unable to make contact with the Central Station after trying both numbers multiple times If this happens there could be...

Page 22: ...rmed in different security modes at the same time Each area will have its own console that will control that area independently from the other When disarming the security system or arming the security...

Page 23: ...Area 2 from a console in Area 1 or viceversa it is first necessary to go to that area GOTO Area From the security menu press the GOTO key on the console keypad AREA ENTER AREA The Area number can be...

Page 24: ...tectors as recommended by the manufacturer Be ready to silence the alarm system as soon as it sounds 5 From the top level display or from the main menu press the 6 key then the 4 key The Battery readi...

Page 25: ...for central heating and air conditioning systems Direct Output Control for relays to activate sprinklers lighting electric heating etc An OmniPro II will control 250 UPB switches modules and keypads u...

Page 26: ...Room 1 Units 1 8 Room 2 Units 9 16 Room 3 Units 17 24 etc Each room can consist of a maximum of 8 HLC devices configured as follows Up to 7 HAI UPB Wall Switches Dimmers and or Modules for controlling...

Page 27: ...1 8 Room 9 16 Room 17 24 and Room 25 31 To configure a House Controller to control a group of 8 rooms it must be set to the last unit number in one of the respective rooms For example a House Controll...

Page 28: ...control lighting scenes Receive commands when buttons are pressed on a CentraLite keypad About Lutron RadioRA Lutron RadioRA uses wireless communication technology to control lighting Each Switch or D...

Page 29: ...o that the OmniPro II can control the modules individually When a module hears a command from the OmniPro II for its house code and unit number it executes the command There are 3 different X 10 forma...

Page 30: ...e ID 113 128 CentraLite loads 113 128 or X 10 modules 1 16 House Code X 7 97 127 ALC addresses 1 31 Module 1 Branch 4 129 144 HLC or Z Wave Room 17 and 18 UPB Unit ID 129 144 Z Wave Node ID 129 144 Ce...

Page 31: ...elected room on all lighting loads in the room are turned on Press 2 A to set all of the lighting loads in the selected room to their preset levels for Scene A Press 3 B to set all of the lighting loa...

Page 32: ...rent level Press 3 BRT to brighten the selected unit 1 9 steps each step is 10 from its current level Press 4 LVL to set the desired lighting level of the selected unit 0 100 Press 6 LED to turn on or...

Page 33: ...FF to turn the selected lighting load off Press 1 ON to turn the selected lighting load on Press 2 DIM to dim the selected unit 1 9 steps each step is 10 from its current level Press 3 BRT to brighten...

Page 34: ...tton is pressed or Phantom Button is executed OmniPro II will automatically update the status of each affected device Controlling ALC or X 10 Units Entry Lights 0 OFF 1 ON 2 DIM 3 BRT Entry Lights 4 L...

Page 35: ...N 9 TIM STA Press 0 OFF to turn the selected unit off Press 1 ON to turn the selected unit on Press 2 DIM to dim the selected unit 1 9 steps each step is 10 from its current level Press 3 BRT to brigh...

Page 36: ...utomatically update the status of the X 10 unit Internal Flags The easiest way to define a flag it to refer to it as a virtual relay A flag can be in one of three separate states On Off or set to a va...

Page 37: ...Off and All On program a Link in this example Link 50 is used that will go to 100 when activated turned on Then write the following programs in the OmniPro II controller WHEN ALL ON LINK 50 ON WHEN A...

Page 38: ...2 X X X X 13 X X X X 14 X X X X 15 X X X X UNIT NUMBERS 16 X X X X X Corresponds to the unit numbers in a Scene Scene Commands Scene Commands are used to Set Scenes issue a Scene On command and issue...

Page 39: ...the same Link to go to their preset light levels at their preset fade rates For instance in our All On and All Off example when Link 50 On is transmitted by OmniPro II each UPB Wall Switch with Link...

Page 40: ...utton is turned on all of the devices that are pre programmed with that Phantom Button will go to their preset light levels When a Phantom Button is turned off all of the devices that are pre programm...

Page 41: ...ctions are performed when you arm your security system such as turning off all lights and setting back the HVAC system Door contacts and motion detectors can be used to turn on lighting automatically...

Page 42: ...of all HAI thermostats in your system Temperature zones 1 64 are for HAI thermostats TEMPERATURE ENTER TEMP ZONE 0 ALL After the key is pressed a menu appropriate for the type of temperature zone is s...

Page 43: ...ection Upstairs TEMP 71 HEAT 70 Upstairs MODE HEAT FAN AUTO Programmable Energy Saver Modules PESMs The PESM is used when you are have any thermostat other than a HAI Communicating Thermostat and woul...

Page 44: ...w setpoint Set high setpoint To enter the temperature menu from the top level display or from the main menu press the 5 TEMP key on the console keypad You will be prompted with the first named tempera...

Page 45: ...the console beeper will be turned on and an alarm dial out sequence will be initiated after the normal dial out delay Both voice and digital communicator dial outs may be used The voice dial out will...

Page 46: ...ceiling fan s unit number to turn it On or Off The PESM or Model 14A00 Temperature Sensor and the ceiling fan are linked together by an event button program Temperature Alarms Temperature sensors can...

Page 47: ...they must be configured using a PC running the UPB UPStart configuration software Configuring HLC Devices HLC devices can be configured using an Omni console or OmniTouch touchscreen connected to the...

Page 48: ...HAI UPB Wall Switches and Dimmers put the device in Setup mode as follows Step Operation 1 Tap the rocker switch quickly 5 times 2 The HAI UPB Wall Switch or Dimmer will flash the lighting load one ti...

Page 49: ...II allows you to check the status of the battery telephone bell circuit auxiliary fuse and security zone loop readings The display is updated 3 times per second although the actual readings are taken...

Page 50: ...rms may be developing You may wish to record the Status Test values for future reference 5 TEMP TEMPERATURE The Temperature Status menu allows you to view and scroll through the status of each Thermos...

Page 51: ...t log entry displays the time and date on the top line and a description of the event on the bottom line 7 15 PM 5 8 USER NAME AWAY For trouble conditions the event log will show the zone name or spec...

Page 52: ...ge At the beep record your eight second message OmniPro II will beep a second time at the end of the eight seconds which signifies the end of the record process After a new message is recorded the dis...

Page 53: ...to log the selected message Clear Message The 3 CLEAR key allows you to clear the selected text message or all text messages from the console s display TRASH NIGHT ENTER MESSAGE 0 ALL You may enter t...

Page 54: ...racter is to be interpreted as an ASCII control character such as M to represent a carriage return Other useful sequences would be J for a line feed character and G for a bell character To include an...

Page 55: ...ne when the OmniPro II picks up or hangs up This is normal To access your OmniPro II from an in house phone Pick up the receiver of any Touch Tone phone in your house Pause for just a moment about a s...

Page 56: ...5 TEMPERATURE 6 STATUS 7 EVENT 8 PHONE 9 GOOD BYE CANCEL 0 REPEAT This means that you press 1 for Control functions 2 for Security 3 for Button etc Pressing one of the keys on the phone will move you...

Page 57: ...ess the key to GOTO a different area OmniPro II will say GOTO AREA ENTER AREA THEN ENTER CODE CANCEL WELCOME TO OMNIPRO II AREA 2 3 Button Press 3 from the MAIN MENU to get to the BUTTON menu If butto...

Page 58: ...MP PLEASE CHOOSE 0 OFF 1 ON 2 HEAT SETTING 3 COOL SETTING 9 TIMED STATUS CANCEL If the STATUS key is selected OmniPro II will read the current status of the PESM For instance ENERGY SAVER IS ON OFF TE...

Page 59: ...OSE 2 TALK 8 LISTEN CANCEL If no key is pressed OmniPro II will automatically switch to listen mode To talk to someone at the premises press the 2 key To listen to the premises press the 8 key You can...

Page 60: ...9 to terminate a remote call If you don t the OmniPro II will hang up anyway after about 15 seconds Panic Button over the Phone On an in house phone only you can activate the Police Emergency keys by...

Page 61: ...t the premises If the digital communicator is unable to successfully communicate with the central station the console will display a Communicator Trouble condition Voice Dialer In UL Listed Installati...

Page 62: ...as if you had called your system A strategy to follow if you are called by your system is to check the Status 6 on the telephone to see what mode the system is in and which zones were tripped Press t...

Page 63: ...en connecting the controller directly to the NIC card on a computer When connected to a switch or router port forwarding must be configured Port forwarding sets up public services on your network The...

Page 64: ...DNS provider runs on a PC on your local network and is used to automatically update your Dynamic DNS provider with your current IP address Several router switch manufacturers have embedded a Dynamic D...

Page 65: ...roller on a local network using HAI PC Access under Configure Network enter the controller s IP address i e 10 0 0 230 To connect to an OmniPro II controller from the Internet using HAI PC Access unde...

Page 66: ...a Master code All other user should be assigned a security code with an authority level areas that can be accessed if area arming is being used and times in which the code is valid To set up a code f...

Page 67: ...OFF TIME 1 TIME 2 DAYS TIME 8 00 AM HHMM RISE AM SET PM To change days press the key then press the 2 DAYS key You will be prompted to enter the day s that the code will be valid Press 1 7 for Monday...

Page 68: ...Security modes Off Day Night Away Vacation Day Instant and Night Delay and bypass and restore zones Buttons Events Messages Show Log Clear Say Phone and Send The OmniPro II executes programs Once at a...

Page 69: ...a particular control unit number Menu 2 All Security related programs Menu 3 Programs for a particular macro button Menu 4 Programs for All On Off functions Menu 5 Programs for a particular Temperatu...

Page 70: ...s the key again to save the program or press the key to cancel edit of this program and return to reviewing the programs Press the 2 DELETE key to delete the selected program 3 Delete All Programs To...

Page 71: ...re or after the time of sunrise or sunset SUNSET 1 BEFORE 2 AFTER AT If the 1 BEFORE or 2 AFTER key is selected you will be prompted to select the amount of minutes ENTER OFFSET 0 120 MINUTES When ent...

Page 72: ...ypad When a button is pressed on a RadioRA Master Control When a button is pressed on a ALC 4 Button Scene Switch Module When a button is pressed on a CentraLite StarLite Keypad Press the 1 CTRL key t...

Page 73: ...ent button description Press the key when done Selecting 1 DLY allows the user to specify whether the event button is activated at the start or end of the exit delay WHEN ACTIVATED 1 START EXIT 2 END...

Page 74: ...Lights On All Off Leviton Scene or UPB Link ALL 0 OFF 1 ON 2 SCN 3 LINK If area arming is being used you will be prompted to specify the desired area AREA ENTER AREA 0 ALL If Leviton Scene is selected...

Page 75: ...espond to scene changes initiated at Compose keypads and dimmers When a scene change is initiated OmniPro II can activate an event button program You are first prompted to enter the X 10 house code X...

Page 76: ...rt for incoming text messages When a text message is received Pro Link searches through all 128 text messages for a matching message If one is found the When Message Received event button correspondin...

Page 77: ...nd LED 3 6 is behind the A D buttons respectively On the 8 button Keypad LED 1 8 is behind the 1 8 buttons respectively For example WHEN U1 SW 3 UNIT 1 LED 3 ON This program illuminates the A button o...

Page 78: ...ous state once the timer has expired Note If a unit is currently timed On for time Dimmed for time Brightened for time or Off for time when the blink program is executed the unit will begin blinking a...

Page 79: ...nt takes place When the event takes place it switches each of the specified touchscreens to full screen video Program Temperature Commands Select the 5 TEMP key to control HAI Communicating Thermostat...

Page 80: ...ll flash or No Beep or LED the message will be displayed on the console but the console will not beep or flash the LED When a message is displayed and No Beep is selected the LED on the console will c...

Page 81: ...u Program Control Conditions Press the 1 CTRL key to specify that the program should only execute if a specified control unit is either On or Off The display prompts for the unit number UNIT ENTER UNI...

Page 82: ...ext specify the state of the time clock IF TIME CLOCK 1 0 OFF 1 ON Program Other Conditions Select the OTHER key to select a condition from a list of other conditions SELECT CONDITION NONE Choose NONE...

Page 83: ...em to No The local in house telephone control features will still work but the system will never answer an incoming call The default setting for Answer Outside Call is Yes Remote Commands The Remote C...

Page 84: ...e Dial Out 1 On and Dial Out 1 Off times and dates Press to change the On and Off times See Set Up Codes DIAL OUT 1 ON 12 00 AM MTWTFSS CHNG DIAL OUT 1 OFF NEVER CHNG For example if your normal work h...

Page 85: ...t Away or Vacation modes the system will wait this amount of time before arming EXIT DELAY 60 45 180 SECONDS The default Exit Delay is 60 seconds You may change it from 45 to 180 seconds Exit Time Res...

Page 86: ...etting off the alarm In some applications it may be preferable to allow arming only if all zones are secure READY With Auto Bypass set to No all zones to be armed must be secure when the system is arm...

Page 87: ...e over a speaker on premises When an alarm first occurs the siren is activated After a few seconds the siren is turned off and the type of alarm is announced The siren is then reactivated The default...

Page 88: ...O 1 YES Notes 1 When configured each House Code will affect 2 rooms of HLC or Vizia RF Z Wave lighting i e HC 1 ALL OFF affects Room 1 and 2 2 When the House Code is configured as UPB RadioRA or Centr...

Page 89: ...darkness condition on a scheduling command or event button To enable the system to properly calculate sunrise and sunset times you must enter your latitude location north or south of the equator longi...

Page 90: ...savings time a start month start weekend end month and end weekend is set up at the factory You may change or disable this function if desired DST START MONTH 3 1 12 0 DISABLE DST START WEEKEND SECON...

Page 91: ...Setup item IP ADDRESS press the down arrow key PORT NUMBER 4369 0 65535 In most installations the default port number can remain the same Port numbers range from 0 to 65535 To change the port number e...

Page 92: ...ently entered character ZONE 1 00 95 ZONE 1 FRONT DOOR 00 95 DEL ZONE 1 FRONT DOOR 00 95 Set Up Voice The OmniPro II can be set up to speak descriptive names such as FRONT DOOR for control zones units...

Page 93: ...THE JONES RESIDENCE 1234 JOHNSON STREET CORNER OF JOHNSON AND THIRD STREET The unit will beep after 8 seconds then play the address back to you If you are not happy with the sound re record by pressi...

Page 94: ...e completed press the Exit icon to return to OmniTouch Home page Changing Audio Source To select a new Audio Source for the current Audio Zone press the Source button on the touchscreen interface Sele...

Page 95: ...allows you to create programs to select an Audio Source for the specified Audio Zone The Key Press Command allows you to create programs to simulate key presses for the respective audio system See Ta...

Page 96: ...select 1 Nine 22 Six Five Favorite 12 Tier 2 source select 2 Track 23 Seven Six Ok button down Tier 2 source select 3 Zero 24 Eight Seven Ok button up Tier 2 source select 4 Disc 25 Nine Eight Play Pa...

Page 97: ...ne must be NO 11 The Exit Time Restart feature must be NO Installer NAME __________________________________ NUMBER _______________________________ FIRE ESCAPE PLANNING Your fire protection system is d...

Page 98: ...ate notice of changes so as to give you an opportunity to maintain uninterrupted service 6 In the event of equipment malfunction all repairs should be made by our company or an authorized agent It is...

Page 99: ...d connections of the power utility telephone lines and internal metallic water pipe system if present are connected together This precaution may be particularly important in rural areas Caution Users...

Page 100: ...UMBER 4 __________________________________ AREA _____________ DIAL OUT 4 ON TIME _______________ DAYS _______________ DIAL OUT 4 OFF TIME _______________ DAYS _______________ DIAL OUT NUMBER 5 _______...

Page 101: ...This message will be repeated 2 times At any time during the message please dial my code which is __________________ If you make a mistake press then enter the code again This will stop the system fr...

Page 102: ...1 22 23 SPACE 0 1 2 3 4 5 6 7 24 25 26 27 28 29 30 31 32 33 34 35 36 37 38 39 40 41 42 43 44 45 46 47 8 9 A B C D E F G H I J K L M N O 48 49 50 51 52 53 54 55 56 57 58 59 60 61 62 63 64 65 66 67 68 6...

Page 103: ...NCEL 293 CANS 294 CARPORT 203 CASE 204 CCTV 295 CD 205 CEILING 296 CELLAR 54 CENTER 297 CENTRAL 206 CHANDELIER 298 CHANGE 196 CHECK 299 CHILDREN S 300 CHRISTMAS 301 CIRCUIT 302 CLASS 303 CLOSE 304 CLO...

Page 104: ...382 INTERNET 227 INTRUSION 104 INVALID 105 IS 383 JACUZZI 384 JANUARY 385 JEWELRY 386 JULY 387 JUNE 388 KEEPER 389 KENNEL 390 KEY 106 KITCHEN 228 LAMP 391 LANAI 392 LAND 393 LANDSCAPE 394 LASER DISK 3...

Page 105: ...59 SECURITY 485 SEND 241 SENSOR 486 SEPTEMBER 487 SERVICE 488 SET 160 SETTING 20 SEVEN 7 SEVENTEEN 21 SEVENTY 489 SEWING 490 SHADES 491 SHED 492 SHOCK 161 SHOP 493 SHOW 494 SHUTTERS 162 SIDE 163 SILEN...

Page 106: ...hrase in OmniPro II This phrase can then be used as part of your voice description and spoken over the telephone along with the item number that is normally spoken It can also be part of your voice de...

Page 107: ......

Page 108: ...NOTE TO INSTALLER Following installation this manual shall be left for the homeowner s use HAI New Orleans LA U S A...

Reviews: