15
SECTION 4
SOFTWARE INTERFACE
This section describes the details of the serial port
commands through which the HI-204
III
-USB
is controlled
and monitored. The serial port commands allow users to set
the receiver parameters, configure output message type,
and retrieve status information. The baud rate and protocol
of the host COM port must match the baud rate and
protocol of the GPS receiver serial port for commands and
data to be successfully transmitted and received. The
default receiver protocol is 4800 bps, 8 data bits, 1 stop bit,
and none parity.
4.1 NMEA OUTPUT MESSAGE SPECIFICATION
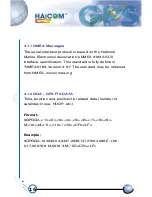
The HI-204
III
-USB
supports NMEA-0183 output format as
defined by the National Marine Electronics Association
(http://www.nmea.org). The currently supported NMEA
messages for GPS applications are:
GGA
GLL
GSA
GSV
RMC
VTG
Global Positioning System Fix Data
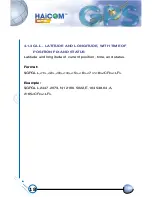
Geographic Position Latitude / Longitude
GNSS DOP and Active Satellites
GNSS Satellites in View
Recommended Minimum Specific GNSS Data
Course Over Ground and Ground Speed
Summary of Contents for HI-204III
Page 1: ...HI 204III USB Ultra High Sensitive USB GPS Receiver...
Page 3: ...1 HI 204III USB WATERPROOF Ultra High Sensitive USB GPS Receiver...
Page 7: ...5 For notebook PC use HI 204III USB connect with a LaptopPC USB port USB port...
Page 13: ...11 2 2 LED INDICATOR LED flashing 0 25Hz LED flashing 1Hz Signal Searching Position Fixed...
Page 30: ...28 USB Driver Setup Guide HI 204III USB USB GPS Receiver...
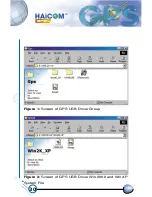
Page 33: ...31 Figure 3 Screen of GPS USB Driver Win 98 and Win ME Group...
Page 35: ...33 Step 1 Click the Next button Figure 4 Win 98 Automatic Installation Driver Screen...
Page 38: ...36 Step 4 Click the Next button Figure 7 Win 98 Automatic Installation Driver Screen...
Page 39: ...37 Step 5 Click the Finish button Figure 8 Win 98 Automatic Installation Driver Screen...
Page 41: ...39 Step 2 Double click the Control Panel icon Figure 10 My Computer Screen...
Page 42: ...40 Step 3 Double click the System icon Figure 11 Control Panel Screen...
Page 43: ...41 Step 4 Press Device Manager button Figure 12 System Properties Screen...
Page 45: ...43 Step 6 Browse COM3 properties Figure 14 System Properties Screen...
Page 51: ...49 Step 2 Select Hardware Figure 23 System Properties Screen...
Page 52: ...50 Step 3 Select Device Manager Figure 24 System Properties Screen...
Page 53: ...51 Step 4 Select Ports COM LPT Figure 25 Device Manager Screen...
Page 54: ...52 Step 5 Select COM4 Figure 26 Device Manager Screen...
Page 55: ...53 Step 6 Select Driver Figure 27 USB to Serial Bridge Screen...
Page 56: ...54 Step 7 Browse COM4 properties Figure 28 USB to Serial Bridge Properties Screen...
Page 64: ...WATERPROOF USB GPS Receiver...


