


INSTALLATION
PAGE 26
ENGLISH
SE
C
TION D
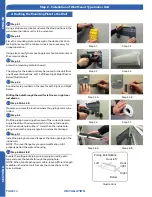
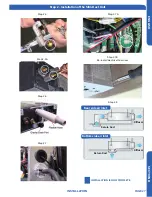
Step By Step Guide To Slim Duct Unit Installation
2.1
Step 2.1
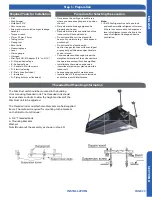
Determine and mark the position of where the Slim Duct
unit is to be installed. Install the hardware necessary to
mount the threaded rods. Always select a location strong
enough to support the indoor Slim Duct unit.
2.2
Step 2.2
Install the threaded rods to the hardware attached to the
structure.
2.3
Step 2.3
Lift the Slim Duct unit and position the threaded rods into
the 4 mounting clips, one located on each corner of the unit.
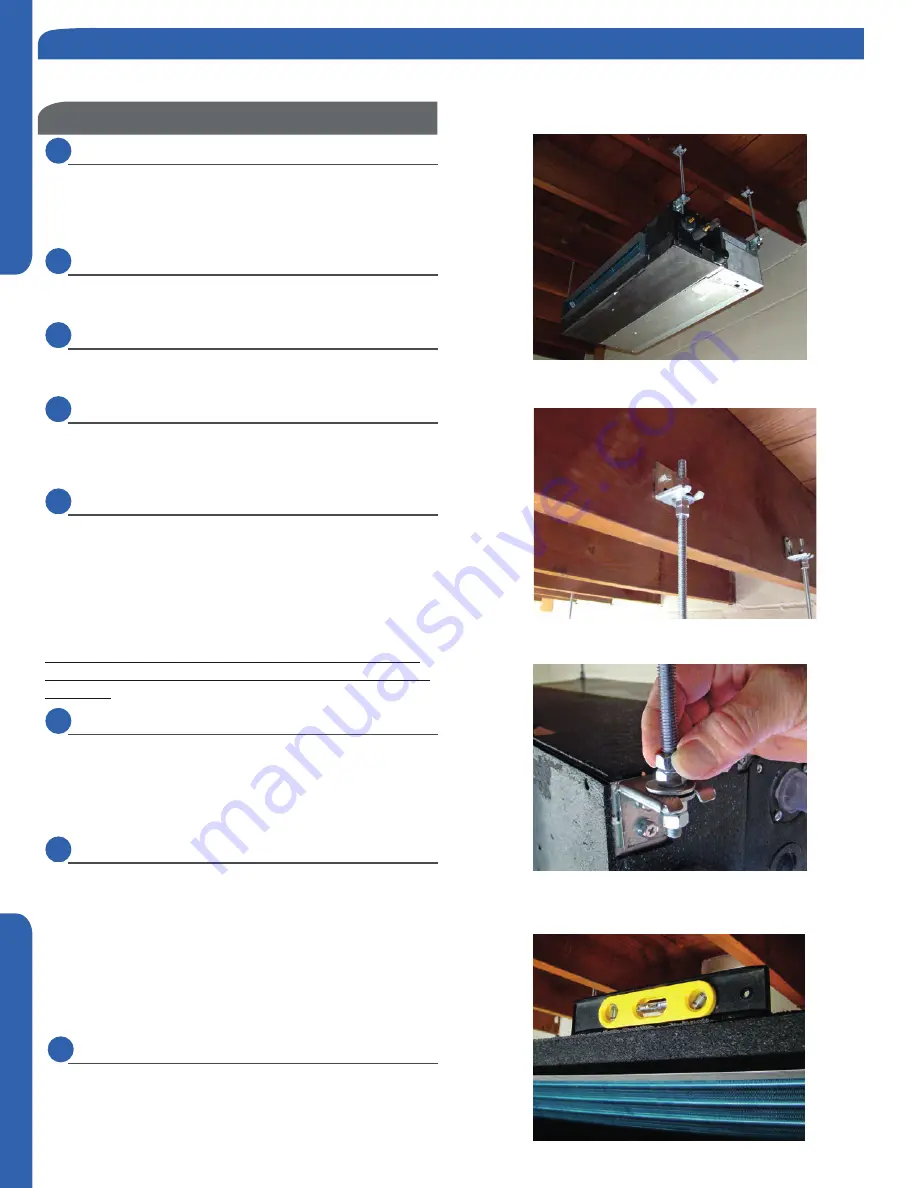
2.4
Step 2.4
Using a level, adjust the nuts on the threaded rods to obtain
level readings both side to side and front to back on the Slim
Duct unit.
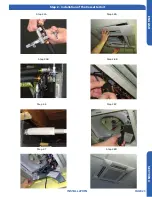
2.5
Step 2.5 - 2.5A
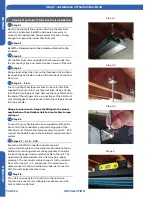
Prior to routing the refrigerant lines to the unit, install the
supplied flare nuts onto the refrigerant lines. Using a flaring
tool, flare the refrigerant lines. Remove the caps attached to
the ends of the refrigerant line connections at the Slim Duct
unit. Holding gas should leak out. Attach the refrigerant lines
to the air handler.
Using a torque wrench, torque the fittings to the proper
specifications. (See Outdoor Unit Section for flare torque
settings.)
2.6
Step 2.6
Connect the grey flexible drain hose supplied with the Slim
Duct unit to the condensate pump discharge pipe of the
Slim Duct unit. Tighten the clamp securely. Using 3/4 “ PVC,
connect the flexible hose to the building’s condensate drain
system.
2.7
Steps 2.7 - 2.7A - 2.7B
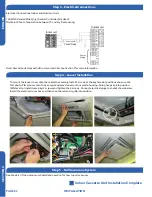
Route the 14AWG stranded 4 conductor power/
communication cable and the wired remote cable to the air
handler. Use reducing washers and appropriate connector
to attach the power/communication cable to the unit. The
wired remote cable will enter the unit through a rubber
grommet. The 4 conductor cable connects to the terminal
block at terminals 1, 2, 3, and ground. The wired remote
cable connects to the air handler main board at connector
CN1. Re-install electrical box cover.
The unit is now ready for connection to the ductwork.
The return air duct can be configured as either a rear side
inlet or bottom side inlet.
Step 2.1
Step 2.3
Step 2.2
Step 2.4
2.8
Step 2.8
Step 2 - Installation of the Slim Duct Unit


