background image

16 Plasma TV

Turning on the TV just after installation.

1

. Connect power cord correctly.

2.

 Press the SWITCH button on back of  the TV. At this moment, the TV is  switched to standby mode.

     Press the POWER button on the remote control or     button on the TV and then the TV will turn on.

* In this manual, the OSD (On Screen Display) may be different from your 

`s, because it is just

an example to help you with the 

operation.

TV

TV

1

.

 If the TV  was turned off with the SWITCH button on the TV

  Press the SWITCH button on the TV to turn the TV on.

2

. If the TV  was turned off with the remote control and then the ON/OFF switch on the back of the TV.

 Press the SWITCH button on the back of TV and then press the POWER button on the remote control to turn 

the TV on.

NOTE

 If you intend to be away on vacation, disconnect the power plug from the wall power outlet.

TV

Turning on the TV

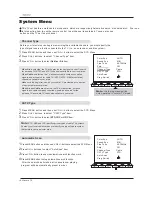
Choose the Menu Language

When you start using your set for the first time, you must select the Menu Language which will be used for displaying

menus and indications.

Menu Language          English

OSD Timeout             15seconds

Menu Background

Translucent

Calendar

Auto Off                         Off

BlueScreen                  Off

Close Caption              Off

Parental

B

C

A

1

Press MENU and then use VOL

+/-

button to select the

FUN.

Menu.

2

Press

CH+/-

button to select

Menu Language

.

3

Select a particular Menu Language by pressing 

VOL+/-

 button 

repeatedly. You can choose one of three Menu Languages. 

(English, French, Spanish)

4

When you are satisfied with your choice, press the 

EXIT

button to 

return to normal viewing.

Choose the Input Source

- Change the picture source so that you can watch your TV, cable TV, VCR, DVD, or any other devices that are 
  connected to your TV.

1. Press INPUT button on the remote controller, the Scoure menu will appear on the screen.

2. Press CH+/-button for option and then press VOL+/- button to confirm.

Note:
If AV1 and S-Video are inserted at the same time, priority will be given to S-Video. 

Source

TV

AV1/S-Video

YPbPr/YCbCr

VGA

DVI

Summary of Contents for 42EP24S - 42" Plasma TV

Page 1: ...Please read this manual carefully and completely before operating the unit and retain this manual for future reference PLASMA TV OWNER S MANUAL MODELS 42EP24STV ...

Page 2: ...al installation This equipment generates use and can radiate radio frequency energy and if not installed and used in accordance with the instructions may cause harmful interference to radio communications However there is no guarantee that interference with not occur in a particular installation If this equipment does cause harmful interference to radio or television reception which can be determi...

Page 3: ... Do not defeat the safety purpose of the polarized or grounding type plug A polarized plug has two blades with one wider than the other A grounding type plug has two blades and a third grounding prong The wide blade or the third prong are provided for your safety If the provided plug does not fit into your outlet consult an electrician for replacement of the obsolete outlet To prevent electric sho...

Page 4: ...nstructions Adjust only those controls that are covered by the operating instructions as improper adjustment of other controls may result in damage and will often require extensive work by a qualified technician to restore the unit to its normal operation e If the unit has been dropped or damaged in any way f When the unit exhibits a distinct change in performance this indicates a need for service...

Page 5: ...tment Setup Adjustment Setup 22 Function Setup Function Setup 23 Menu Menu Language Option 23 Menu Time out Option 23 Menu Background Option 23 Auto Off 23 BlueScreen 23 Close Caption 24 Parental 24 Time Setup 25 Clock Setting 26 Off On time 26 Rimind Time Remind Prog 26 Lock Menu Options Lock Setup 27 Preset Prog 27 Prog Num 28 20 21 Calendar Display and Check 23 Change Password 27 Tuning Lock 27...

Page 6: ...ption on MENU or tune to the desired channel e VOLUME Buttons MENU Button Power On Off Button Remote Control Sensor illuminates red in standby mode illuminates blue when the display is turned on Power Standby Indicator Menu exit 6 Plasma TV VOL VOL Front panel controls ...

Page 7: ...r cable PC through the input Audio Video Input Connect audio video output from an external device to these jacks S Video Input Power Cord Socket This TV operateson AC power Thevoltage is indicated on the specifications page Never attempt to operate the TV onDC power Earphone port 0 Power On Off Owner s Manual 7 External audio video output AUDIO output Antenna Input Connect cable or antenna signals...

Page 8: ...LOCK GUIDE AVC VOL Information display Display of current channel signals program and systems EXIT Clears all on screen displays and returns to TV viewing from any menu P STD Selects a factory preset picture mode depending on the viewing environment ARC Changes the aspect ratio FREEZE Freezes the currently viewed picture GUIDE no available Shows program schedule CC Closed Caption CHANNEL UP DOWN S...

Page 9: ...le electric shock If grounding methods are not possible have a qualified electrician install a separatecircuit breaker Do not tryto ground theunit by connecting it to telephonewires lightening rods or gas pipes The TV can be installed in various ways such as on a wall or on a desktop etc The TV is designed to be mounted horizontally Ensure that the following accessories are included with your plas...

Page 10: ...ed compared to connecting a regular VCR to the Video input 2 Insert a video tape into the VCR and press PLAY on the VCR Refer to the VCR owner s manual 3 Select the input source by the INPUT button on the remote control TV TV After subscribing to a cable TV service from a local provider you can watch cable TV programming The cannot display TV programming unless a TV tuner device or cable TV conver...

Page 11: ...DVD audio outputs to the AUDIO INPUT jacks on the as shown in the figure 2 If your DVD only has an S Video output jack connect this to the S VIDEO input on the and connect the DVD audio outputs to the AUDIO INPUTjacks on the as shown in the figure NOTE If your DVD player does not have component video output use S Video How to use 1 Turn on the DVD player insert a DVD 2 Use the INPUT button on the ...

Page 12: ...to the owner s manual for the digital set top box 2 Use INPUT on the remote control to select YPbPr YCbCr VGA or DVI source TV s Signal 480i 480p 720p 1080i 1080p YPbPr YCbCr Yes Yes Yes Yes Yes VGA Yes Yes Yes Yes No DVI No Yes Yes Yes No The has a special signal output capability which allows you to hook up a second TV or TV Connect the second TV or TV to the s AV OUT See the Operating Manual of...

Page 13: ...1 Turn on the PC and the 2 Turn on the display by pressing the POWER button on the s remote control 3 Use INPUT on the remote control to select VGA or DVI source 4 Check the image on your There may be noise associated with the resolution vertical pattern contrast or brightness in PC mode If noise is present change the PC mode to another resolution change the refresh rate to another rate or adjust ...

Page 14: ...speaker position I II III and IV in Figure 4 Fix the speaker to the plasma screen with ST4X16 screws 5 Connect the speaker to the speaker terminal of plasma screen Nip the speaker terminal and insert the connecting cable into the terminal slot Release the speaker terminal and ensure that the white connecting cable is inserted in the terminal slot marked red and black connecting cable is inserted i...

Page 15: ... baffle and put the baffle into the stand rip the protective sheet off of the PMMA Install the Stand Face the PDPscreen upside down on a clean blanket or the bracket and pay attention not to indent the casing See figure Lay down the stand and put it to responding position of the PDP screen and make sure the brace pole towards the hole of the PDP Fix 2 PDPbrace pole to the PDP on the back of the pl...

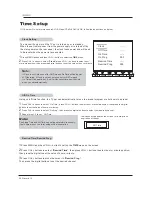
Page 16: ... the Menu Language When you start using your set for the first time you must select the Menu Language which will be used for displaying menus and indications Menu Language English OSD Timeout 15seconds Menu Background Translucent Calendar Auto Off Off BlueScreen Off Close Caption Off Parental B C A 1 Press MENU and then use VOL button to select the FUN Menu 2 Press CH button to select Menu Languag...

Page 17: ...7 SOU Mode Music Standard Theater Personal Picture Mode Press P STD button on the remote controller for menu display and then use CH button to select the desired mode press VOL to confirm Sleep Timer Every press of SLEEP button the timer will be set in the following sequence Sleep 0Min Sleep 5Min Sleep 15Min Sleep 30Min Sleep 60Min Sleep 90Min Sleep 120Min Sleep 0Min If remaining time of set timer...

Page 18: ...ted the TV will detect antenna signals and will search for antenna TV NTSC and ATSC channels available in your local area When Cable is selected the TV will detect cable company supplied signals and will search for cable TV NTSC ATSC QAM modulated channels available in your area Make sure that registration with your cable TV provider and connection of equipment are completed When Air and Cable are...

Page 19: ...er the skipped channel 1 Press MENU and then use VOL button to select the SYS Menu 2 Press CH button to select Prog Switch 3 Press VOL to enter the submenu and press the digital button to set the desired channel number Press CH button to To Prog item and Press the digital button to set the exchange channel number press CH button to Switch then press VOL button to confirm 4 When you are satisfied w...

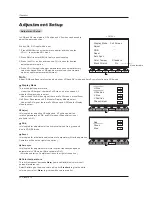
Page 20: ...re Sharpness This will adjust the sharpness of fine details in the picture DNR Digital Noise Reduction Automatically filters out and reduces the image noise and improves picture quality when receiving weak video signals Select Auto Off Weak Medium Strong according to the image noise 1 Press MENU and then use VOL button to select the PIC Menu 2 Press CH button to select the desired items 3 Press VO...

Page 21: ...tput level Balance This will adjust the output of the right and left speakers to obtain the best stereo reproduction for your listening position SOU Mode This select the modes for sound reproduction dependent on the broadcast signals or signals from external inputs received Press CH button to Select SOU Mode press VOL button to select the Music Standard Theater or Personal Treble This will adjust ...

Page 22: ...st the picture ratio Under the VGAsignal there are Full Screen one to one and 4 3 mode for Display mode to select Under the AV1or S Video signal there are Full Screen Vertical Zoom Half Zoom Panorama and 4 3 Mode for Display Mode to select Under the DVI signal there are Full Screen and 4 3 Mode for Display Mode to select Adjust this is opted for adjusting H Position and V Position as well as relat...

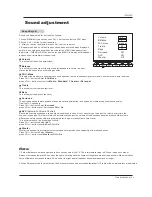
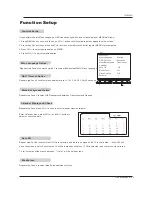
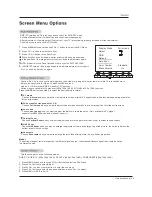
Page 23: ...cais or Espanol as MENU Menu Language OSD Timeout Option Repeat step 3 and 4 to select menu display time for 5 10 15 20 25 30 or 40 seconds Menu Background Option Repeat step 3 and 4 to select OSD background between Translucent and Opaque Function Setup Owner s Manual 23 Auto Off Repeat step 3 and 4 to select On Off If and there is no signal to the TV for 2 minutes the TV will be in standby condit...

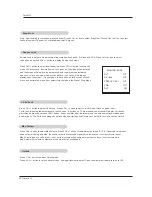
Page 24: ...Screen Off Close Caption Off Parental B C A TEXT The term for the words that appear in a large black frame and almost cover the entire screen usually messages provided by the broadcaster Parental Control can be used to block specific channels ratings and other viewing sources The Parental Control Function V Chip is used to block program viewing based on the ratings sent by the broadcasting station...

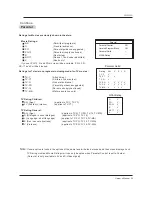
Page 25: ...lence applies to TV Y7 TV Rating General ALL Age applies to TV G TV PG TV 14 TV MA D Dialogue sexual dialogue applies to TV PG TV 14 L Language adult language applies to TV PG TV 14 TV MA S Sex sexual situations applies to TV PG TV 14 TV MA V Violence applies to TV PG TV 14 TV MA Parental Continue Parental Control Off Unrated Program Block Off Parental Rating ALL V S L D TV Y V TV Y 7 V V TV G V T...

Page 26: ... when the power is reconnected 1 Press MENU button and then VOL button to select the TIME menu 2 Press CH buttons to select Clock press VOL buttons to select hour or minute position then press the digital buttons to set the value of hour or minute Clock Setting Off On Time Using on off time function the TV set can automatically turn on to a preset program or shut down in a preset 1 Press CH button...

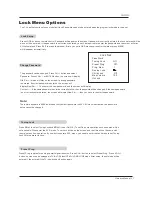
Page 27: ...word is correctly entered the Lock set menu will be menu willl be entered If the password is not correctly entered you will be required to reenter the password and the cursor will stay At the first place Press EXITto erase the window If time you set in OSD menu expires after the latest press MENU will disappear automatically The TV has the function of security default lock Password needs to be ent...

Page 28: ...justed the sound value cannot exceed maximum volume value If current volume is over Max Volume when Lock Set menu is set current volume will become set maximum volume If current volume is below maximum volume customer set volume will stay unchanged Unlock Press CH button to select Unlock mode Press VOL button to unlock all set modes setting all lock options to off and the maximum volume returns to...

Page 29: ...le in PC signal especial for 800X600 mode and modes of under it Vertical Zoom Choose Vertical Zoom when you want to adjust the picture the picture vertically that is without any back bars Half Zoom Choose Half Zoom when you want to enlarge the picture vertically by enlarge top of the picture that is the letters on the bottom are still on the screen Panorama Choose Panorama when you want to enlarge...

Page 30: ... is normal the image is muted during the display startup process Please contact your service center if the picture has not appeared after five minutes Picture appears slowly after switching on Select Color Temperature in the ADJ menu and press the VOL button Keep a sufficient distance between the TV and the VCR Activate any function to restore the brightness of the picture No or poor color or poor...

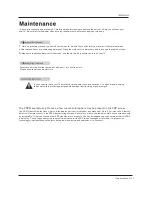
Page 31: ...f you expect to leave your TV dormant for a long time such as a vacation it s a good idea to unplug the power cord to protect against possible damage from lightning or power surges The PDP Manufacturing Process a few minute colored dots may be present on the PDP screen The PDP Plasma Display Panel which is the display device of this product is composed of 0 9 to 2 2 million cells Afew cell defects...

Page 32: ...20 Volts 50 60Hz Size WxHxD inches mm Weight pounds kg 4 3x21 9x2 4 110x556x62 2x5 5 2x2 5 The specifications shown above may be changed without notice for quality improvement Weight pounds kg Resolution Power requirement Color System Color Operating Temperature Range Operating Humidity Range Maximum Elevation MODEL 852x480 Dot 32 Plasma TV ...

Page 33: ...V0 1 0090506987 ...

Reviews: