2
English
Features Diagram
PART NAMES
OPERATING INSTRUCTIONS
1. This fan is for HOUSEHOLD USE ONLY and plugged into electrical wall outlet.
2. To make / stop the fan head oscillate, push down / pull the oscillating control knob on the motor
housing.
3. To adjust vertical angle, tilt fan head up or down as desired.
4. Speed is controlled by depressing the piano keys.
5. Check front grille is securely fixed before operation.
ASSEMBLY INSTRUCTIONS
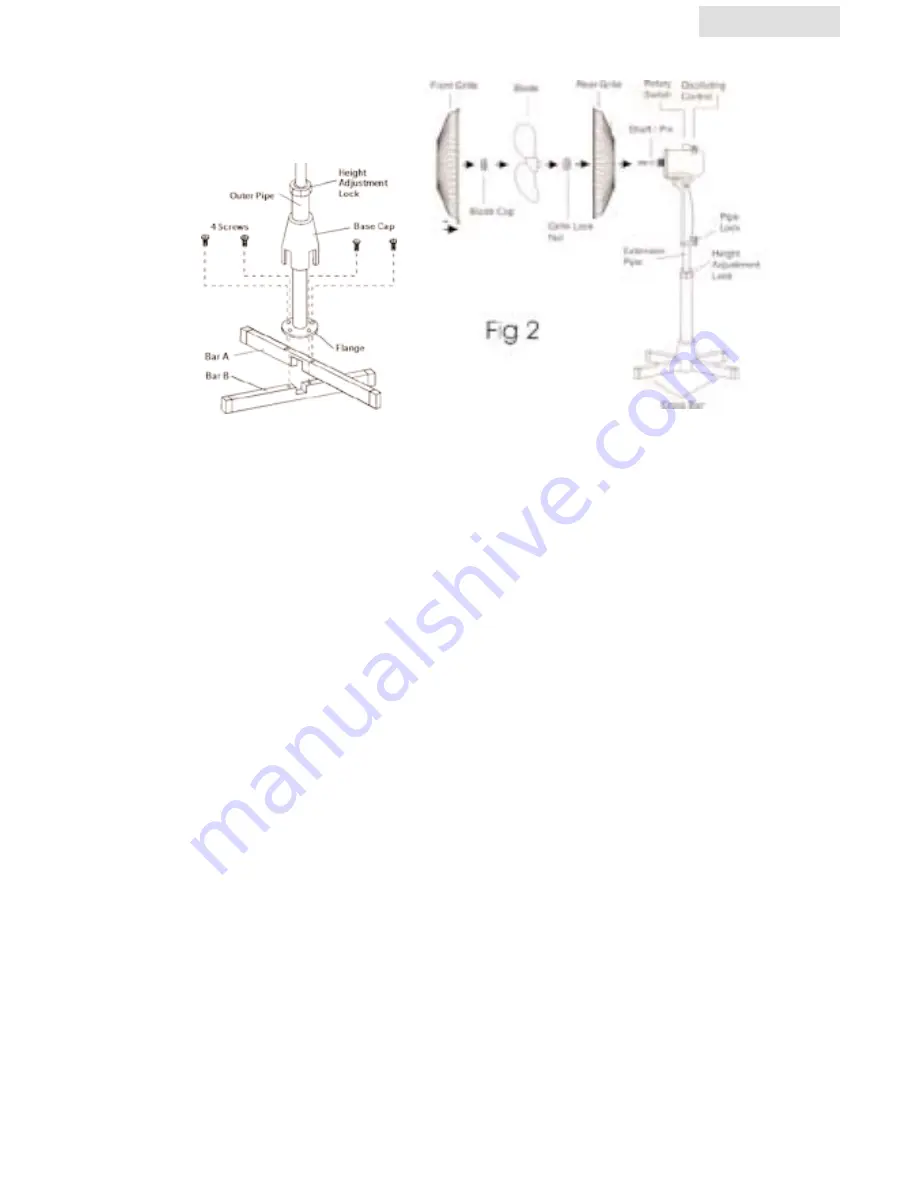
1. Loosen and remove the four screws from bar A and bar B (Fig 1). Cross the 2 bars as shown and align
the four holes with those on the Flange. Secure the Flange to the bars with the four screws. Slide the Base
Cap down over the assembly.
2. Unscrew the Grille Lock Nut from the shaft end of the Motor Housing (Fig 2).
3. Mount the Rear Grille, with HANDLE UP to the Motor Housing by matching the 3 holes on the Rear Grill
to the 3 pegs on the front of the Motor Housing. Push in firmly until the 3 pegs protrude through the 3
holes.
4. Secure the Rear Grille to the Motor Housing with the Grille Lock Nut.
5. Discard the sleeve from motor shaft.
6. Insert the Blade on to the Motor Shaft, matching the slots on the back of the Blade with the Shaft Pin (Fig.
2). Secure Blade with Blade Cap, turning counter-clockwise to tighten.
7. Test Blade operation by rotating it with your hand. There should be no friction with the Grille Lock Nut.
If Blade does not rotate freely, repeat steps 3 through 6.


