background image


SERVICE MANUAL

Mod

el: HCM071PA 

12

Issue  2013-11-21 

Rev.  

Ref1311S001V0


Chapter 5 Control and display system 

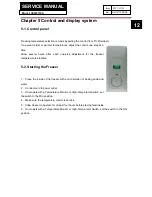
5-1. Control panel 


Freezing temperature selection is made by setting the control from 

1

to 

7

(coldest).  

If we want colder or warmer temperatures, adjust the control one step at a 

time. 

Allow several hours after each one-step adjustment for the freezer 

temperature to stabilize. 

5-2. Starting the Freezer


1.  Clean the inside of the freezer with a mild solution of baking soda and 

water  

2.  Connect cord to power outlet. 

3.  On models with a Temperature Monitor or High-Temp Alarm Switch, set 

the switch to the Min


position. 

4.  Make sure the temperature control is set at 4. 

5.  Allow freezer to operate for at least four hours before placing food inside. 

6.  On models with a Temperature Monitor or High-Temp Alarm Switch, set the switch to the 

ON


position. 


Summary of Contents for HCM071PA

Page 1: ...hnicians only and is not designed for use by the general public It dose not contain warnings and cautions to advice non technical individuals of potential dangers in attempting to service a product Product powered by electricity should by serviced or repaired only by experienced professional technicians Any attempt to service or repair the product or products dealt with in this service information...

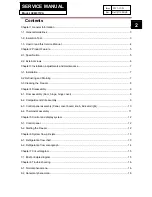
Page 2: ...ng 7 3 3 Cleaning the Freezer 8 Chapter 4 Disassembly 9 4 1 Door assembly Door hinge hinge cover 9 4 2 Compartment Grill assembly 9 4 3 Control panel assembly Panel cover board knob indicator light 10 4 4 Thermostat assembly 11 Chapter 5 Control and display system 12 5 1 Control panel 12 5 2 Starting the Freezer 12 Chapter 6 System flow principle 13 6 1 Refrigeration flow chart 13 6 2 Refrigeratio...

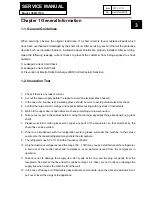
Page 3: ...ith any kinds of instruments 5 Watch if the upper door is open when we check something at a lower position 6 Take out every part in the cabinet before moving the machine especially things like panels e g glass shelf 7 Please wear intact cotton gloves when repair any parts of the evaporator so that scratches by the sharp fins can be avoided 8 If there is a breakdown with the refrigeration system pl...

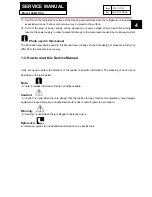
Page 4: ...nd photos used in this Manual may not base on the final design of products which may differ from the products in some way 1 3 How to read this Service Manual Icons are used to attract the attention of the reader to specific information The meaning of each icon is described in the table below Note A note provides information that is not indispensable Caution A caution is used when there is danger t...

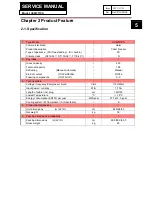
Page 5: ...98 Defrosting Manual Automatic Manual Kind of coolant R134a R600a R134a Foaming components R141b C P C P 3 Technical data Voltage frequency Compressor brand V Hz 115V 60Hz Input power currency W A 1 70A Length of cable incl plug cm 150 155 Lowest Temperature C 18 C Energy consumption EN153 per year kWh year 277 kW h year Cooling system K Compressor A Absorbtion K 4 Product net dimensions Unit dime...

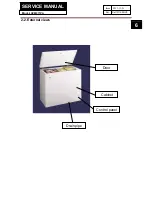
Page 6: ...SERVICE MANUAL Model HCM071PA 6 Issue 2013 11 21 Rev Ref1311S001V0 2 2 External views Door Cabinet Control panel Drain pipe ...

Page 7: ...y about twice a year To have the freezer operate most efficiently do not permit more than 1 2 13 mm of frost to accumulate on the shelves To remove frost scrape with a plastic or wood spatula or scraper Do not use an ice pick or sharp edged instrument as it may damage or scratch the freezer Do not use any electrical device in defrosting the freezer For Complete Defrosting 1 Turn the temperature co...

Page 8: ...h wax or mild liquid dishwashing detergent Dry and polish with a clean soft cloth Do not wipe the freezer with a soiled dishwashing cloth or wet towel Do not use scouring pads powdered cleaners bleach or cleaners containing bleach Inside Clean the inside of the freezer at least once a year We recommend that the freezer be unplugged before cleaning If this is not practical wring excess moisture out...

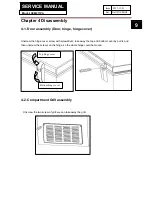
Page 9: ...r hinge hinge cover Unscrew the hinge cover screw with screwdriver take away the top and bottom cover by pull it and then unscrew the screws on the hinge so the whole hinge could be moved 4 2 Compartment Grill assembly Unscrew the two screw of grill we can take away the grill Top hinge cover Bottom hinge cover ...

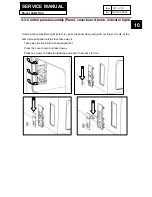
Page 10: ...ob indicator light Unscrew the compartment grill refer 4 2 push the panel claw gently with our finger or tools at the same time pull panel outside then take away it Take away the knob with a sharp edged tool Press the cover board and take it away Press two claws on indicator light side and push it from back to front ...

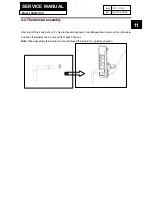
Page 11: ...01V0 4 4 Thermostat assembly First take off the knob refer 4 3 Use turnbuckle spanner or acutilingual plier unscrew the turnbuckle and then thermostat can be moved from back of panel Note When assembly thermostat we should placed thermostat in originally direction ...

Page 12: ... step adjustment for the freezer temperature to stabilize 5 2 Starting the Freezer 1 Clean the inside of the freezer with a mild solution of baking soda and water 2 Connect cord to power outlet 3 On models with a Temperature Monitor or High Temp Alarm Switch set the switch to the Min position 4 Make sure the temperature control is set at 4 5 Allow freezer to operate for at least four hours before ...

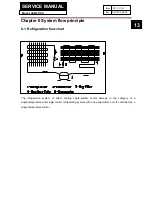
Page 13: ... 6 System flow principle 6 1 Refrigeration flow chart The refrigeration system of direct cooling single system cooler belongs to the category of a single temperature and single control refrigerating system with one evaporators and is controlled by a single temperature control ...

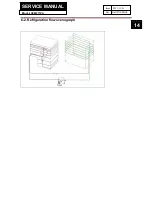
Page 14: ...SERVICE MANUAL Model HCM071PA 14 Issue 2013 11 21 Rev Ref1311S001V0 6 2 Refrigeration flow scenograph ...

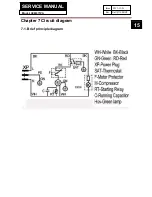
Page 15: ...SERVICE MANUAL Model HCM071PA 15 Issue 2013 11 21 Rev Ref1311S001V0 Chapter 7 Circuit diagram 7 1 Brief principle diagram ...

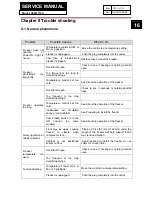
Page 16: ... door lid open Too frequent or too long door lid openings Temperature control set too cold See About the operation of the freezer Inadequate air circulation space around cabinet See Preparing to install the freezer Fast Freeze switch is in the ON position on some models See About the operation of the freezer Noisy operation or cabinet vibrates Floor may be weak causing freezer to vibrate when comp...

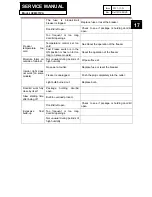
Page 17: ...els About the operation of the freezer Moisture forms on outside of cabinet Not unusual during periods of high humidity Wipe surface dr Interior light does not work on some models No power at outlet Replace fuse or reset the breaker Freezer is unplugged Push the plug completely into the outlet Light bulb burned out Replace bulb Door lid wont fully close by itself Package holding door lid open Slow...

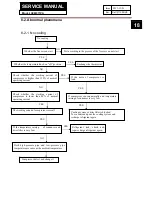
Page 18: ...king current of compressor is higher than 120 of normal operating current If the noise of compressor is loud Check whether the working current of compressor is lower than 80 of normal operating current The working sound of compressor is small If compressor can run naturally and temperature raising of condenser is very low If the temperature raising of condenser and drier filter is very low Both hi...

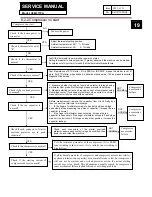
Page 19: ...apacitor from circuit firstly and then connect two terminals for discharge 1 IF the finger of multimeter swings to 0 quickly and then swings back slowly when measuring two poles of capacitor it means the run capacitor is normal 2 If the finger of multimeter does not swing it means the run capacitor is open circuit If the finger of mlimeter swings to 0 and stops means it is short circuit if it stop...

Page 20: ...SERVICE MANUAL Model HCM071PA 20 Issue 2013 11 21 Rev Ref1311S001V0 ...

Page 21: ...Sincere forever Haier Group Haier Industrial Park No 1 Haier Road 266101 Qingdao China http www haier com ...

Reviews: