background image

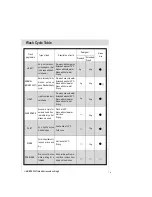
Wash Cycle Table

( ) AS/NZS 2007 test with rinse aid setting 

5

W

ash

programme

Description of cycle

Pre-wash with hot water.
Extended wash at 70°C.
Rinses with cold water.
Rinse with hot water.
Drying.

Pre-wash use cold water.
Extended wash at 50°C.
Rinse with cold water.
Rinse with hot water.
Drying.

Hot rinse at 65°C.

Drying.

Short wash at 40°C.

Cold rinse.

Short cold wash to pre-

vent food residue from

drying on the dishes.

Pre-wash use cold water.
Extended wash at 50°C.
Rinse with cold water.
Rinse with hot water.
Drying.

Wash at 45°C.
Rinse with cold water.
Hot rinse.
Drying.

HEAVY

NORMAL

(AS/NZS 2007)

LIGHT

RINSE

GLASSWARE

PRE-RINSE

FAST

Very dirty dishes,

pots and pans. (Not

to be used with deli-

cate items.)

Normal load of dirty

dishes, pots and

pans, Standard daily

cycle.

Lightly soiled deli-

cate items.

Economic cycle for

delicate items. Run

immediately after

dishes are used.

Very lightly solied

mixed dishes.

For dishes that only

require a rinse and

dry.

Pre-rinse of dishes

while waiting for a

full load.

Types of load

Detergent

Extended

Wash

Prewash

5g

5g

5g

25g

25g

25g

25g

15g

15g

Rinse

Aid

( )

8

Summary of Contents for HDW100SCT

Page 1: ...Dishwasher HDW100WCT HDW100SCT Instructions for Use 0120505591 ...

Page 2: ... Interior Detergent and Rinse Aid Loading the Dishwasher Turning on the Appliance Energy Saving Tips How to Keep Your Dishwasher in Shape Wash Cycle Table Cleaning and Special Maintenance Troubleshooting Installation Technical data Diagram 2 3 3 4 5 6 7 7 8 9 9 12 13 14 15 15 ...

Page 3: ...ould be supervised to ensure that they do not play with the appliance Dishwasher detergents are strongly alkaline They can be extremely dangerous if swallowed Avoid con tact with the skin and eyes and keep children away from the dishwasher when the door is open Check that the detergent receptacle is empty after completion of the wash cycle Do not use extension cords or multiple sockets The plug mu...

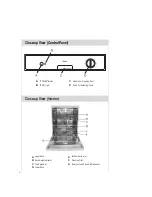
Page 4: ...D Light POWER Button Knob For Selecting Cycle Handle For Opening Door C D Close up View Interior A B C D Upper Rack Rack Height Adjustor Top Spray Arm Lower Rack E F G Washing Filter Bottom Spray Arm Detergent and Rinse Aid Dispenser 3 ...

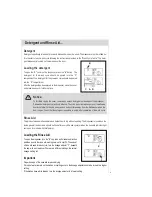
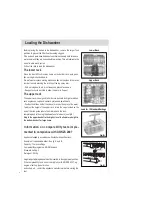
Page 5: ...placed in the dispenser close the cover and press down until it clicks in place B C A D Important Proper dosage of the rinse aid improves drying If drops of water remain on the dishes or spotting occurs the dosage adjuster should be turned to a higher setting If the dishes have white streaks turn the dosage adjuster to a lower setting Loading the Rinse Aid To open the dispenser turn the E cap in a...

Page 6: ...glasses cups and saucers plates and small bowls Position the dishes so that they do not move by the spray of the water To adjust the height of the upper rack rotate the caps located on the end of the rack guide rails to the side remove the rack completely and refit using the alternate set of wheels see fig B Adjust the upper basket to the higher level to allow more height in the bottom basket for ...

Page 7: ...END light will turn off the wash cycle will begin When the buzzer constantly beeps six times the END light will turn on and the cycle has finished Turn off the appliance using the POWER button turn off the water supply and open the door of the dishwasher Wait a few minutes before unloading the dishwasher to avoid handling the dishes and utensils while they are still hot and more susceptible to bre...

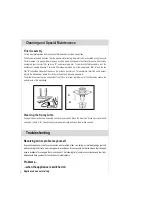
Page 8: ...Appliance If the appliance must be moved try to keep it in the vertical position If absolutely necessary it can be laid on its back Seals One of the reasons that odours form in the dishwasher is that food get trapped in the seals Periodic clean ing with a sponge will prevent this DO NOT LAY THE MACHINE ON ITS RIGHT HAND SIDE Solvents or Abrasive Cleaning Products Do not use solvents or abrasive cl...

Page 9: ...xtended wash at 50 C Rinse with cold water Rinse with hot water Drying Wash at 45 C Rinse with cold water Hot rinse Drying HEAVY NORMAL AS NZS 2007 LIGHT RINSE GLASSWARE PRE RINSE FAST Very dirty dishes pots and pans Not to be used with deli cate items Normal load of dirty dishes pots and pans Standard daily cycle Lightly soiled deli cate items Economic cycle for delicate items Run immediately aft...

Page 10: ...e it correctly in its seat and pressing downward The dishwasher must not be used without the filters Improper replacement of the filters may reduce the performance of the appliance Cleaning the Spray Arms Food particles may become encrusted on the spray arms and block the hole see Close up view interior on page 3 letters C E Check the spray arms periodically and clean them when needed A B Troubles...

Page 11: ...ble equipment damage as well as danger to the user with the appliance itself the water is turned on and the hose is connected properly the water supply to the house is on and has sufficient pressure the water supply hose is crimped or bent the filter for the water supply hose is clogged the drain hose is too low When the alarm sounds in a series of 2 beeps pause 2 beeps pause the drain hose is cri...

Page 12: ...rs are blocked The programme is still running Wait for the programme to end during washing Unusual amount of foam is creased Normal washing up liquid has been poured into the rinse aid container Appliance stops suddenly while washing is taking place Cut off electricity supply to appliance Water supply has been interrupted Remove any spilled rinse aid with a cloth as it could otherwise lead to exce...

Page 13: ...e aid was set too low Although water is quite hard no salt has been put in appliance Water softener was set too low If you used a phosphate free detergent try a detergent containing phosphates and compare results White stains are left on crockery glasses have a milky appearance Selected programme did not include drying function Amount of rinse aid was set too low Items were removed from dishwasher...

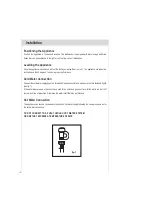
Page 14: ...performance Cold Water Connection Connect the cold water supply hose to a threaded 3 4 bsp connector and make sure that it is fastened tightly see fig 1 If the water pipes are new or have not been used for an extended period of time let the water run first till it is clear and free of impurities Otherwise the water inlet filter may get blocked Hot Water Connection The appliance can also be connect...

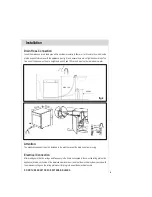
Page 15: ...l system can cope with the maximum voltage on the rating plate insert thr plug into an earthed electrical socket Drain Hose Connection Insert the drain hose into a drain pipe with a minimum diameter of 40mm or let it run into the sink Use the plastic support that comes with the appliance see fig 2 and ensure there are no tight bends or kinks The free end of the hose must be at a height between 40 ...

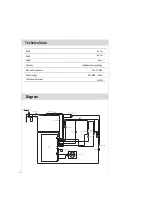
Page 16: ...Technical data Diagram Width 60 cm Depth 60 cm Height 85 cm Capacity 12 standard place settings Mains water pressure 0 03 1 0 MPa Power voltage 220 240V 50Hz 1950W Total absorber power 15 ...

Reviews: