


NO. Brand Code
AUDIO
Accuphase
Acurus
ADC
Adcom
Admiral
ADS
Aiwa
Akai
Alco
Altec Lansing
Amphion Media Works
AMW
Anam
Angstrom
Apex
Arcam
AudioSource
Audiotronic
Audiovox
B & K
Bang & Olufsen
Bel Canto Design
Biamp
BOSE
Boston Acoustics
California Audio Labs
CambridgeSoundWorks
Capetronic
Carver
Cary Audio Design
Casio
Chase Technologies
Clarinette
Classe
Classic
Coby
Creative
Curtis
Curtis Mathes
Dell
Denon
Digital Audio Control
Dual
Durabrand
Eclipse
Elan
Emerson
Fisher
Fonmix
Fosgate
GE
Glory Horse
Go Video
GPX
Gradiente
Harman/Kardon
Hitachi
iLive
Inkel
Insignia
Integra
iSymphony
Jamo
JBL
Jensen
JVC
Kenwood
KLH
Knoll Systems
Koss
Krell
Left Coast
Lenoxx
LG
Linn
Lloyd's
Logitech
Luxman
292
266
319
208 219
308
309
118 126 168 318
310
332
301
325
325
321
267
195
294 311
268
322
190 214 220 332
213 236
336
269
270
071 088 285
305
271
241
319
318 322
272
329
273
329
297
221
147 331
274 302
207
283
312
053 054 055 056 057 133 134 156 157 158 160 161
163 164 165 171 172 176 180 185 187 188 189 206
275
258
299
218
295
229
326
303
276
048 282
331
306
196
235 313
177 224 286 318
326
244
314
233 240
317
245
256
186 193
257
032 033 034 035 036 037 104 121 150 182 211 284
331
038 039 040 041 042 073 082 089 095 115 122 130
135 323
332
277
237 324
225
386
299 333
175
318
329
278
279 288
1
2
3
4
5
6
7
8
9
10
11
12
13
14
15
16
17
18
19
20
21
22
23
24
25
26
27
28
29
30
31
32
33
34
35
36
37
38
39
40
41
42
43
44
45
46
47
48
49
50
51
52
53
54
55
56
57
58
59
60
61
62
63
64
65
66
67
68
69
70
71
72
73
74
75
76
77
78
NO. Brand Code
79
80
81
82
83
84
85
86
87
88
89
90
91
92
93
94
95
96
97
98
99
100
101
102
103
104
105
106
107
108
109
110
111
112
113
114
115
116
117
118
119
120
121
122
123
124
125
126
127
128
129
130
131
132
133
134
135
136
137
138
Magnavox
Marantz
Mark Levinson
McIntosh
MCS
Memorex
Midiland
Mitsubishi
Modulaire
NAD
Nakamichi
NEC
Nikko
Onkyo
Optimus
Oritron
Panasonic
Parasound
Penney
Philco
Philips
Pioneer
Polaroid
Polk Audio
Prima
Proscan
Qisheng
Quasar
RadioShack
RCA
Realistic
Regent
Rio
Rotel
Samsung
Sansui
Sanyo
Sharp
Sharper Image
Sherwood
Shure
Sonic Blue
Sony
Soundesign
Soundmatters
Soundstream
Stereophonics
Sunfire
Teac
Technics
Thorens
Toshiba
Tview
Venturer
Victor
Wards
Xantech
Yamaha
Yorx
Zenith
075 191 318 319 322 329
215 228 260 286 291 318 322 328
298
227
328
315
280
184 194
329
261 335
291 334
290
281
043 044 045 046 047 080 018 087 094 097 119 124 127 146 166
167 178 181 203 217
283 293 319 320 321 330
324
019 020 201 022 023 024 069 076 077 091 098 107 113 144 151
209 328
230
329
332
183 210 286 294 318 322
025 026 027 028 029 030 031 062 068 072 090 100 101 105 123
132 148 149 162 212 246 247 248 249 250 251 252 253 254 283
287 319 320
222 226
216 286 318
307
048
304
328
331
048 049 050 051 151 137 234 283 319 320 321 332
293 329
333
327
231
084 103 138 143
291 318
238 326
205 242 296
331
145 243
290
327
000 001 002 003 004 005 006 007 058 058 059 060 061 063 064
065 066 067 070 074 079 085 093 108 109 110 111 112 117 125
128 129 131 140 170 262 263 264 265
282 289 330
232
316
320
323
223 321 332
052 086 114 116 141 328
322
152
259
239 332
284
282 287 289 318
300
008 009 010 011 012 013 014 015 016 017 018 078 083 092 096
099 102 106 120 139 142 153 154 155 169 173 174 179 192 197
198 199 200 201 202 204 255 317
329
136 159
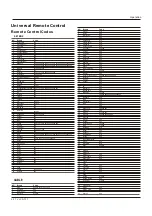
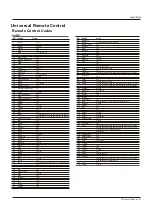
Operation
Remote Control Codes
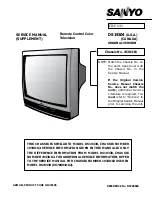
Owner s Manual 41
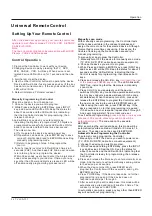
Universal Remote Control
Summary of Contents for HL42T
Page 46: ...R ...