10
b
a
a
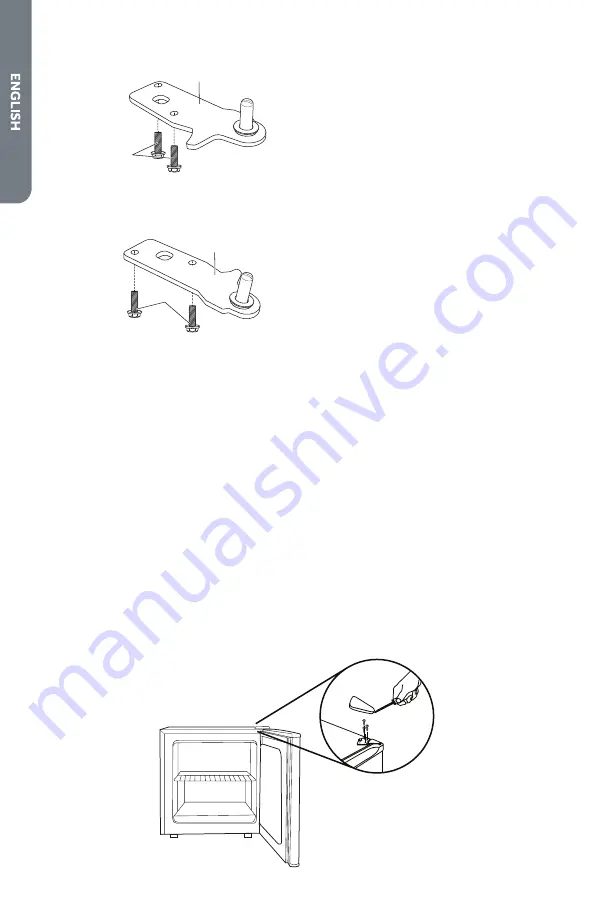
Bottom Hinge Screws
b
Bottom Hinge
8. Remove the bottom hinge bracket, turn the bracket upside down, and insert the
hinge pin through the top of the bracket.
b
a
a
Bottom Hinge Screws
b
Bottom Hinge
9. Align the bottom hinge bracket with the hinge holes on the opposite side of the
cabinet bottom, and fasten with the screws removed in Step 7.
10. Align the hole in the bottom edge of the door with the pin in the bottom hinge,
and then lower the door onto the pin. Push down gently until the door is firmly
seated on the bottom hinge.
11. Re-install both leveling legs.
12. Align the top hinge bracket with the hinge holes, insert screws and partially
tighten. Make sure that door and cabinet are properly aligned and then tighten
the top hinge screws completely.
13. Replace the top hinge cover by aligning the back of the cover with the back of
the hinge. Press down firmly on the front of the cover until it snaps in place.
STEP 3 - ALIGN DOOR
(IF NECESSARY)
1. Using a flat-blade screwdriver, gently insert the blade under the top hinge cover
and pry up to remove.
2. Using a Phillips-head screwdriver, loosen the three top hinge screws.
Summary of Contents for HRC2731AC
Page 2: ......


