English
6
Door Alignment
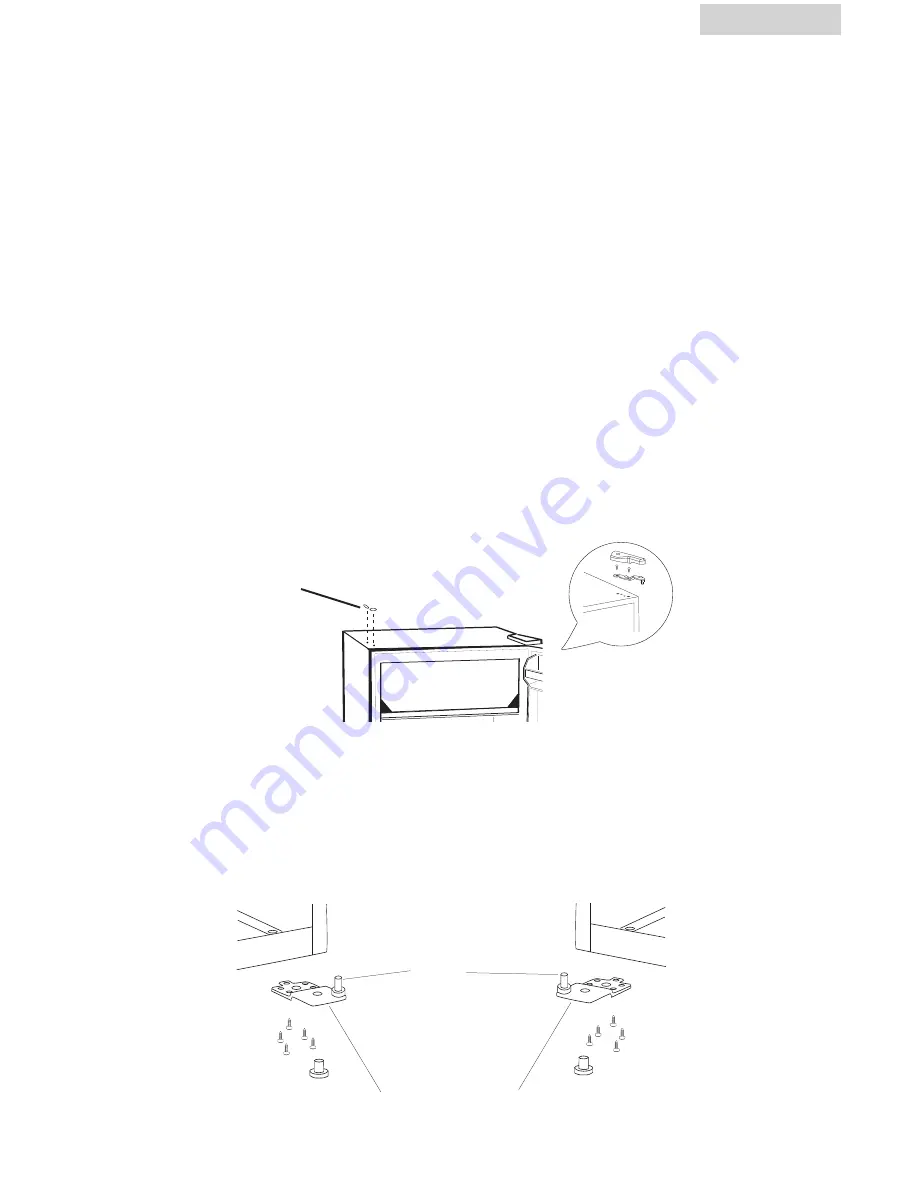
(all models) (see fig. #1)
1. Remove the top hinge cover.
2. Loosen the top hinge screws using a phillips head screwdriver.
3. Adjust the door or put a spacer in between and then tighten the screws.
4. Replace the top hinge cover.
Reversing the Door Hinge
(All models)
1. Removing the top hinge cover screw and then remove the top hinge cover. (see fig. #1)
2. Using a Philips Head Scewdriver, loosen and remove the screws holding the top hinge in place.
(see fig. #1)
3. Remove the top hinge and carefully lift off the door.
4. Carefully remove the top screw hole plug from the opposite side and insert the plug in the screw
hole openings of the just removed screws. (see fig. #1)
5. Remove the door pin from the bracket of the lower hinge by turning counter clockwise. Move the
pin to the opposite hole and tighten. (see fig. #2)
6. Tip the refrigerator back against a wall so that it may not fall over.
7. Loosen the screws holding the lower hinge bracket and remove the hinge.
8. Align the holes in the lower hinge bracket to the corresponding holes in the opposite side of the
cabinet. Insert and tighten the screws.
9. Align the bottom hole on the left side of the door with the pin of the lower hinge and slide into
place.
10. Align the pin of the top hinge with top hole on the left side of the door and push into place.
Replace the screws in the upper hinge bracket but do not tighten all the way. (see fig. #1)
11. Make sure the door closes easily but forms a tight seals. Adjust the door as needed. (See Door
Alignment Section) Once you are satisfied with the door alignment, completely tighten the upper
door hinge screws.
12. Replace the hinge cover. (see fig. #1)
fig. # 1
screw hole plugs
door pin
lower hinge bracket
fig. # 2
fig. # 3


