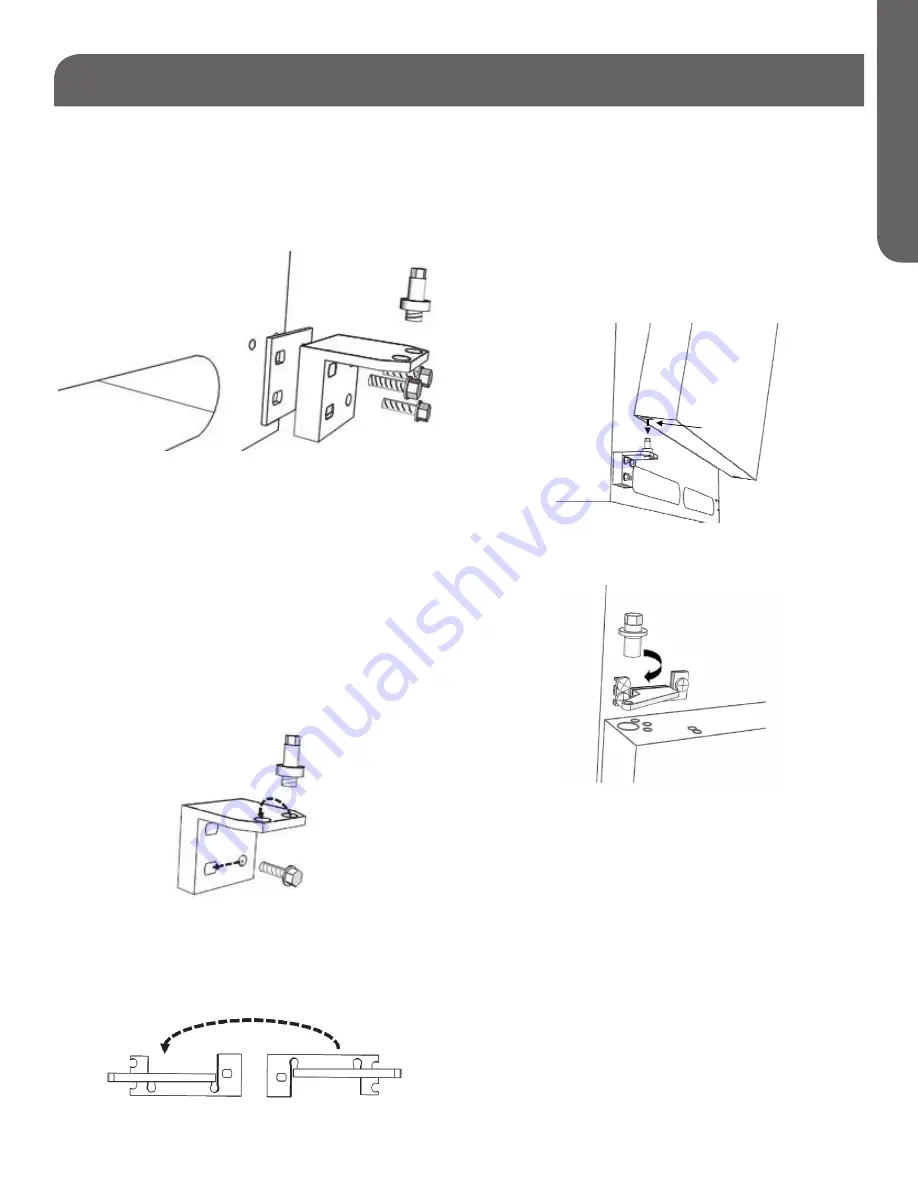
10. Remove the bottom hinge by unscrewing the
bolts mounting it to the cabinet.
NOTE: It is easier to remove and re-install the
bottom hinge pin while the hinge is itself is
still attached to the cabinet.
RE-INSTALLING THE HINGES AND
DOORS
1. Unscrew the bottom hinge pin and re-locate
it to the opposite hole on the top of the hinge.
(Fig. 13)
2. Attach the bottom hinge spacer and bottom
hinge to the cabinet using the bolts originally
provided. Be sure to use the top two mounting
holes on the hinge and the bottom hole on the
same side that the hinge is being moved to.
3. Flip the center hinge according to the diagram
below and attach the hinge spacer and hinge to
the cabinet. (Fig. 14) Do not install the center
hinge pin yet.
4. Remove the top thimble cover on the hinge side
of the refrigerator door and relocate it to the
opposite thimble hole. Use both hands to mount
the door on bottom hinge pin, making sure the
pin goes fully into the bottom thimble hole.
When the top thimble hole is aligned with the
hole in the center hinge, place the hinge pin into
the hole, threaded end down, and tighten.
Do Not Over-Tighten
5. Remove the top thimble plug on the hinge
side of the freezer door and relocate it to the
opposite thimble hole. Place the door onto the
center hinge pin, being sure that the pin goes
fully into the bottom thimble hole. Tape may be
used as it was during the removal steps to hold
the door in place during the next step.
6. Place the top hinge pin into the thimble hole on
the same side as the lower hinges.
PAGE 11 • SET UP & USE
ENGLISH
REVERSING THE DOOR CONT.
Fig. 12
Fig. 13
Fig. 14
Thimble Hole
Fig. 15
Fig. 16
Summary of Contents for HT18TS45SW
Page 2: ......


