First use
After normal power-on, please open the door of recorder and turn battery switch of recorder to
the “I” end to switch on the back battery of recorder;
The recorder itself is equipped with a piece of record paper. Please inspect the status of this
paper. If it needs to be changed, please refer to the description in Page 22;
In order to protect recorder pen, the recorder pen has a plastic protective cap. Please remove
the plastic protective cap before use;
According to the requirements of machine and yourself, adjust the temperature measurement tap
position and record time period of temperature recorder, in which the tap position represents the
temperature measurement scope of the temperature, record time period represents the time used
for recording a piece of paper by temperature recorder. After adjustment, the recorder will record
the current tap position setting and record period automatically and re-adjustment is not required.
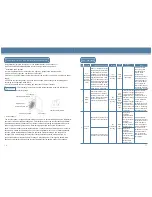
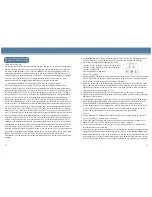
Head cap and lock latch – protect the temperature recorder. Uplift the lock latch slightly and pull
the head cap to open it. Press the lock latch after closing the door to fasten the head cap;
Film button – be used for basic operation like setting;
1# button: Choose temperature range or left adjustment;
2# button: Choose recording period or right adjustment;
3# button: Setting button;
A button: Reading of U-disk data
B button: Time setting;
Operating indicator light-different colors represent different temperature measurement tap position.
When in regular use, the operating indicator light should be green; when the operating indicator
light is flashing, it means the machine is recording temperature;
Scriber-the tip of scriber records data through the tight connection with record paper. The metal
bar of scriber has some elasticity to guarantee clear scribing. When leaving factory, the scriber is
equipped with protective sheath. If you need to use it, it is recommended to retain the sheath to
protect the scriber during long time of non-use;
USB interface-the matched storage card can be plugged into it to set time and export data;
Gland nut and record paper-screw the gland nut clockwise and the record paper can be changed
after gland nut is unscrewed;
Charge indicator light-charge indicator light being on constantly represents it is in quick charge
status; charge indicator light flashing represents quick charge has been completed and it is in
trickle charge status; and charge indicator light being off represents charge is completed.
Key-this switch is the switch for charge battery. When in regular use, this switch must be turned
on. Under the condition of full charge of battery, after the external power supply is cut off, the
recorder can record temperature for 24 hours continuously by emergency battery.
USB function module (optional)
USB interface function
The computer panel has USB output function which can make use of U-disk to export temperature
and other test data. Plug in U-disk, the machine begins to automatic identification and import data
into U-disk. During data import, press “Conform calibration” key, the flashing display of “USB” on
display panel represents the data export is being on and not yet complete. After flashing for 5s, it
exits and displays the actual temperature in refrigerator. If the display panel displays ALL in flashing
mode, it means data export has been completed, and the U-disk can be removed from USB
interface at this time and plugged in the USB interface of computer to read data.
Time setting of record data of U-disk interface (the present time setting of system):
Press and hold the “Cal” key for 10s then “1P” is displayed in the temperature display area of
refrigerator stably, press the “Cal” key then the year is displayed in the temperature display area in
flashing mode (the factory value is 10), press the “Sensor” key or “Cal cancel” key to adjust the year
in recycling display from 10 to 99. For instance, set the year as 2013, select 13, press “Cal” key to
save and confirm. And next, “2P” is displayed in the temperature display area of refrigerator stably,
press the “Cal” key then the month is displayed in the temperature display area of refrigerator in
flashing mode (the factory value is 01), press the “Sensor” key or “Cal cancel” key to adjust the
month in recycling display from 01 to 12, select the present month, and press “Cal” key to save and
confirm. And next, “3P” is displayed in the temperature display area of refrigerator stably, press the
“Cal” key then the date is displayed in the temperature display area of refrigerator in flashing mode
(the factory value is 01), press the “Sensor” key or “Cal cancel” key to adjust the date in recycling
display from 01 to 31, select the local present date, and press “Cal” key to save and confirm. And
next, “4P” is displayed in the temperature display area of refrigerator stably, press the “Cal” key then
the hour is displayed in the temperature display area of refrigerator in flashing mode (the factory
value is 01), press the “Sensor” key or “Cal cancel” key to adjust the hour in recycling display from
00 to 23, select the local present hour, and press “Cal” key to save and confirm And next, “5P” is
displayed in the temperature display area of refrigerator stably, press the “Cal” key then the minute
is displayed in the temperature display area of refrigerator in flashing mode (the factory value is 01),
press the “Sensor” key or “Cal cancel” key to adjust the minute in recycling display from 00 to 59,
select the local present minute, and press “Cal” key to save and confirm. Then “5P” will be displayed
in the temperature display area of refrigerator again and 1P-5P can be reset. After completing these
settings, press and hold “Cal” key for 5s or no operation within 10s to save data and exit
automatically. Then the temperature in refrigerator will be displayed in the temperature display area
normally.
21
24
Summary of Contents for HXC-158B
Page 2: ......


