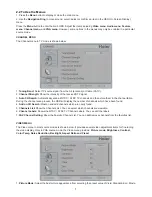
8
or Personal.
2.
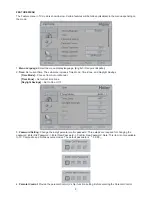
Brightness:
Video brightness adjustment, the tuning range is 0 ~ 100.
3.
Contrast:
Video contrast adjustment, the tuning range is 0 ~ 100.
4.
Sharpness:
Video sharpness adjustment, the tuning range is 0 ~ 100.
5.
Color:
Video color chroma adjustment, the tuning range is 0 ~ 100.
6.
Tint:
Video tint adjustment, the tuning range is R50 ~ G50.
7.
Color Temp:
Three color temperature modes. (Normal / Warm / Cool)
8.
Noise Reduction:
Gives four NR effect degrees, such as: Low, Mid, High and Off.
9.
Adaptive Contrast:
Choose On or Off to adjust the gamma after analyzing the input signal automatically.
10.
Backlight:
Backlight strength adjustment, the tuning range is 0 ~ 30.
11.
Aspect Ratio:
Choose the display aspect: Normal, Zoom1, Wide, Zoom2, or HDMI PC mode (Only for HDMI
Video Source).
12.
Preset:
Restore the default video settings.
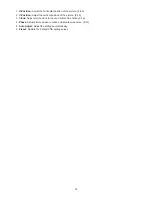
AUDIO MENU
The Audio menu in TV mode is shown below.The audio language setting is only available with the NTSC (analog)
TV source. The option is disabled in other source modes.
1.
Sound Mode:
Choose the audio mode: Personal, Music, or Speech.
2.
Bass:
Bass tone adjustment, the tuning range is 0 ~ 63.
3.
Treble:
Treble tone adjustment, the tuning range is 0 ~ 63.
4.
Balance:
Audio balance adjustment, the tuning range is L50 ~ R50.
5.
Audio Source:
Select the audio source from Mono, Stereo, or SAP. (This function works in ATV only.)
6.
Audio Language:
Change the audio language setting on ATSC TV programs. The number of the supported
audio languages depends on the ATSC TV programs. (English / Français / Español)
7.
SPDIF:
Digital audio output format. Select from RAW and PCM. (This function works in DTV only.)
8.
Speaker:
Choose to turn on / off the TV's intergrated speakers. The digital audio output signals and earphone
output signals will not be turned off even though the TV speaker is off. The default setting is On.
9.
AVL:
Choose On or Off to adjust volume to be consistent across programs and channels automatically.
10.
Preset:
Restore the default audio settings.
Summary of Contents for L19
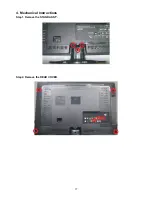
Page 17: ...17 4 Mechanical Instructions Step1 Remove the STAND ASS Y Step2 Remove the REAR COVER ...
Page 19: ...19 Step 5 Separate the MAIN FRAME and PANEL Step 6 Remove the KEY BOARD IR BOARD and SPEAKERS ...
Page 27: ...27 6 PCB Layout 6 1 Main Board 715G3759M02000005K ...
Page 28: ...28 ...
Page 29: ...29 6 2 Power Board 715G3754P01W30003H ...
Page 30: ...30 ...
Page 31: ...31 ...
Page 32: ...32 6 3 Key Board 715G3303 2 6 4 IR Board 715G3963R01000004S ...


