background image

Others functions 

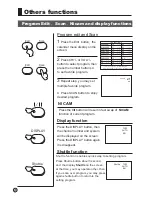
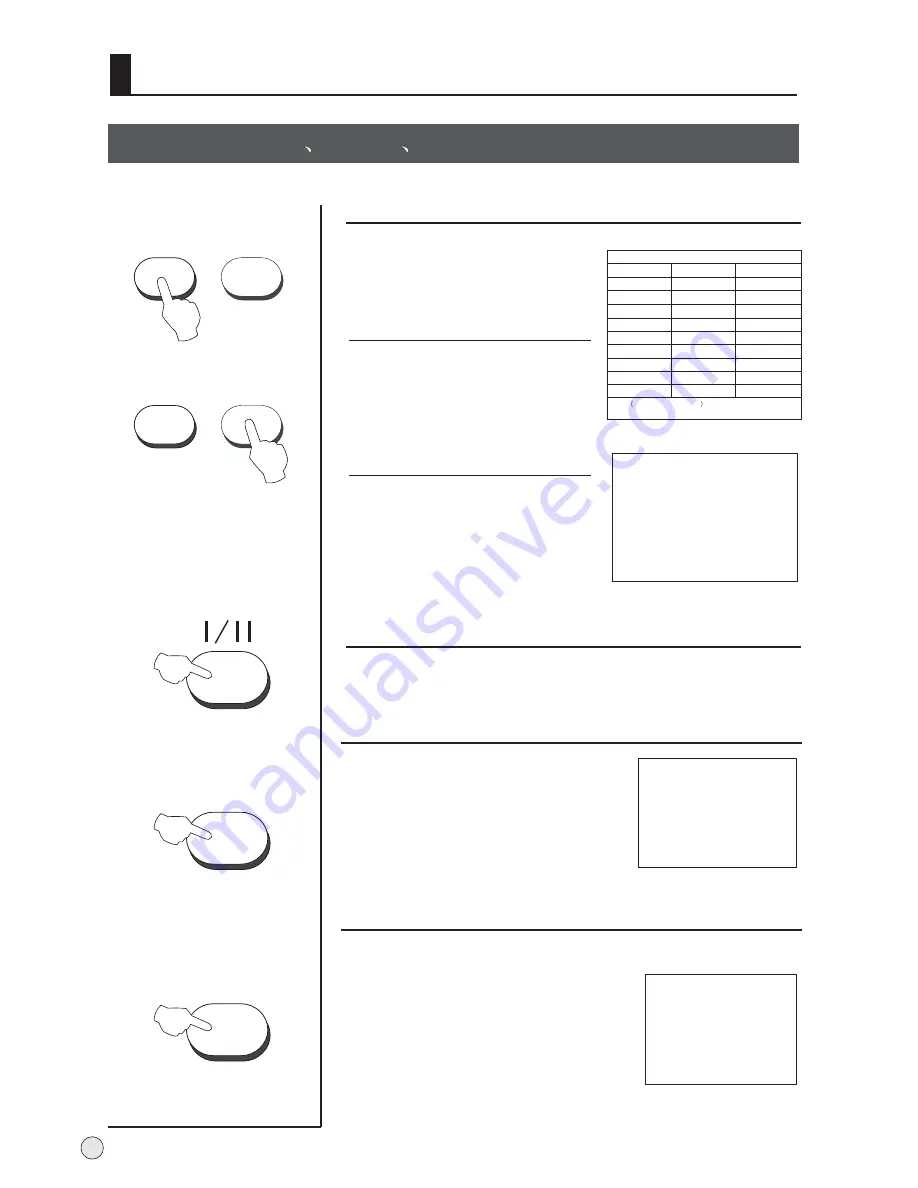
Program Edit

 Scan

Nicam and display functions

Program edit and Scan

Display function

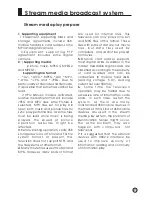
Press the DISPLAY button, then

the channel number and system 

will be displayed on the screen.

Press again,

it is disappear.

the DISPLAY button 

 TV03
AUTO
 BG

1

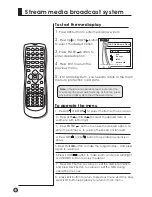
 Press the Edit  button, the

,

calender menu display on the 
screen.

2

 Press CH+/- or VOL+/- 

button to select program, then 
press the number buttons 4 
to set favorite program.

3

 Repeat step ,you may set 

multiple favorite program.

4  Press SCAN button to enjoy 
desired program.

DISPLAY

Program Table

00 @0497
01 @0622
02 @0832
03 @1442
04 @1842
05 @2112
06 @2322
07

-----

08

-----

09

-----

10

-----

11

-----

12

-----

13

-----

14

-----

15

-----

16

-----

17

-----

18

-----

19

-----

20

-----

21

-----

22

-----

23

-----

24

-----

25

-----

26

-----

27

-----

28

-----

29

-----

Vol+/Vol-  Ch+/Ch- to Select Program

1=Del 2=Change  3=Rename 4=Favorite 5=Skip

Edit

Scan

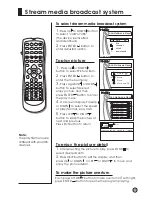
Press the 

I/II

 button will result in fast swap of

NICAM

function of current program. 

NICAM

Edit

Scan

Favorite      TV04

AUTO

D/K

28

Shuttle

 TV03
AUTO
 BG

Shuttle

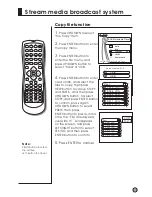
Shuttle function

Press Shuttle button about 3 second,

and  the display 

Shuttle

on the screen,

at the time, you may operate other, then

if you scan over program, you may press

again shuttle button to return to the 

setting program.

Shuttle function enables quick swap to setting program.

Summary of Contents for L40A9-AD

Page 1: ...MODEL L40A9 AD TFT LCD TELEVISION OWNER S MANUAL Please READ this manual carefully before operating your TV and retain it for future reference ...

Page 2: ... of the best built best backed products available today We ll do everything in our power to keep you happy with your purchase for many years to come As a member of the Haier family you re entitled to protection by one of the most comprehensive warranties and outstanding service networks in the industry thanks for investing in a Haier product ...

Page 3: ... Sound control functions 21 Time functions 23 Multiple aspect ratio and language 25 Multiple OSD position 26 Calendar search and time skip 27 OTHERS Others functions 28 PC setting 29 Stream media broadcast system 31 Specifications and functions 41 42 Troubleshooting 43 Maintenance Accessories Color SYS Sound SYS Edit Scan Shuttle Time Skip UP Left Prew Forward USB DOWN Right Next REV EXIT Pause En...

Page 4: ...on receiver in an area with heavy moisture Attention should be paid to avoid accidental scratches or impacts onto the LCD screen WARNING RISK OF ELECTRIC SHOCK DO NOT OPEN Caution Please read this manual carefully before using your television and keep this manual in a good place for future reference To achieve the best performance of your television read this User s Manual carefully and properly s...

Page 5: ...tric cord away from heat sources to avoid electric shocks or fire hazards Do not connect excessive sockets in parallel or share the same socket by multiple plugs to avoid fire hazards The product must be placed on a solid and stable surface to avoid collapse Unauthorized disassembly of the television is prohibited to avoid electric shocks or fire hazards Contact authorized after sales service if t...

Page 6: ......

Page 7: ...Volume increase for enhancing the volume or adjusting the menu 3 TV AVbutton 4 Menu button 5 Power and indicator for turning on or off the power supply 6 Remote receiving window 7 Card jack This is a simplified representation of front panel Here shown may be somewhat different from your TV Buttons and interface location 4 CH VOL TV AV MENU POWER ...

Page 8: ...Y L AUDIO R ANT IN WOOFER L AUDIO R PC L AUDIO IN R VIDEO IN DVI RS 232 VIDEO OUT S VIDEO AUDIO OUT SPEAKER L R L R Buttons and interface location Rear panel Control EXT Subwoofer Subwoofer audio output terminal Audio input for linking DVI PC or other appliance audio frequency output terminals Video Audio output terminal Connect ordinary video audio or other appliance audio input terminals PC VIDE...

Page 9: ...tacle between the remote controller and television set As strong light may interfere the signals change your position to operate the remote controller if the television cannot be turned on or off as you expect Keep the remote controller away from heat source or humid area to ensure effective performance of the remote controller Make sure that two AA alkaline batteries are loaded The batteries must...

Page 10: ...UP DOWN Selects available channels found with Auto program Color SYS Sound SYS Edit Scan Shuttle Time Skip UP Left Prev USB DOWN Right Next REV EXIT Pause Enter ZOOM HELP PIP Swap Zoom Move Sleep Calendar Display of year month date CHANNEL select is not available OK button Information display Display of current channel signals program and systems Picture mode option standard Soft Bright Personal S...

Page 11: ...emote controller window The effective receiving scope for the signal is 8 meters to the front of the remote controller windows and 45 to the left or right side and 20 above or below the control windows Use of remote controller 1 To ensure a normal operation the remote controller should not be dropped or damaged in any way It should also be kept dry and away from all heat sources 2 Battery replacem...

Page 12: ... cable Plug additional purchase Antenna input 75 standard coaxial type Antenna or Cable Service without a Cable Box Connections For optimum picture quality adjust antenna direction if needed To improve picture quality in a poor signal area purchase and install a signal amplifier If the antenna needs to be split for two Tv s install a 2 WaySignal Splitter in the connections If the antenna is not in...

Page 13: ...ual for operating instructions External Equipment Connections COMPONENT Pr Cr Pb Cb Y L AUDIO R ANT IN L AUDIO R PC L AUDIO IN R VIDEO IN VIDEO OUT S VIDEO AUDIO OUT SPEAKER L R L R DVD or DTV setup To watch digitally broadcast programs purchase and connect a digital set top box How to connect Use the TV s COMPONENT Y Pb Cb Pr Cr INPUT jacks RGB or DVI port for video connections depending on your ...

Page 14: ... required How to use 1 Turn on the PC and the TV 2 Turn on the display by pressing the POWER button on the TV s remote control 3 Use PC DVI on the remote control to select PC or DVI source 4 Check the image on your TV There may be noise associated with the resolution vertical pattern contrast or brightness in PC mode If noise is present change the PC mode to another resolution change the refresh r...

Page 15: ... and insert the connecting cable into the terminal slot Release the speaker terminal and ensure that the white connecting cable is inserted in the terminal slot marked red and black connecting cable is inserted in the black terminal slot and that anode and cathode poles are correctly connected nnectent Screw hole Loudhailer Annectent bracket AUDIO OUT SPEAKER L R L R Connect Woofer Woofer 1 Take t...

Page 16: ...ized AC cord does not fit into a non polarized AC outlet do not attempt to file or cut the blade It is the user s responsibility to have an electrician replace the obsolete outlet If you cause a static discharge when touching the unit and the unit fails to function simply unplug the unit from the AC outlet and plug it back in The unit should return to normal operation Polarized AC Cord Plug Polari...

Page 17: ...changeto standing by status please press down POWER button on the remote controller 4 If you want to fully switch off the power supply for the TV set please press down the power switch button on theTV set Auto switch off function If an empty channel is selected or the TV programs are ended for the day the power will be switched off 5 minutes later automatically If the OFF TIME is setting it will b...

Page 18: ...ote or the front of the TV set to adjust the volume level The range is 0 100 When the volume buttons are pressed the volume level is displayed automatically on the TV screen 3 Using Prog NO Function press the MENU button and VOL button till picture menu shown on the right display on the screen Press the VOL button to select a channel number in number increasing direction Press the VOL button to se...

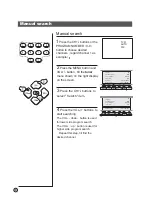
Page 19: ...o select the correct color system In general you can set it as AUTO picture sound tuner function signal timer picture sound tuner function signal timer 26 D K 00 527 27 MHz AUTO picture sound tuner function signal timer Prog No Sound System Color System Fine Tune Search Auto Search Vol Adjust Prog No Sound System Color System Fine Tune Search Auto Search Vol Adjust Watching TV Program continued Wa...

Page 20: ...uner menu shown on the right display on the screen Note the tuner menu will be in normal TV mode only operated 2 Press the CH buttons to select Auto Search item 3 Press the VOL button to ensure automatic search function work After the s arch has finished the Program Table will display on the screen e All channels now playing program will be automatically preset in order Searching Channel 26 D K 00...

Page 21: ...D K 4 Press the VOL buttons to start searching The VOL down button is used for lower side program search The VOL up button is used for higher side program search Repeat this step till find the desired channel 01 D K 00 527 27 MHz AUTO Prog No Sound System Color System Fine Tune Search Auto Search Vol Adjust picture sound tuner function signal timer 01 D K 00 527 27 MHz AUTO Prog No Sound System Co...

Page 22: ... menu shown on the right display on the screen 3 buttons to select Fine Tune item Press the CH 4 Press the VOL buttons all through to carry out fine tune till the best picture and sound are obtained then loosen the button 08 D K 00 527 27 MHz AUTO Prog No Sound System Color System Fine Tune Search Auto Search Vol Adjust picture sound tuner function signal timer 08 D K 05 527 27 MHz AUTO Prog No So...

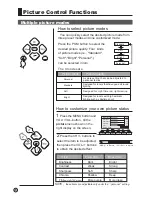
Page 23: ...ft 1 Press the MENU button and VOL VOL button till the menu shown on the right display on the screen picture 2 Press the CH buttons to select the item to be adjusted then press the VOL buttons to obtain the desired effect Picture mode Picture quality Personal Standard Soft Bright The 4 modes are A spare setting that can be adjusted to personal tastes Designed for rooms that have good all round lig...

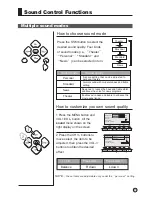
Page 24: ... then press the VOL buttons to obtain the desired effect Sound Control Functions News 00 Personal 04 picture sound tuner function signal timer picture sound tuner function signal timer Balance Woofer vol Woofer Equalizer Sound mode Sound mode Sound quality Personal Standard News Theater A spare setting that can be adjusted to personal tastes Designed to reduce the bass and treble which enhances th...

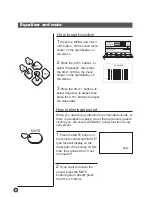
Page 25: ...need to pay attention to surrounded sounds or there is a telephone calling you or there are some guests visiting you the sound elimination mute function is very convenient How to eliminate sound 1 Press the MUTE button on the remote control and MUTE type face will display on the lower part of the screen At this time the sound of the TV set is turned off 2 If you want to recover the sound press the...

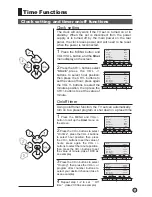
Page 26: ... take 8 as an example 4 Repeat step 1 2 to set Off time take 23 00 as an example Using on off timer function the TV set can automatically turn on to a preset program or shut down in a preset time The clock will only work if the TV set is turned on or in standby When the set is disconnect from the power supply or is turned off by the main power on the rear panel the clock loses power and will need ...

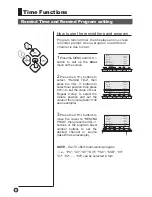
Page 27: ...on to call up the timer menu on the screen MENU and VOL 2 Press the CH buttons to select Remind Time then press the VOL buttons to select hour position then press CH to set the value of hour Repeat 2 step to select the minute position and set the value of the minute take 19 30 as an example 3 Press the CH buttons to move the cursor to REMIND PROG then press the VOL buttons or the program direct nu...

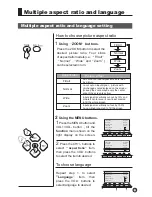
Page 28: ...Skip Aspect Ratio Calendar Aspect ratio Picture effect Fill all Normal Wide Zoom no cut out on input signal screen is filled by picture no cut out on input signal picture with un changed scale displayed on the screen to keep the scale maybe only the center area of the screen is active input signal is vertically cut out by 10 and picture s center area is non linear zoomed to fill the whole screen i...

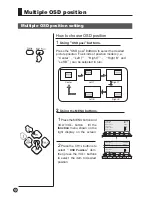
Page 29: ...the screen 2 Press the CH buttons to select OSD Position item then press the VOL buttons to select the item to desired position Multiple OSD position picture sound tuner function signal timer picture sound tuner function signal timer OSD position OSD position OSD position OSD position OSD position Center Left T Right T Left B Right B 2 Using buttons the MENU 26 English Small Center 00 00 Language ...

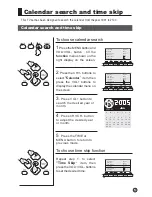
Page 30: ...th 5 Press the TIME or MENU button to return to previous mode picture sound tuner function signal timer Language OSD Size OSD Position Time Skip Aspect Ratio Calendar picture sound tuner function signal timer To choose time skip function picture sound tuner function signal timer Repeat step 1 to select Time Skip item then press the VOL VOL buttons to set the desired time 27 1 8 7 6 5 4 3 2 15 14 1...

Page 31: ... to enjoy desired program DISPLAY Program Table 00 0497 01 0622 02 0832 03 1442 04 1842 05 2112 06 2322 07 08 09 10 11 12 13 14 15 16 17 18 19 20 21 22 23 24 25 26 27 28 29 Vol Vol Ch Ch to Select Program 1 Del 2 Change 3 Rename 4 Favorite 5 Skip Edit Scan Press the I II button will result in fast swap of NICAM function of current program NICAM Edit Scan Favorite TV04 AUTO D K 28 Shuttle TV03 AUTO...

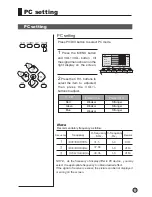
Page 32: ...on and VOL VOL button till the signal menu shown on the right display on the screen 2 Press the CH buttons to select the item to adjusted then press the VOL buttons to adjust Press PV DVI button to select PC mode I T E M Press VOL Press VOL PC setting NOTE As the frequency of display differ in PC device you may select the appropriate frequency to obtain desired effect If the signal of receive is e...

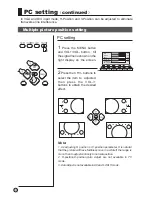
Page 33: ...he signal menu shown on the right display on the screen 2 Press the CH buttons to select the item to adjusted then press the VOL buttons to obtain the desired effect Multiple picture position setting Note 1 A It is natural that t s adjusting H position or V position he picture will have faintness once in a while if the range is more then to adjust contrarily to normal position 2 H position V posit...

Page 34: ... the filesystems of otherformat 4 Many moviefiles usesuffix ofAVI and MPG However many kinds of format are used for internal files This television can only play some AVI and MPG files of this format Those files with suffix of dat are not movie files but data files used by computers and cannot be played for movies 5 External card reader supports most digital cards available in the market Readable d...

Page 35: ...MB SD 128MB This TV is Compatible with the card of SD MMC CF MS SM format How to use Card jack jack jack jack Note 1 Please note chooses uses the digital memory card with you corresponds the receptacle 2 Card reader in 1 cannot simultaneously insert two kind of cards in the graphical representation position Note 1 the card insertion time after the flows media system starts 2s insert the card to nu...

Page 36: ...minals on the back of the card Always insert a card in the correct direction Failure to do so may result in damage to the card and the unit Do not subject the card to excessive pressure or strong impacts Malfunctions of the unit or card may result in data loss or damage to the card Haier shall not accept any liability for damage or loss of stored data Warning Memory cards can be swallowed by young...

Page 37: ...enter media play system 2 Press Up or DOWN button to select the desired option 3 Press ENTER button to enter desired option 4 Press EXIT to return the previous menu 5 If to exit USB system you need to return to the main menu to protection card data SETUP File copy Card USB Remove USB Press ENTER key to play this devices To operate the menu AAA Multimedia Player 7 Press HELP button to call up or ex...

Page 38: ...or LEFT or RIGHT to move and enjoy the picture detail To select stream media broadcast system 1 Press Up or DOWN button to select card or USB The device be inserted and identified 2 Press ENTER button to enter adjusted option Picture Music Movie Music and PIC F 007 JPG F 008 JPG F 009 JPG F 010 JPG F 011 JPG F 012 JPG To make the picture overturn 0 Each press of FWD button to make overturn 90 with...

Page 39: ...peat mode press UP DOWN button the DISC Repeat will appear on the screen and then press ENTER to ensure it 2 Program mode press UP DOWN button to select the music in left list and press ENTER button to program in turn and then the DISC Repeat will appear on the screen and then press button to select Done and then press ENTER button to ensure it To enjoy music The day went away MP3 Play mode standa...

Page 40: ...ay Mode 5 Press FWD or REV button to set speed press ENTER button to resume to standard mode 6 Press or button to select the next movie or previous 7 Press EXIT button repeatedly to return To play Movie E08 8SOBTILES 1 Picture Music Movie Music and PIC AAA Multimedia Player AAA Multimedia Player Stream media broadcast system Color SYS Sound SYS Edit Scan Shuttle Time Skip UP Left Prev USB DOWN Rig...

Page 41: ...INGHT button to select the music Note press PAUSE button to stop playing the picture 5 Press repeatedly EXIT button to return To select the Music and PIC item F 007 JPG F 008 JPG F 009 JPG F 010 JPG F 011 JPG F 012 JPG MP3 The day you went away MP3 JPEG 0016 JPG Play Play mode standard IMAGE 00 01 43 Picture Music Movie Music and PIC AAA Multimedia Player AAA Multimedia Player Stream media broadca...

Page 42: ...lready exits overwrite it will appears on the screen and press LEFT RIGHT button to select YES NO and then press ENTER button to confirm 5 Press ENTER to cancel Copy file function Card Select source Port USB F 007 JPG F 008 JPG F 009 JPG F 010 JPG F 011 JPG F 012 JPG Root F 007 JPG F 008 JPG F 009 JPG F 010 JPG F 011 JPG F 012 JPG Root COPY PASTE Press ENTER key to enter COPY menu AAA Multimedia P...

Page 43: ...u 3 and press again ENTER button to enter language option 4 Press UP DOWN to select desired language and press ENTER to ensure it 5 Press EXIT button to return Press ENTER button to SETUP menu AAA Multimedia Player AAA Multimedia Player AAA Multimedia Player SETUP File copy Card USB Remove USB Stream media broadcast system Color SYS Sound SYS Edit Scan Shuttle Time Skip UP Left Prev USB DOWN Right...

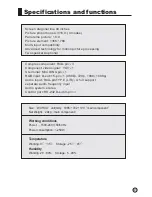
Page 44: ...A pin 3 Component video signal YUV 1 S terminal Mini DIN 4 pin 1 RGB input D sub 15 pin 1 480i p 720p 1080i 1080p Audio input RCA pin TYPE L R 4 full support separate audio frequency input Audio system stereo Control port RS 232 D sub 9 pin 1 1065 742 100 Net 29kg Size WXHXD unit mm main component Weight main component Working conditions Power 150V 240V 50 60Hz Power consumption 250W Temperature W...

Page 45: ... s a great way to keep the dust off your screen for a while Wet a soft cloth in a mixture of lukewarm water and a little fabric softener or dish washing detergent Wring the cloth until it s almost dry and then use it to wipe the screen 2 Make sure the excess water is off the screen and then let it air dry before you turn on your TV Cleaning the Cabinet Extended Absence If you expect to leave your ...

Page 46: ...ot leave the television with static picture in an extended period as it may result in residual image on your television screen 43 Problem Possible remedies Picture too big or small One speaker failure Slight sound from display Turn on the power supply Properly plug the TV set to the power socket Check to see if the power cable of other appliance is plugged in the TV set Make sure that the power ca...

Page 47: ......

Reviews: