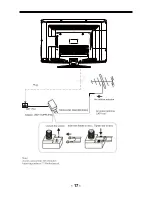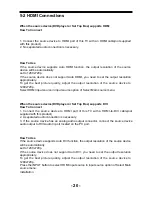
5-2 HDMI Connections
When the source device(DVD player or Set Top Box) supports HDM
How To Connect
1. Connect the source device to HDMI port of this TV with an HDMI cable(not supplied
with this product).
2. No separated audio connection is necessary.
How To Use
If the source device supports Auto HDMI function, the output resolution of the source
device will be automatically
set to 1280x720p.
If the source device does not support Auto HDMI, you need to set the output resolution
appropriately.
To get the best picture quality, adjust the output resolution of the source device to
1280x720p.
Select HDMI input source in input source option of Select Main source menu.
When the source device(DVD player or Set Top Box) supports DVI
How To Connect
1. Connect the source device to HDMI port of this TV with a HDMI-to-DVI cable(not
supplied with this product).
2. A separated audio connection is necessary.
3. If the source device has an analog audio output connector, connect the source device
audio output to DVI Audio In port located on the PC port.
How To Use
If the source device supports Auto DVI function, the output resolution of the source device
will be automatically
set to 1280x720p.
If the source device does not support Auto DVI, you need to set the output resolution
appropriately.
To get the best picture quality, adjust the output resolution of the source device to
1280x720p.
Press the INPUT button to select HDMI input source in input source option of Select Main
source menu.
Installation
- 20 -
Summary of Contents for L42B1180
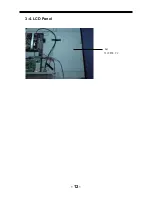
Page 13: ...3 4 LCD Panel 12 T420H W06 V2 AU ...
Page 18: ... 17 ...
Page 19: ... 18 ...
Page 20: ... 19 ...
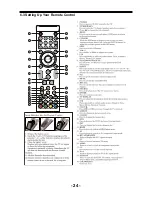
Page 25: ...6 3 Setting Up Your Remote Control 24 ...
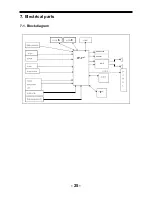
Page 26: ...7 Electrical parts 7 1 Block diagram 25 AMP Headphone Coaxial 1 2 MSD318QT Main IC ...
Page 37: ...8 TV OPERATION 36 ...
Page 38: ... 37 ...
Page 39: ... 38 Press ENTER Key To Select ...
Page 40: ... 39 Press ENTER Key To Select ...
Page 41: ... 40 ...
Page 44: ... 43 9 Trouble shooting 9 1 Simple check ...
Page 46: ... 45 3 Panel display abnormally connector J9 is at normal level ...
Page 50: ... 49 7 PC no picture or picture abnormal ...
Page 51: ... 50 8 YPBPR AV no picture or picture abnormal Check Y ...

