background image

LE50K9000UA
LE55K9000UA

Summary of Contents for LE50K9000UA

Page 1: ...LE50K9000UA LE55K9000UA ...

Page 2: ...ONS AND REMINDERS 2 IMPORTANT SAFETY INSTRUCTIONS 1 PREPARATION 3 PERIPHERAL CONNECTION AND CONTROLS MAKING CONNECTIONS OPERATING INSTRUCTIONS PRODUCT SPECIFICATION 4 5 6 17 18 TROUBLESHOOTING TABLE OF CONTENTS ...

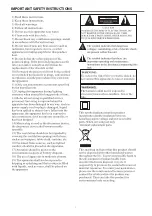
Page 3: ...IMPORTANT SAFETY INSTRUCTIONS 1 ...

Page 4: ...PRECAUTIONS AND REMINDERS If you are going to clean the product Unplug the TV use soft fabric no water never chemicals 2 ...

Page 5: ...ge 18 for the size of the screws Follow the instructions of the user manual that came with the wall mount bracket to install TURNING ON THE TV 1 Install the stand and place the TV on a solid surface Ensure that the TV is placed in a position to allow free back cover To prevent any unsafe situations no naked sources such as lighted candles should be placed on or in the vicinity Avoid heat direct su...

Page 6: ...ES BUTTON Middle key Up and down keys Left and right keys In the non menu page Under the menu page press the left and right keys to adjust the volume addition and subtraction In the standby mode press the middle button to turn on the TV Remote Control 1pcs TV 50 55 58 65 AAA Battery 2pcs User s Manual 1pcs Quick Start Guide 1pcs Warranty Card 1pcs Screws 4pcs In the boot state long press the middl...

Page 7: ...ia signal resource 3 YPbPr Component input terminal 4 RF Antennal close circuit TV USB1 HDMI2 HDMI3 HDMI1 L R VIDEO OPTICAL 1 W A N 2 3 4 CVBS DVD Player or other machine with YPbPr YCbCr MAKING CONNECTIONS USB2 HDMI4 ARC EARPHONE TF MINI YPbPr COMMON INTERFACE CI ANT IN ANTENNA CABLE LNB IN SATELLITE 5 ...

Page 8: ...C Timeshift mode stop 9 10 TEXT SUBTITLE Press to select the teletext mode 12 11 FAV Press to open a favorite channel list 13 SOURCE Press to open the input source list 14 NFTFLIX Press to open the NFTFLIX 15 Press to open the YouTube Press to open the google assistant or start a voice search HOME 16 17 18 19 20 21 INFO Press to display the channel information Press to display electronic programme...

Page 9: ... Used to set your device s password to ensure security and privacy 1 Your device is powered by Android TV and press the button to select the browsing feature 2 You can get more apps from Google Play and press the button to go to the next screen 3 Transfer photos and other content to the TV via the built in chromecast press OK to complete the browsing Press to select the system language and press O...

Page 10: ...t whether to search select Scan to search select Skip scan to skip the search Press OK to complete the setup For selecting the mode press key to select Home mode and press OK to the previous step To select the Tuner mode for searching press to select and press OK During initial setup pressEXIT to exit the initial setup NOTE After setting is complete You can watch TV Press the OK button to agree to...

Page 11: ...lications are listed Inputs Icon to select an input source Network Interent Settings For details on the settings see the next explanation the Inputs icon press OK to open the input source list then press up to highlight an input and press OK to switch 2 Under live TV press the SOURCE button to display the list of input sources You can select the desired source 1 Press button to select what you wan...

Page 12: ...nter the sub menu the TV can receive analog and QAM broadcasting signals Auto Channel Update Channel installation mode Select on screen display channel sources You can select the signal type CHANNEL Antenna 1 Menu Settings Channel Channel Installation Mode enter choose Antenna 2 Enter Menu Settings Channel Channels 3 Channel Scan directly enters the ATV DTV automatic search platform interface of A...

Page 13: ...channel Channels Satellite Re scan 3 Press OK to enter Satellite parameter Settings which include LNB POWER LNB Frequency DiSEqC Set 22K and other parameters Then return to Satellite re scan and right click to enter the search menu Then return to Satellite re scan and right click to enter the search menu Satellite Add Add a star broadcast signal Satellite Manual Tuning manually search for a certai...

Page 14: ...the sub menu Press button to select the Automatic date time then press OK button to enter the sub menu Press button to select the option Set date then press OK button to enter the sub menu Press button to select the option Set time then press OK button to enter the sub menu Press button to select the option Set time zone TIME Press button to select the option then press OK button to choose ON OFF ...

Page 15: ...e ON OFF Press button to select the option then press OK button to enter the sub menu Press button to select the 120 minutes 150 minutes 180 minutes 210 minutes Press button to select the option then press OK button to enter the 15 minutes 30 minutes 60 minutes 240 minutes option then press OK button to enter the sub menu Press button to select the PICTURE button to enter the sub menu Optional use...

Page 16: ...rol Press button to select the option then press OK button to choose ON OFF Downmix Mode Press button to select the option then press OK button to enter the sub menu Optional Stereo Surround Reset to Default Reset all settings to the factory defaults STORAGE Removable Storage Press button to select the option then press OK button to enter the sub menu Note Show external devices if available select...

Page 17: ... Press button to select the Screen saver SCREEN SAVER option then press OK button to enter the sub menu Press button to select the Location status the option then press OK button to choose ON OFF Press button to select Usage diagnostics USAGE DIAGNOSTICS LOCATION Put device to sleep Press button to select the option then press OK button to enter the sub menu Optional 30 minutes 1 hour 3 hours 6 ho...

Page 18: ... the connection fails Wait 30 seconds and then press the RED and BLUE buttons at the bottom of the remote control for 5 seconds to repeat the previous steps Press EXIT or BACK button return to the previous menu REMOTE ACCESSORIES 16 ADD AND USE OF MULTI MEDIA PLAYER 1 In the HOME interface select the icon in the APP column to add the application and click OK Press up and down to select the MultiMe...

Page 19: ...tions control Some TEXT modes could block the screen Good picture but no sound Increase the volume level by pressing the VOL button on the remote control or on the TV side control panel Press the MUTE Good sound but poor color Adjust the contrast color and brightness settings Poor picture Poor picture quality may occur when an activated S VHS camera or camcorder is connected to your TV and other p...

Page 20: ...y interactive Digital text Digital video broadcasting DVB subtitles available Auto setup Auto scan for new channels Now and next programme guide 7 day electronic programme guide EPG Top up TV compatible CI slot Audio description compatible Sound quality Digital features Standby Power consumption 0 5W UHF VHF tuner Sleep timer Parental Guidance Picture and text Remote control batteries required 2 x...

Page 21: ...er output Digitally interactive Digital text Digital video broadcasting DVB subtitles available Auto setup Auto scan for new channels Now and next programme guide 7 day electronic programme guide EPG Top up TV compatible CI slot Audio description compatible Sound quality Digital features Standby Power consumption 0 5W UHF VHF tuner Sleep timer Parental Guidance Picture and text Remote control batt...

Page 22: ...www Haier com ...

Reviews: