6
2. Operating Instructions
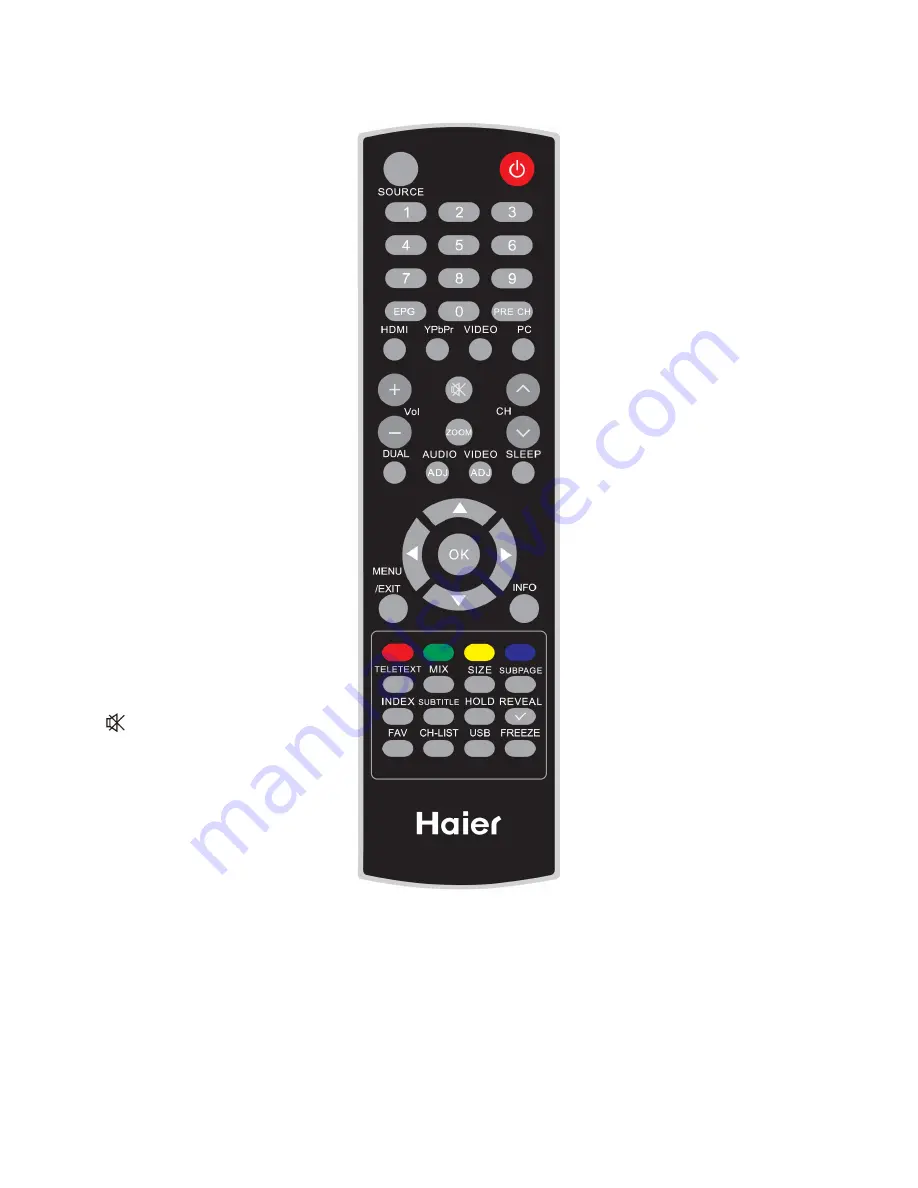
2.1 The Use of Remote Control
POWER
Press to turn ON/OFF(standby) the
TV.
SOURCE
Press repeatedly to choose the
various input sources.
Number buttons
Press to enter TV channel number to
select channel.
EPG
Press to display the Electronic
Programme Guide.
PRE CH
Press to display the previous
channel.
HDMI
Press to choose HDMI source mode.
YPbPr
Press to choose YPbPr source mode.
VIDEO
Press to choose AV source mode.
PC
Press to choose PC source mode.
VOL+ / VOL-
Press + or - to adjust the volume.
CH
Λ
/ CH V
Press
Λ
or V to browse through the
TV channels.
MUTE
Switch the sound ON/OFF.
TELETEXT
Press to display or close the Teletext.
MIX
Display the Teletext with TV.
SIZE
Press to change the font size: Full
screen,
Top half and Bottom half.
SUBPAGE
Display the sub page (when
available).
INDEX
Press to return to page 100 or the
index
page.
SUBTITLE
• In TV mode: It works only for turning
on the subtitle and change to the next
page marked as subtitle.
I T t
d S l t th
t
ZOOM
Select the display aspect from Auto,
Normal (4:3), Wide (16:9), subtitle,
full screen, or 14:9 mode.
DUAL
Press to select from mono, stereo,
Dual I, or Dual II.
AUDIO ADJ
Press to choose from Personal,
Speech, Music.
VIDEO ADJ
Press to choose the Smart Picture
mode from Personal, Standard,
Movie, Vivid, Eco.
SLEEP
Press to set the preset time to switch
the TV to standby mode
automatically.
MENU/EXIT
Press to open or close menu.
▲
,
▼
,
◄
,
►
, OK
Press to adjust or confirm the various
function items on the menu.
INFO
Press to display or close the
information screen.
Colour buttons
• In TV mode: Follow the directions in
the OSD screen.
• In Text mode: Text control buttons.
HOLD
Press to stop the scrolling of pages.
The
text decoder stops receiving
data.
REVEAL
Reveal hidden information such as
answers
to a quiz.
FAV
Display the Favourite Channel List.
CH-LIST
Display the Channel List.
USB
Press USB to display the multimedia
selection screen.
FREEZE
Summary of Contents for LT19A1
Page 34: ...34 6 PCB Layout 6 1 Main Board 715G3693M01000004K ...
Page 35: ...35 ...
Page 36: ...36 6 2 Power Board 715G2783 2 7 ...
Page 37: ...37 ...
Page 38: ...38 ...
Page 39: ...39 6 3 Key Board 715G3303K01001004S 6 4 IR Board 715G3870R01000004M ...
Page 41: ...41 8 Block Diagram ...
Page 63: ...63 11 Exploded View ...


