background image

b) Overload of electric motor  

Analysis of Trouble  
Probably, too many things have been put into the refrigerator, and hence the thermal load 
exceeds its refrigerating capacity; or in case the power supply voltage drops considerably, the 
current flowing through the motor will increase drastically making the thermal protector 
actuate and the fuse blown, and hence the motor stops running. If the motor is still running 
continuously in such a case, its windings will be burned out. 

Remedy 
Reduce the thermal load; pay attention to the variation in voltage of the power supply. 

c) Abnormal thermal protection 

Analysis of Trouble  
The compressor current is within its normal range, but the thermal protector actuates 
repeatedly. 

Remedy 
Replace the thermal protector with a new one. 
3) Sudden stoppage due to other causes

Normal Stoppage 
A thermostat generally controls start and stop of the compressor. When the temperature in 
the refrigerator reaches its desired value, the thermostat will shut down the compressor 
automatically. Never take this normal operation as a trouble, care should be taken to 
differentiate it from other real troubles in servicing. 

D. Compressor won 't start 
In case the compressor cannot be started, you must find out the origins of this trouble 
through checkup step by step, because probably there are many causes, including those 
electrical and mechanical. 

1) Inspect the power supply to see whether it is connected to the compressor circuit. 

Analysis of Trouble 
In case the compressor cannot be started, this will generally exhibit in the power supply 
circuit, for instance, power failure, poor contact of switch, and blown fuse. Make a 
comprehensive analysis of these phenomena, find out its real cause and take correct 
measures to remove this trouble. 

Remedy 
a) Check the input power circuit to see whether where is voltage of the power supplies, 
namely, the circuit which is connected to the knife switch. This can be determined with an 
avometer or a test pencil. If a blown fuse is found, ascertain and remove its cause, then 
replace it with a new one of the same specifications. 

Summary of Contents for PBFS21EDAW

Page 1: ...access 3 Optimized condensing system 4 Pre cooling for defrosting for freshness storage 5 Automatic problem detecting and warning system door cooling warning system Haier Group 6 Vitamin C technology...

Page 2: ...REFRIGERATION PRINCIPLE 9 System flow chart 9 4 CIRCUIT DIAGRAM 10 11 4 1 Schematic 10 4 2 Connect diagram 11 5 Sensor and Error code 12 6 TROUBLESHOOTING 13 30 6 1 Common Troubles in Refrigerators a...

Page 3: ...PRODUCT CODE and SERIES INTRODUCTION Model Designations Bottom Mount 21 25 cu ft Refrigerator Freezer Details...

Page 4: ...Gallon bottled seat Cooked IRRG ER Ice making drawer Deepfreeze refrigeration big drawer Deepfreeze fridge Ice spoon Ice maker Ice meeting drawer Drawer clapboard Deepfreeze fridge big drawer For the...

Page 5: ...nge by means of hexagonal screwdriver and then remove the hinge Remove the door and place it in a proper position Remove the middle hinge if necessary 2 Removing and replacing the left door of refrige...

Page 6: ...k Button D Time Area E K L M N K M N E Quick refrigerant button F G Deepfreeze fridge temperature adjusting button H deepfreeze fridge temperature indicating area I Chill cold storage temperature indi...

Page 7: ...WHPSHUDWXUH DGMXVWPHQW Press Button J or Button K the chill cold storage temperature vision area will flicker and when the chill cold storage temperature is set the range of the chill cold storage tem...

Page 8: ...apply for the models with the function of taking out cold drinks Only apply for the models without the function of taking out cold drinks F G H F G H RRU ERG YLVLRQ WLPH DGMXVWPHQW MXVW IRU 3 6 35 6 V...

Page 9: ...out of the refrigerant quick deepfreeze refrigeration state KLOO FROG VWRUDJH TXLFN GHHSIUHH H UHIULJHUDWLRQ VHWWLQJ Press Button L the chill cold storage quick deepfreeze refrigeration button indica...

Page 10: ...cold storage function is turn on again HOVLXV DKUHQKHLW VZLWFKLQJ IXQFWLRQ Press Button F and Button G and Button J on the vision board at the same time for three seconds the Celsius will be used aft...

Page 11: ...pairing department to have the refrigerator repaired in order to test the optimizing controlling of the refrigerator When any door body is opened for over 60 seconds the door opening alarming function...

Page 12: ...REFRIGERATION PRINCIPLE 1 Compressor 2 Mullion Heater 3 Dry Filter 4 condenser 5 Mullion Heater 6 Evaporator 7 Capillary tube SYSTEM FLOW CHART SYSTEM FLOW SCENOGRAPH...

Page 13: ...CIRCUIT DIAGRAM 1 Schematic...

Page 14: ...2 Connect diagram for PRFS25EDA series...

Page 15: ...ice maker motor CN 6 Ice Maker CN9 Dispenser 1 neutral 1 2 damper heater CN 7 Drawer 9 10 light switch 7 8 temp sensor 5 dispenser arm switch 4 dispenser lamp 3 dispenser heater 2 Ice dispenser door...

Page 16: ...VHQVRU DFN VLGH ZDOO RI UHH HU FRPSDUWPHQW PELHQW VHQVRU URXQGHG 8QGHU XSSHU KLQJH OHIW FRYHU HIURVW VHQVRU 7RS ULJKW FRUQHU HYDSRUDWRU FHPDNHU VHQVRU FHPDNHU IOH WUD K XPLGLW VHQVRU FXELF 8QGHU XSSHU...

Page 17: ...al leak points do exist in the system In troubleshooting pay attention to those parts that are liable to leak check main connection points for oil seepage and tubing for cracks If there is no severer...

Page 18: ...condition that the refrigerant in the system is unchanged This phenomenon occurs mostly when the compressor has been used for quite a long time its moving parts have worn to a considerable degree fit...

Page 19: ...ring it thoroughly recharge the system with refrigerant and seal the charging port B No Refrigerating The phenomenon that the compressor runs normally but no frost or only a little frost appears on th...

Page 20: ...s heard and the gas suction pressure rises as well it can be confirmed that the trouble is caused by ice clogging Remedy If there is too much moisture in the refrigerating system it is advisable to re...

Page 21: ...similar symptoms In repairing firstly hear attentively if there is some abnormal sound coming from the compressor sometimes the broken pieces of valve block may strike against the cylinder and feel t...

Page 22: ...od not too long thus making the protective relay actuate and bring to a stoppage Remedy Check up how the air has been left in the refrigerating system Generally there are two possibilities one is that...

Page 23: ...s desired value the thermostat will shut down the compressor automatically Never take this normal operation as a trouble care should be taken to differentiate it from other real troubles in servicing...

Page 24: ...rmal relay sometimes may be open due to the leakage of temperature sensing agent from the temperature sensor Remedy Remove the relay cover to check up its contacts if they are open this means that the...

Page 25: ...the old with a new one d Check the terminals for loose connection and electric circuits for other abnormal phenomena 5 Mechanical faults of compressor a Seizing of shaft This phenomenon is caused most...

Page 26: ...e to the fact that the contacts of the thermostat cannot be released Remedy Dismantle the thermostat and make a through checkup if it is totally out of functioning replace it with a new one 3 evaporat...

Page 27: ...occurred in some electric devices or the erroneous wiring in installing power cord plug or outlet by the user This is very dangerous 3 Electric leakage test a Slight electric leakage A tingle sense wi...

Page 28: ...loosening of parts Improper and compact laying of tubes or the loosening of parts may cause vibration and noise 4 Large noise of the fan a The fan motor is loose b Noise is produced by normal operati...

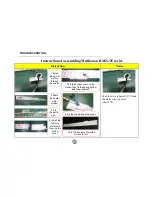
Page 29: ...x the earth wire 1 1 Install top axis of mullion through the heater 2 Paste the heater onto mullion 2 4 4 Install the reinforce metal and foam on the bottom cover 5 Fix the bottom cover on the mullion...

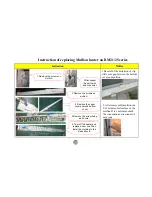
Page 30: ...and bottom cover 5 Remove the screw fixing earth wire 6 6 Tear off the heater and replace a new one Then Install it according to the steps above 5 3 Remove the screws on mullion 1 Remove the screws on...

Page 31: ...will cause gap between the airproof and horizontal mullion 1 1 Remove the screws fixing horizontal mullion 2 2 Dismantle the horizontal mullion and foam airproof 3 3 Disconnect the linking clip and mu...

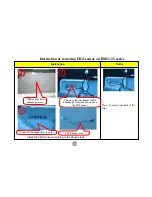
Page 32: ...ce Place the sensor in middle of the clips Install the FRZ sensor according to the above steps 1 1 Remove the FRZ airpassage cover 2 2 Remove the rear gasket of FRZ airpassage cover then you can see t...

Page 33: ...mm two thread and with electric iron plating soldering tin 4 connection port 4 connection electric iron pyr oconde nsation pipe Make pyrocondensation tube cover the two thread and with electric iron j...

Page 34: ...ction of signal input terminal on Inverter PCB is right Notice right of signal input terminal is while the left is multimeter If it s wrong connection reconnect them 7 Test the output of control signa...

Page 35: ...rtain time proportion if the humidity is heavy or more door openings 5 The Center mullion heater will stop working under proper humidity or less door openings 6 And it s 25W 529 There are the technica...

Page 36: ......
Reviews: