background image

49-2000682  Rev. 0

21

ESP

AÑOL  

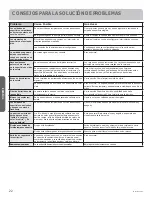
CONSEJOS PARA LA SOLUCIÓN DE PROBLEMAS

Problema

Causa Posible

Qué Hacer

Mi horno nuevo no 
cocina como el anterior. 
¿Hay algún problema 
con las configuraciones 
de temperatura?

6XKRUQRQXHYRFXHQWDFRQXQVLVWHPDGHFRFFLyQ
GLIHUHQWHFRQUHODFLyQDODQWHULRU\SRUORWDQWRHVSRVLEOH
TXHFRFLQHGHIRUPDGLIHUHQWH

(QORVSULPHURVXVRVXVHORVWLHPSRV\WHPSHUDWXUDVGHVX
UHFHWDFRQFXLGDGR6LD~QSLHQVDTXHVXKRUQRQXHYRFRFLQDFRQ
GHPDVLDGRFDORURGHPDVLDGRIUtRSRGUiDMXVWDUHOWHUPRVWDWR
XVWHGPLVPRSDUDDSOLFDUVXSUHIHUHQFLDGHFRFFLyQHVSHFtILFD

NOTA:

(VWHDMXVWHDIHFWDODVWHPSHUDWXUDVGH%DNH+RUQHDU

\&RQYHFWLRQ%DNH+RUQHDUSRU&RQYHFFLyQQRDIHFWDUiODV
IXQFLRQHV&RQYHFWLRQ5RDVW'RUDUSRU&RQYHFFLyQ%URLO$VDUR
&OHDQ/LPSLDU

La comida no se hornea 
de forma apropiada

&RQWUROHVGHOKRUQRFRQILJXUDGRVGHIRUPDLQFRUUHFWD

&RQVXOWHODVHFFLyQ0RGRVGH&RFFLyQ

/DSRVLFLyQGHOHVWDQWHHVLQFRUUHFWDRHOHVWDQWHQRHVWi
QLYHODGR

&RQVXOWHODVHFFLyQ0RGRVGH&RFFLyQ\OD*XtDGH&RFFLyQ

8VRGHXQDFDFHURODLQFRUUHFWDRGHXQDFDFHURODGH
WDPDxRLQFRUUHFWR

&RQVXOWHODVHFFLyQ8WHQVLOLRV

/DWHPSHUDWXUDGHOKRUQRGHEHVHUDMXVWDGD

&RQVXOWHODVHFFLyQ)XQFLRQHV(VSHFLDOHV

6XVWLWXFLyQGHLQJUHGLHQWHV

6XVWLWXLULQJUHGLHQWHVSXHGHPRGLILFDUHOUHVXOWDGRGHODUHFHWD

La comida no asa de 
forma apropiada

&RQWUROHVGHOKRUQRFRQILJXUDGRVGHIRUPDLQFRUUHFWD

$VHJ~UHVHGHVHOHFFLRQDUHOPRGRFRUUHFWRSDUDDVDU

6HXVyXQDSRVLFLyQLQFRUUHFWDGHOHVWDQWH

3DUDDFFHGHUDVXJHUHQFLDVGHXELFDFLyQGHHVWDQWHVFRQVXOWH
OD*XtDGH&RFFLyQ

6HFRFLQyFRPLGDHQXQDROODFDOLHQWH

$VHJ~UHVHGHTXHHOXWHQVLOLRHVWpIUtR

8WHQVLOLRGHFRFLQDLQDGHFXDGRSDUDDVDU

8VHXQDROODHVSHFtILFDPHQWHGLVHxDGDSDUDDVDU

(OSDSHOGHDOXPLQLRXVDGRSDUDODROOD\ODUHMLOODSDUD
DVDUQRVHDMXVWyQLFRUWyGHIRUPDDSURSLDGDVHJ~QOR
UHFRPHQGDGR

6LXVDUiSDSHOGHDOXPLQLRGHEHUiXVDUVHFRQIRUPHFRQODV
DEHUWXUDVGHODROOD

(QDOJXQDViUHDVHVSRVLEOHTXHHOQLYHOGHFRUULHQWH
YROWDMHVHDEDMR

3UHFDOLHQWHHOHOHPHQWRSDUDDVDUGXUDQWHPLQXWRV

La temperatura del 
horno es demasiado 
caliente o demasiado 
fría

/DWHPSHUDWXUDGHOKRUQRGHEHVHUDMXVWDGD

&RQVXOWHODVHFFLyQ)XQFLRQHV(VSHFLDOHVRDMXVWHHOWHUPRVWDWR
HQPRGHORVFRQSHULOODGHWHPSHUDWXUD
GHOKRUQR

El horno no funciona o 
parece no funcionar

(VSRVLEOHTXHXQIXVLEOHGHVXKRJDUVHKD\D
TXHPDGRRTXHHOGLV\XQWRUVHKD\DGHVFRQHFWDGR

5HHPSODFHHOIXVLEOHRUHLQLFLHHOGLV\XQWRU

&RQWUROHVGHOKRUQRFRQILJXUDGRVGHIRUPDLQFRUUHFWD

&RQVXOWHODVHFFLyRUQR

(OKRUQRVHHQFXHQWUDHQ6DEEDWK0RGH0RGR
6DEiWLFR

9HULILTXHTXHHOKRUQRQRHVWpHQ6DEEDWK0RGH0RGR
6DEiWLFR&RQVXOWHODVHFFLyQ)XQFLRQHV(VSHFLDOHV

Sonido de 
“chisporroteo” o 
“traqueo”

eVWHHVHOVRQLGRGHPHWDOFDOHQWiQGRVHRHQIULiQGRVH
GXUDQWHODVIXQFLRQHVGHFRFFLyQ\OLPSLH]D

(VWRHVQRUPDO

¿Por qué la estufa 
hace un sonido de 
“clic” cuando uso el 
horno?

6XHVWXIDIXHGLVHxDGDSDUDPDQWHQHUXQFRQWUROPiV
DMXVWDGRVREUHODWHPSHUDWXUDGHOKRUQR

(VWRHVQRUPDO

A veces el horno tarda 
más en precalentarse a 
la misma temperatura

8WHQVLOLRRFRPLGDHQHOKRUQR1~PHURGHHVWDQWHVHQ
HOKRUQR

(OXWHQVLOLRRODFRPLGDHQHOKRUQRKDUiTXHpVWHWDUGHPiV
HQSUHFDOHQWDUVH5HWLUHHVWRVDUWtFXORVSDUDUHGXFLUHOWLHPSR
GHSUHFDOHQWDPLHQWR$JUHJDUPiVHVWDQWHVDOKRUQRKDUiTXH
pVWHWDUGHPiVHQSUHFDOHQWDUVH5HWLUHDOJXQRVHVWDQWHV

La luz del horno no 
funciona

/DOiPSDUDHVWiIORMDRSUHVHQWDGHIHFWRV

$MXVWHRUHHPSODFHODOiPSDUD

/DOX]GHIXQFLRQDPLHQWRGHOLQWHUUXSWRUHVWiURWD

/ODPHDOVHUYLFLRWpFQLFR

£$KRUUHWLHPSR\GLQHUR3ULPHURUHYLVHORVFXDGURVTXHDSDUHFHQHQODVVLJXLHQWHVSiJLQDV\HVSRVLEOHTXHQRQHFHVLWHVROLFLWDU
UHSDUDFLRQHV

Summary of Contents for QSS740

Page 1: ...User Manual QSS740 Electric Ranges 49 2000682 Rev 0 03 20 GEA ESPAÑOL Para consultar una version en español de este manual de instrucciones visite nuestro sitio de internet Haierappliances com ...

Page 2: ......

Page 3: ...e of purchase TABLE OF CONTENTS SAFETY INFORMATION 4 USING THE RANGE 8 Connecting Your Wifi Enabled Oven 8 Remote Enable Equipment 8 Surface Units 9 Oven Controls 11 APP Only Product Settings 11 Sabbath Mode 12 Cookware Guidelines 13 Cooking Modes 13 Oven Probe 13 Oven Racks 14 Aluminum Foil and Oven Liners 14 Cooking Guide 15 CARE AND CLEANING 16 Oven 16 Cooktop 16 Glass Cooktop 17 Door and Drawe...

Page 4: ...s the storage drawer or kick panel can be removed for easy inspection If visual inspection is not possible slide the range forward confirm the anti tip bracket is securely attached to the floor or wall and slide the range back so the rear leveling leg is under the anti tip bracket If the range is pulled from the wall for any reason always repeat this procedure to verify the range is properly secur...

Page 5: ...e of the oven These surfaces may be hot enough to burn even though they are dark in color During and after use do not touch or let clothing or other flammable materials contact the surface units areas nearby the surface units or any interior area of the oven allow sufficient time for cooling first Other surfaces of the appliance may become hot enough to cause burns Potentially hot surfaces include...

Page 6: ...face unit will also improve efficiency Only certain types of glass glass ceramic earthenware or other glazed containers are suitable for cooktop service others may break because of the sudden change in temperature To minimize the possibility of burns ignition of flammable materials and spillage the handle of a container should be turned toward the center of the range without extending over nearby ...

Page 7: ... the manufacturer s directions Pull the oven rack to the stop lock position when loading and unloading food from the oven This helps prevent burns from touching hot surfaces of the door and oven walls Do not leave items such as paper cooking utensils or food in the oven when not in use Items stored in an oven can ignite Never place cooking utensils pizza or baking stones or any type of foil or lin...

Page 8: ...are not expressly approved by the manufacturer could void the user s authority to operate the equipment Compatible Apple or Android devices and home WiFi network required REMOTE ENABLE EQUIPMENT This device complies with part 15 of the FCC Rules Operation is subject to the following two conditions 1 This device may not cause harmful interference and 2 this device must accept any interference recei...

Page 9: ...nd insulating materials and will disappear in a short time NOTE On models with light colored glass cooktops it is normal for the cooking zones to change color when hot or cooling down This is temporary and will disappear as the glass cools to room temperature The surface unit will cycle on and off to maintain your selected control setting It is safe to place hot cookware on the glass surface even ...

Page 10: ...tops Poor conductivity and slow to absorb heat Will scratch the cooktop surface More about Cookware Place only dry pans on the surface elements Do not place lids on the surface elements particularly wet lids Wet pans and lids may stick to smooth surface when cool Do not use woks that have support rings This type of wok will not heat on the cooktop We recommend that you use only a flat bottomed wok...

Page 11: ...perature See the Cooking Modes Section for more information The probe can only be used with Bake Convection Bake and Convection Roast Auto Conv Auto Conversion When using Convection Bake and Convection Roast cooking Auto Recipe Conversion will automatically convert the regular baking temperatures entered to convection bake cooking temperatures when turned on Note that this option does not convert ...

Page 12: ...t to the desired bake temperature Exiting Sabbath Mode Sabbath mode can be disabled either by the app or pushing the oven knob in for 3 seconds Oven Light Operation The oven light is OFF for duration of Sabbath Opening and closing of the door will not turn the oven light to ON Sabbath Mode Power Outage Note If a power outage occurs during a Sabbath bake the unit will return to Sabbath mode when po...

Page 13: ...ood closely while broiling Use caution when broiling on the upper rack positions as placing food closer to the broil burner increases smoking splattering and the possibility of fats igniting It is not necessary to preheat when using the Broil mode To use this mode turn the Oven Mode Selector knob to Broil Broil Hi SmartHQ app only The Broil High mode uses intense heat from the upper element or bur...

Page 14: ...Bake and Convection Roast through the SmartHQ app To use the probe with preheating 1 Select the desired cook mode Bake Convection Bake or Convection Roast through the app and select the desired cooking temperature 2 Insert the probe into the food see Proper Probe Placement 3 Once the oven is preheated place the food in the oven and connect the probe to the probe outlet making sure it is fully inse...

Page 15: ...e rack supports Tilt up the front of the rack and push the rack in until it stops Then lay the rack flat and push it in until it is all the way into the oven Racks may become difficult to slide To improve sliding conditions use a soft cloth or paper towel to rub vegetable oil on the left and right edges of the racks and or rack supports NOTE Remove unused racks when using the oven for faster prehe...

Page 16: ...broil heater Boneless chicken breasts Broil Low Bake 3 Move food down for more doneness less searing and up for greater searing browning when broiling For best performance when broiling center food below the broil element or burner Whole turkey Bake Convection Roast 1 Use a low sided pan such as a broil pan Preheating is not necessary Turkey Breast Bake Convection Roast 3 Use a low sided pan such ...

Page 17: ...OKTOP Control Panel and Knobs Wipe the control panel after each use of the oven with a damp cloth For cleaning use mild soap and water or a 50 50 solution of vinegar and water Rinse with clean water Polish dry with a soft cloth Do not use abrasive cleansers strong liquid cleansers plastic scouring pads or oven cleaners on the control panel they will damage the finish Stainless Steel Surfaces on so...

Page 18: ...ace with ceramic cooktop cleaner and a paper towel Heavy Burned On Residue 1 Allow the cooktop to cool 2 Use a single edge razor blade scraper at approximately a 45 angle against the glass surface and scrape the soil It will be necessary to apply pressure to the razor scraper in order to remove the residue 3 After scraping with the razor scraper spread a few drops of ceramic cooktop cleaner on the...

Page 19: ...he door gasket it has an extremely low resistance to abrasion If you notice the gasket becoming worn frayed or damaged in any way or if it has become displaced on the door you should have it replaced Cleaning the Door Exterior If a stain on the door vent trim is persistent use a mild abrasive cleaner and a sponge scrubber for best results Do not use this method on any other surface Stainless Steel...

Page 20: ...improved lighting inside the oven clean the glass cover frequently using a wet cloth This should be done when the oven is completely cool OVEN DOOR The door is very heavy Be careful when removing and lifting the door Do not lift door by the handle To Remove the Door 1 Fully open the door 2 Pull the hinge locks up and away from the range frame to the unlocked position 3 Firmly grasp both sides of t...

Page 21: ...luminum foil on broil pan wrap tightly and add slits conforming to those in the pan to allow grease to drain Oven temperature too hot or too cold Oven temperature needs adjustment See the Oven Controls section Oven appears not to work A fuse in your home may be blown or the circuit breaker tripped Replace the fuse or reset the circuit breaker Oven controls improperly set See the Using the Oven sec...

Page 22: ...ktop section Hot surface on a model with a light colored cooktop This is normal The surface may appear discolored when it is hot This is temporary and will disappear as the glass cools Plastic melted to the surface Hot cooktop came into contact with plastic placed on the hot cooktop See the Glass surface potential for permanent damage section in the Cleaning the glass cooktop section Pitting or in...

Page 23: ...le and exclusive remedy is product repair as provided in this Limited Warranty Any implied warranties including the implied warranties of merchantability or fitness for a particular purpose are limited to one year or the shortest period allowed by law This limited warranty is extended to the original purchaser and any succeeding owner for products purchased for home use within the USA If the produ...

Page 24: ...numbers and website information The following products and more are available ACCESSORIES Accessories Small Broiler Pan 8 x 1 x 13 Parts Oven racks Oven burners Light bulbs Cleaning Supplies Stainless Steel Wipes Stainless Steel Appliance Cleaner Cleaning Pads for Ceramic Cooktops Ceramic Cooktop Cleaner Ceramic Cooktop Scraper Kit Kit includes cream and cooktop scraper Graphite Lubricant ...

Page 25: ...49 2000682 Rev 0 25 ENGLISH NOTES ...

Page 26: ...26 49 2000682 Rev 0 ENGLISH NOTES ...

Page 27: ...49 2000682 Rev 0 27 ENGLISH NOTES ...

Page 28: ...T Do Not Return This Product To The Store If you have a problem with this product please call 1 877 337 3639 for the name and telephone number of the nearest authorized service center DATED PROOF OF PURCHASE REQUIRED FOR WARRANTY SERVICE ...

Page 29: ...ESPAÑOL Manual del usuario QSS740 Cocina Eléctricas 49 2000682 Rev 0 03 20 GEA ...

Page 30: ...2 49 2000682 Rev 0 ESPAÑOL ...

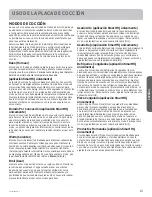
Page 31: ...cesita ayuda con su electrodoméstico Intente a través del Sitio Web de Haier las 24 horas del día cualquier día del año Usted también puede comprar más electrodomésticos maravillosos de Haier y aprovechar todos nuestros servicios de soporte a través de Internet diseñados para su conveniencia En EE UU Haierappliances com INFORMACIÓN DE SEGURIDAD 4 USO DE LA PLACA DE COCCIÓN 8 Conexión de su Horno c...

Page 32: ...ección se pueden retirar para una fácil inspección Si no es posible realizar una inspección visual deslice la cocina hacia adelante confirme que el soporte anti volcaduras esté ajustado de forma segura al piso o la pared y deslice la cocina hacia atrás de modo que la pata niveladora trasera se encuentre debajo del soporte anti volcaduras Si la cocina es expulsada de la pared por alguna razón siemp...

Page 33: ...ODV XQLGDGHV GH VXSHUILFLH R FXDOTXLHU iUHD LQWHULRU GHO KRUQR GHMH SDVDU XQ WLHPSR SUXGHQFLDO SDUD TXH VH HQIUtHQ 2WUDV VXSHUILFLHV GHO DSDUDWR SXHGHQ FDOHQWDUVH OR VXILFLHQWH FRPR SDUD SURYRFDU TXHPDGXUDV DV VXSHUILFLHV SRWHQFLDOPHQWH FDOLHQWHV LQFOX HQ OD HVWXID ODV iUHDV RULHQWDGDV KDFLD OD HVWXID OD DEHUWXUD GH YHQWLODFLyQ GHO KRUQR ODV VXSHUILFLHV FHUFDQDV D OD DEHUWXUD ODV KHQGLGXUDV XELFDG...

Page 34: ...RFDQGR XQ LQFHQGLR TXH SRGUtD SURSDJDUVH D ORV JDELQHWHV FHUFDQRV 8WLOLFH XQ WHUPyPHWUR SDUD JUDVD FXDQGR VHD SRVLEOH SDUD FRQWURODU OD WHPSHUDWXUD GHO DFHLWH Ŷ 3DUD HYLWDU HO GHUUDPH GH DFHLWH XQ LQFHQGLR XWLOLFH XQD FDQWLGDG PtQLPD GH DFHLWH FXDQGR IUtD HQ VDUWHQHV SRFR SURIXQGDV HYLWH OD FRFFLyQ GH DOLPHQWRV FRQJHODGRV FRQ XQD FDQWLGDG H FHVLYD GH KLHOR Ŷ 8WLOLFH HO WDPDxR GH UHFLSLHQWH DGHFXDG...

Page 35: ... RMRV Ŷ 1R XVH HO KRUQR VL XQ HOHPHQWR GH FDOHQWDPLHQWR JHQHUD XQ SXQWR EULOODQWH GXUDQWH HO XVR R DSDUHFHQ RWURV VLJQRV GH GDxRV 8Q SXQWR EULOODQWH LQGLFD TXH HO HOHPHQWR SDUD FDOHQWDU SXHGH IDOODU JHQHUDU XQD SRVLEOH TXHPDGXUD LQFHQGLR R GHVFDUJD HOpFWULFD SDJXH HO KRUQR GH LQPHGLDWR VROLFLWH D XQ WpFQLFR FDOLILFDGR GHO VHUYLFLR TXH UHHPSODFH HO HOHPHQWR SDUD FDOHQWDU Ŷ 0DQWHQJD GHVREVWUXLGD OD ...

Page 36: ...R PRGLILFDFLRQHV DO GLVSRVLWLYR GH DFFHVR UHPRWR LQVWDODGR HQ HVWH KRUQR TXH QR HVWiQ H SUHVDPHQWH DSUREDGRV SRU HO IDEULFDQWH SRGUtDQ DQXODU OD DXWRULGDG GHO XVXDULR SDUD RSHUDU HO HTXLSDPLHQWR EQUIPO DE ACCESO REMOTO INSTALADO VWH GLVSRVLWLYR FXPSOH FRQ OD 3DUWH GH OD 1RUPDWLYD GH OD 6X IXQFLRQDPLHQWR HVWi VXMHWR D ODV GRV FRQGLFLRQHV VLJXLHQWHV VWH GLVSRVLWLYR QR SRGUi RFDVLRQDU LQWHUIHUHQFLDV ...

Page 37: ...alentamiento de piezas nuevas y materiales aislantes y desaparecerá en poco tiempo NOTA En modelos con estufas de vidrio de color claro es normal que las zonas de cocción cambien de color cuando están calientes o enfriándose Esto es temporal y desaparecerá a medida que el vidrio se enfríe a temperatura ambiente La unidad superficial seguirá un ciclo de encendido y apagado para mantener su configur...

Page 38: ...io de las estufas El esmalte puede derretirse y adherirse a la estufa cerámica Vidrio cerámico Desempeño pobre Raya la superficie Cerámica Desempeño pobre Puede rayar la superficie Hierro fundido No se recomienda a menos que se encuentre específicamente diseñado para estufas de vidrio Pobre conductividad y lentitud para absorber el calor Raya la superficie de la estufa Más sobre Utensilios Coloque...

Page 39: ...a más información consulte la sección de Modos de Cocción La sonda sólo puede ser usada con las funciones Bake Hornear Convection Bake Hornear por Convección y Convection Roast Dorar por Convección Auto Conv Conversión Automática Al usar las opciones de cocción Convection Bake Hornear por Convección o Convection Roast Dorar por Convección Auto Recipe Conversion Conversión de Receta Automática conv...

Page 40: ... sólo se podrá iniciar una vez activado el modo Sabbath Sabático a través de la aplicación y girando la perilla del horno de la unidad hasta la temperatura de horneado deseada Cómo Salir del Modo Sabático El modo Sabbath Sabático se podrá desactivar desde la aplicación o presionando la perilla del horno durante 3 segundos Funcionamiento de la Luz del Horno La luz del horno está en OFF Apagado en e...

Page 41: ...puerta del horno y el cajón cerrados Monitoree la comida de cerca al asar Tenga cuidado al asar en estantes de posiciones superiores ya que colocar la comida más cerca del quemador para asar incrementa el humo salpicaduras y la posibilidad de que se incendien las grasas No es necesario realizar el precalentamiento al usar estos modos para Asar Asado Alto aplicación SmartHQ únicamente El modo Broil...

Page 42: ...e el modo de cocción deseado Hornear Hornear por Convección o Dorar por Convección a través de la aplicación y seleccione la temperatura de cocción deseada 2 Inserte la sonda en la comida consulte sobre la Ubicación Correcta de la Sonda 3 Una vez que el horno fue precalentado coloque la comida en el mismo y conecte la sonda en su correspondiente tomacorriente asegurándose de que esté completamente...

Page 43: ...s de los estantes Incline el frente del estante hacia arriba y empuje el mismo hasta que se detenga Luego apoye el estante y empuje el mismo hasta que entre completamente en el horno Es posible que resulte difícil deslizar los estantes Para mejorar las condiciones de deslizamiento use una tela suave o una toalla de papel para frotar aceite vegetal sobre los extremos izquierdo y derecho de los esta...

Page 44: ...MR SDUD TXH TXHGH PiV SUHSDUDGD PHQRV VRDVDGD PiV DUULED SDUD VRDVDU GRUDU DO DVDU 3DUD XQ PHMRU UHQGLPLHQWR DO DVDU FHQWUH OD FRPLGD GHEDMR GHO HOHPHQWR TXH HPLWH FDORU SDUD DVDU 3DYR HQWHUR RUQHDU RUDGR SRU RQYHFFLyQ 1 8VH XQD ROOD FKDWD WDO FRPR XQD ROOD SDUD DVDU 1R VH UHTXLHUH SUHFDOHQWDUOD 3HFKXJD GH 3DYR RUQHDU RUDGR SRU RQYHFFLyQ 3 8VH XQD ROOD FKDWD WDO FRPR XQD ROOD SDUD DVDU 1R VH UHTXL...

Page 45: ... uso del horno con una tela húmeda Para limpiar use jabón suave y agua o una solución que sea mitad de vinagre y mitad de agua Enjuague con agua limpia Pula en seco con una tela suave No use limpiadores abrasivos limpiadores líquidos fuertes almohadillas para fregar de plástico y limpiadores de horno en el panel de control dañarán el acabado Superficies de Acero Inoxidable en algunos modelos No us...

Page 46: ...lla de papel Residuos pegados rebeldes 1 Deje enfriar la estufa 2 Utilice el raspador de filo único a un ángulo aproximado de 45 degrees contra la superficie del vidrio y raspe la suciedad Puede ser necesario aplicar presión al raspador para quitar la suciedad 3 Después de utilizar el raspador coloque unas gotas de limpiador de estufas cerámicas sobre toda el área de suciedad quemada Utilice una a...

Page 47: ...la abrasión Si observa que la junta se empieza a gastar se deshilacha o daña de cualquier forma y si quedó fuera de la puerta deberá reemplazar la misma Limpieza del Exterior de la Puerta Si las manchas en el borde de la ventana de la puerta son persistentes use un limpiador abrasivo suave o una esponja con estropajo para obtener un mejor resultado No use este método sobre ninguna otra superficie ...

Page 48: ...ando una tela húmeda Esto se deberá hacer cuando el horno esté completamente frío PUERTA DEL HORNO La puerta es muy pesada Tenga cuidado al retirar y levantar la puerta No levante la puerta usando la manija Para retirar la puerta 1 Abra la puerta totalmente 2 Empuje los bloqueos de la bisagra hacia arriba y afuera de la estructura de la cocina hasta la posición de desbloqueo 3 Firmemente tome ambo...

Page 49: ...R XVDGR SDUD OD ROOD OD UHMLOOD SDUD DVDU QR VH DMXVWy QL FRUWy GH IRUPD DSURSLDGD VHJ Q OR UHFRPHQGDGR 6L XVDUi SDSHO GH DOXPLQLR GHEHUi XVDUVH FRQIRUPH FRQ ODV DEHUWXUDV GH OD ROOD Q DOJXQDV iUHDV HV SRVLEOH TXH HO QLYHO GH FRUULHQWH YROWDMH VHD EDMR 3UHFDOLHQWH HO HOHPHQWR SDUD DVDU GXUDQWH PLQXWRV La temperatura del horno es demasiado caliente o demasiado fría D WHPSHUDWXUD GHO KRUQR GHEH VHU ...

Page 50: ...DU OD HVWXID GH YLGULR 6XSHUILFLH FDOLHQWH HQ XQ PRGHOR FRQ XQD HVWXID GH FRORU FODUR VWR HV QRUPDO D VXSHUILFLH SXHGH SDUHFHU GHFRORUDGD FXDQGR HVWi FDOLHQWH VWR HV WHPSRUDO GHVDSDUHFHUi D PHGLGD TXH VH HQIUtD HO YLGULR Plástico derretido sobre la superficie D HVWXID FDOLHQWH HQWUy HQ FRQWDFWR FRQ SOiVWLFR FRORFDGR VREUH OD PLVPD 9HU OD VHFFLyQ 6XSHUILFLH GH YLGULR SRVLELOLGDGHV GH GDxR SHUPDQHQW...

Page 51: ...ÓN DE GARANTÍAS IMPLÍCITAS Su única y exclusiva alternativa es la reparación del producto como se indica en la Garantía Limitada Las garantías implícitas incluyendo garantías implícitas de comerciabilidad o conveniencia sobre un propósito particular se limitan a un año o al período más corto permitido por la ley Esta garantía limitada se extiende al comprador original y a cualquier propietario pos...

Page 52: ...s productos están disponibles ACCESORIOS Accesorios Olla para Asar Pequeña 8 x 1 x 13 Piezas Estantes del horno Elementos del horno Lámparas de luz Suministros de Limpieza Limpiadores de Acero Inoxidable CitriShine Limpiador de Electrodomésticos de Acero Inoxidable Almohadillas de Limpieza para Placas de Cocción Cerámicas Limpiador de la Placa de Cocción de Cerámica Espátula para Placa de Cocción ...

Page 53: ...49 2000682 Rev 0 25 ESPAÑOL NOTAS ...

Page 54: ...Si tiene un problema con este producto por favor comuníquese al 1 877 337 3639 para solicitar el nombre y número telefónico del centro de servicio al cliente autorizado más cercano NECESITA UNA PRUEBA DE COMPRA FECHADA NÚMERO DE MODELO Y DE SERIE PARA EL SERVICIO DE LA GARANTÍA ...

Reviews: