background image

Using process

Using process

 Disposal after washing 

When washing, lint filter must be used
After using, please clean it in time.

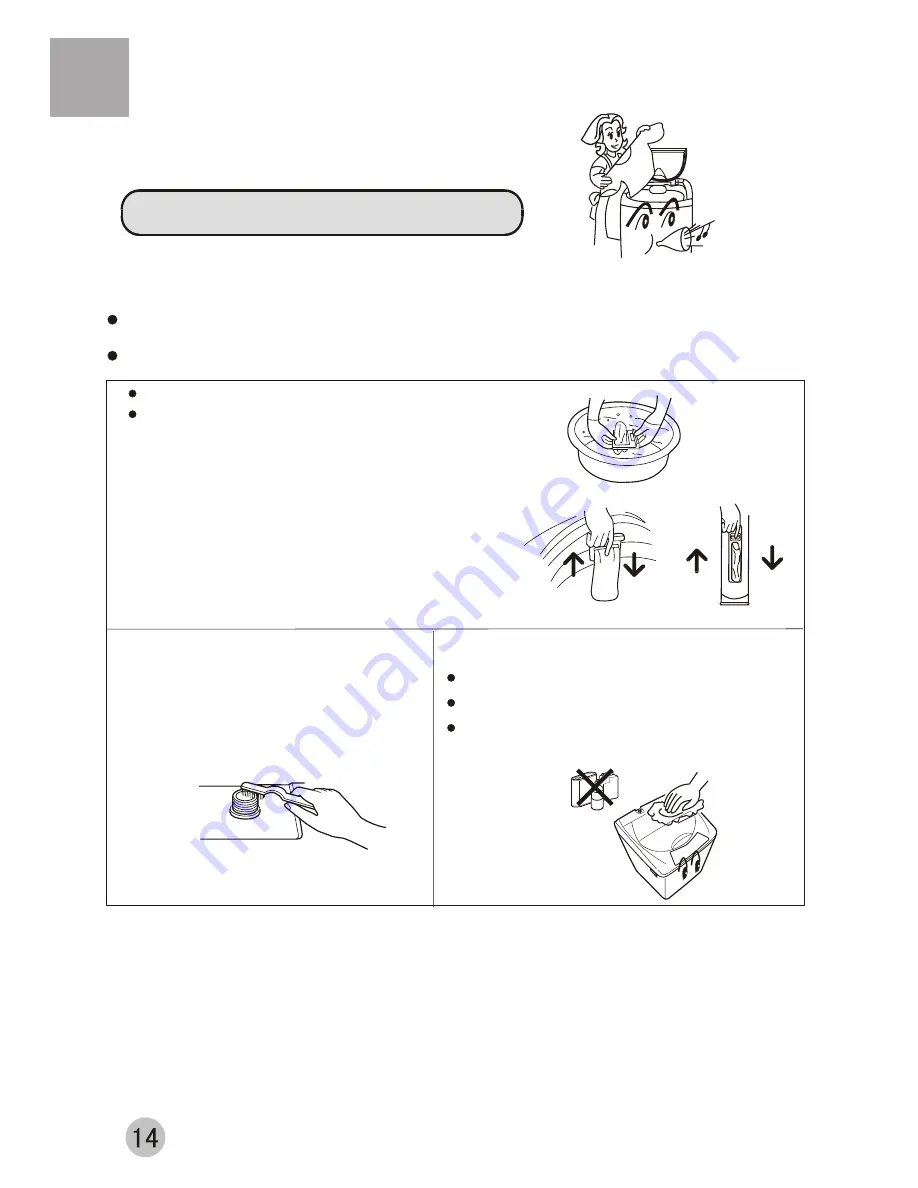
Lint filter:
1.

Pull upward to detach

2.Clean the lint
   Put it in water and clean while it is still wet. 
  (See to Figure 1).

3.

Press downward to assemble.

1.After washing, close the water faucet.  ( If needed, you can dismantle the water inlet hose).

7

After using, please clean the lint and foreign materials of the lint filter etc. in time. Otherwise it may influence 
your using the machine.

Please first pull off the power plug from the receptacle before cleaning.

5.Wipe off the water drops on the surface of the machine and inside the tub. Open the top lid for some time (about 1 hour), 
   then close the top lid.

4.Hang up the power cord and drain hose.

3.Be sure to pull off the power plug before maintenance.

2.Do not store water in the washing machine for a long period.  Drain  the  water  completely after each using.

Clean

Figure 1

Figure 2

Pull down

Put up

The filter screen of the water inlet 
valve is likely to be blocked by 
foreign materials and influence the 
water inlet. Please clean it with
brush every two months.

If the cabinet is dirty, wipe it with wet cloth

Do not flush it directly with water.

Wipe it with neutral detergent.

Do not wipe it with thinner, petrol, alcohol

etc.

Thinner

Alcoho

l

Petrol

After Finishing wash
alarm automatically

The washing machine cuts off the power supply
automatically when wash cycle ends.

6   Finish washing

Pull down

Put up

Summary of Contents for XQB50-10A

Page 1: ...Automatic Washing Machine XQB50 10A User s manual This manual is for Please read this manual carefully before using Retain it for future reference ...

Page 2: ...ll the water inlet hose 5 Preparation before washing 6 Put in the laundries 7 Put in the detergent 8 Use the operation buttons 9 Close the top lid 13 Finish washing 14 Disposal after washing 14 Trouble shooting Answer to questions 15 Packing list 16 Specifications 17 Contents Using process ...

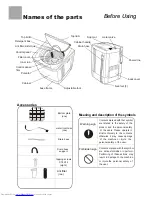
Page 3: ...of the user Contents marked with that symbol are actions forbidden to perform Performing of those actions may result in damage of the machine or injure the personal safety of the user Accessories Bottom plate one water inlet hose one ST4X16 tapping screws eight Lint filter two Adjustable foot fixed foot 3 back cover Cabinet base frame Drain hose Control panel film Control panel Filter cover Power ...

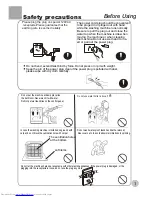
Page 4: ...not block the ventilation hole with carpet Do not let the machine share one receptacle with other electric appliances If the power plug is damaged or the plugging into the receptacle is loose do not use the plug any more Do not wash water proof laundries like the raincoat bike covers etc to avoid abnormal vibrations in spinning Do not use water hotter above 50 C Do not put the machine at damp plac...

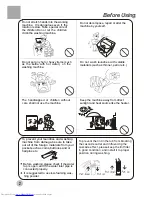
Page 5: ...rous even if the rotation is slow Take special care of the children Do not let the children climb the washing machine Petrol Thinner To prevent your laundries and washing machine from damage be sure to take out all of the foreign materials from your pocket such as coins buttons sand or hairpins etc Before washing please check if the water tap is open and if the water inlet pipe is connected proper...

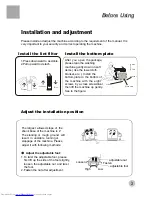
Page 6: ...e 1 Press downward to assmble 2 Pull upward to detach 1 To twist the adjustable foot please first lift up the side of the foot slightly loosen the adjustable nut and twist the foot 2 Fasten the nut after adjustment Loosen Fasten High Low adjustable nut adjustable foot Install the bottom plate After you open the package please lean the washing machine gently down on soft items like the towel cloth ...

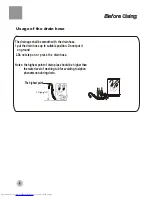
Page 7: ... drain hose 1 put the drain hose up to suitable position Do not put it on ground 2 Do not step on or press the drain hose Notes the highest point of drain pipe should be higher than the water level of washing tub for avoiding to siphon phenomenon during drain The highest point 0 8m H 1 2m ...

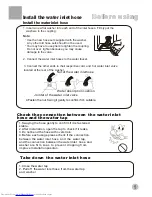
Page 8: ...water inlet valve located at the rear of the washer Check the connection between the water inlet hose and the water tap 1 Swaying the hose gently to confirm if it is fastened stable 2 After installation open the tap to check if it leaks 3 Do not bend the hose with overstrain 4 Before each usage please check if the connection between the water inlet hose and the water tap and the connection between...

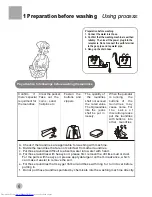
Page 9: ...ing with machine b Divide the laundries that are not colorfast from other laundries c Put those laundries difficult to absorb water into water with hand d For those laundries with heavy soil please first remove the dirt like mud or dust For the parts with heavy soil please apply detergent on them in advance which can make it easier to remove the soil e For those laundries that may get lint ball an...

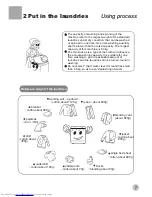
Page 10: ...ries under dry condition that can be washed or spinned in one time One time washing quantity shall be lower than the rated capacity The largest capacity of this machine is 5 0kg The thickness size type of the cloth will influence the actual washing capacity It is suitable for one time washing to put in reasonable amount of laundries and the laundries can be turned round in washing Do not select Hi...

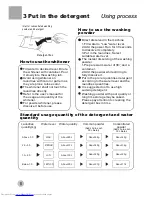
Page 11: ...el The instant dissolving of the washing powder 1 Prepare warm water of 30 and a container 2 Add the powder while stirring to fully dissolve it Put in the prorer quantities detergent according to the water level and the laundries quantities It is suggested not to use high sudsing detergent Washing powder with poor quality or long time storage maybe caked Please pay attention to cleaning the deterg...

Page 12: ... hrs during reservation period To indicate fault symbols for abnormal conditions see page 15 SURPLUS MIN Page 15 The user selects a suitable water level depending on the load WATER LEVEL button PROGRAM button RESERVATION you can select one or several of inse and Spin Press programs PROGRAM RESERVATION button StandardJ eans Gentle Quick R you can select of peservtion Press over 2 seconds the progra...

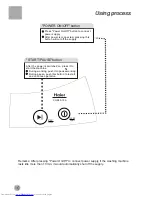
Page 13: ...sing process XQB50 10A POWER ON OFF START PAUSE After the power is switched on press it to start the machine During working push it to pause working During pause push this button to restart and continue operation START PAUSE button Press Power On Off button to connect power supply After power is connected pressing this button will cut off the supply POWER ON OFF button ...

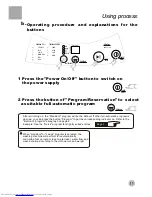
Page 14: ... according to the cloth nature and weight Page 9 Using process Using process b Operating procedure and explanations for the buttons 1 Press the Power On Off button to switch on the power supply 2 Press the button of Program Reservation to select a suitable full automatic program POWER ON OFF START PAUSE PROGRAM RESERVATION WATERLEVEL SOAK WASH RINSE SPIN PROCEDURE STATUS PROGRAM STATUS GENTLE QUIC...

Page 15: ...e and collar are dirty first soak then wash Standard Corresponding program JEANS GENTLE QUICK WASH WASH SPIN Wash bb Rinse cc Spin dd Soak AA Wash bb Rinse cc Spin dd Wash bb Rinse cc Spin dd Wash bb Rinse cc Spin dd Wash bb Spin dd Total Time About 39 44 About 64 89 About 34 About 10 About 13 18 About 9 Time list of each program minute When the laundries is lightly soiled that needs to be washed ...

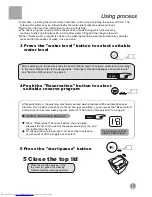
Page 16: ...n Water level to select a water level according to the load Please refer to the paragraphs Detergent standard dosages and water levels and Button of Water level on page 9 Page 9 Page 9 3 Press the water level button to select suitable water level After switching on the washing machine reserved wash program will be automatically set inactive If you desire a wash cycle to end at a reserved time you ...

Page 17: ...and inside the tub Open the top lid for some time about 1 hour then close the top lid 4 Hang up the power cord and drain hose 3 Be sure to pull off the power plug before maintenance 2 Do not store water in the washing machine for a long period Drain the water completely after each using Clean Figure 1 Figure 2 Pull down Put up The filter screen of the water inlet valve is likely to be blocked by f...

Page 18: ... plug tightly Trouble shooting Answer to question Does the water level arrive at the set water level Affusion to the set water level Is the power plug loose Insert the power plug tightly Is the top lid closed Close the top lid Are the laundries put orderly Put the laundries orderly Not spin Not wash Buzzing upon reservation starts Nixie tube indicates E0 Safety switch actuates not spin after self ...

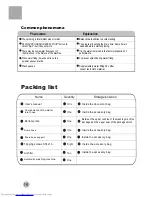
Page 19: ... inspection of performance Common phenomena Phenomena Explanation Balance the laundries to avoid slanting The program is setting the drain time Some time is needed before it starts spinning To prevent splash during water filling The spinning is intermittent when it starts While water filling in wash and rinse the pulsator pauses rotation There may be some water flowing out of the drain hose in the...

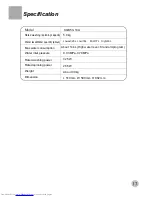
Page 20: ...sumption Rated washing power Rated spinning power Weight Dimension 5 0kg About 144L High water level Standard program 0 03MPa 0 78MPa 325W 285W About 39kg L 510mm W 500mm H 882mm Model XQB50 10A Specification Specification Lowest 20L Low 30L Mid 37L High 48L Water inlet pressure ...

Reviews: