12 / 47
Hakki Pilke 50 Pro
Translation
Version 1-2018
6.
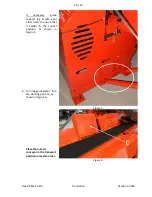
Lower the splitting
support arch to the
working position and
lock it with latch F.
7.
Finally, insert support
arch locking pin G and
pin H, as shown in Figure
9b.
Figure 9b
Place the out-feed conveyor in the transport position as follows:
1.
Turn the splitting groove support arch to the transport position, by performing steps 6 and 7 in
reverse (Section 3.1.2).
2.
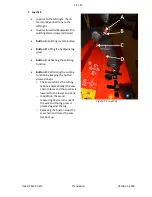
Release lock C of the conveyor’s upper section (Figure 9) and lower the conveyor to the lowest
possible
position with lever D, as shown in Figure 10.
3.
Turn the conveyor belt’s support bar E (Figure 9) on top of the belt and then turn the upper
section of the conveyor on top of the lower section with the handle(s) B (Figure 8).
Note! If
necessary, have two people on either side of the conveyor to lift it!
4.
Turn the conveyor to the middle position with lever D (Figure 10).
5.
Lift the conveyor until it locks into the raised position. Ensure that lock A connects firmly. Ensure
that the protective strip of the splitting groove is retracted in the front.
Note! Do not stand on the out-feed conveyor!


