28 / 48
Hakki Pilke 55 Pro
Translation
Version 3-2022
4.6.
After use
1.
After you have finished making firewood, stop the out-feed conveyor, shut down the machine and
remove the firewood from the splitting groove and conveyor.
2.
Ensure that the machine has not been damaged.
3.
Ensure that the machine can be moved safely off the processed firewood.
4.
Clean the machine.
If you will not be using the firewood processor for a while, do the following:
5.
Store the machine according to the instructions in Section 10.
5.
Machine maintenance
The machine must be disconnected from its power source before any maintenance, adjustment,
replacement or cleaning measures. Only use spare parts that are supplied by the manufacturer or your
retailer. If the guards of the machine have to be removed for maintenance, they must always be reattached
before the machine is activated. After maintenance and adjustment measures, the machine must be test
run according to the instructions in Section 4.1.
5.1.
Cutting blade and drive end
If the cutting blade of the machine does not penetrate the wood properly or the cut is skewed, the cutting
chain is most likely blunt or the saw bar is bent.
The most common cause for problems with cutting logs is
an unevenly dulled saw chain which veers 5
–
10 cm to either side and causes the saw bar to stop.
It is a
good idea to keep a replacement chain on hand, so that you do not need to interrupt your work to sharpen
the chain.
5.1.1.
Replacing and tensioning the saw chain
The Hakki Pilke 55 Pro firewood processor comes standard with a patented AC10
™
automatic and
hydraulically powered saw chain tensioner. When the machine is running, the hydraulic cylinder pushes the
saw motor backwards with a constant force, keeping the saw chain’s tension optimal. The o
perator does
not need to worry about the saw chain’s tension.
Replace the saw chain, as follows:
1. Turn off the machine, disconnect it from its power source and open the left and right guard.
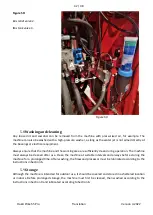
2. Turn lever B (Figure 9) to the OFF position to release the pressure in the automatic cutting chain
tensioner.
3. Pull the cutting chain downwards at the middle of the beam. This will loosen the chain and allow you to
remove it.
Note! Always wear cut protection gloves when handling the saw chain.
4. Install the new saw chain and ensure that the cutting teeth come first in relation to the rotating direction.
5. Turn lever B in Figure 9 to the ON position.
6. Close the machine guards and turn on the machine. This will automatically tension the cutting chain to
the right tension and raise the saw bar.
To check the tension of the cutting chain, wear protective gloves and pull the lower edge of the chain at
the middle of the beam. The tension is correct when you cannot pull a drive tooth to a fully visible position
with moderate force, but the chain moves on the bar when pulled with a tool.


