64k- or 32k-color Type
A2-1
A2
3D
P
a
rts
Appendix 2 3D Parts
The 3D parts provided by Hakko Electronics will make parts placed on screens seem more real.
This chapter explains the procedure and precautions for 3D parts settings in the course of screen
creation.
The following explanation slightly varies with the color types selected for the individual edit models.
According to your color type setting ([System Setting]
→
[Edit Model Selection]
→
[Color]), read the
corresponding section in this chapter.
For information on the features of parts, refer to the V8 Series Reference Manual.
64k- or 32k-color Type
This section explains the available 3D parts and the necessary settings. Please familiarize yourself
with these.
* For the 128-color type, refer to “128-color Type” (page A2-17).
Switch / Lamp
Available Parts
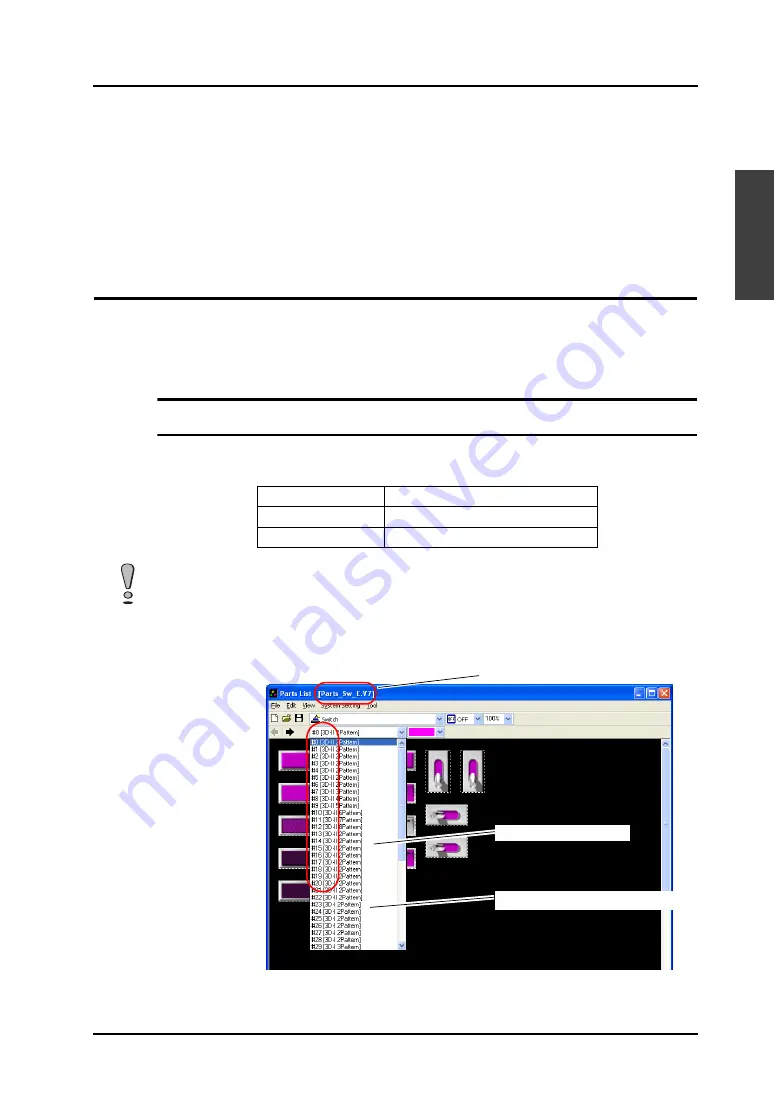
You may select 3D parts from the [Parts List] or from the [Change Part] in the item dialog.
The following parts files are provided.
Selection from [Parts List]
* Using parts with “II” (such as “3D-II”) in their comment fields is recommended.
Parts with “I” are for 128-color type (V6-compatible).
Parts
Parts File
Switch
Parts_Sw.V7
Lamp
Parts_Lp.V7
The parts files are stored in the “***\V-SFT V5\Parts” folder.
As for the “Parts” folder, “Parts3D” folder, and bitmap files in the folder, do not move their locations and
change their names.
Parts file name
“II”: 64k-/32k-color type
“I”: 128-color type (V6-compatible)
Summary of Contents for V8 series
Page 1: ...V8series Operation Manual...
Page 2: ......
Page 4: ......
Page 12: ......
Page 16: ......
Page 30: ......
Page 45: ...1 3 Starting 1 15 1 Introduction 5 The selected screen data file is opened...
Page 50: ...1 4 Quitting 1 20 Please use this page freely...
Page 92: ...2 6 Screen Composition 2 42 Please use this page freely...
Page 263: ...4 4 Graphic Properties Setting 4 59 4 Drawing Example of Item Dialog Line Box Text...
Page 264: ...4 4 Graphic Properties Setting 4 60 Please use this page freely...
Page 348: ...5 18 Multi language 5 84 Please use this page freely...
Page 406: ...6 7 After Transfer Communication with PLC 6 58 Please use this page freely...
Page 413: ...7 1 Overview 7 7 7 Print Print Example Screen Output List Output...
Page 414: ...7 1 Overview 7 8 Table Print Screens Graphic library...
Page 415: ...7 1 Overview 7 9 7 Print System Setting Memory Use List...
Page 416: ...7 1 Overview 7 10 Use Cross reference Message For the graphic library...
Page 417: ...7 1 Overview 7 11 7 Print Animation...
Page 418: ...7 1 Overview 7 12 Please use this page freely...
Page 610: ...After Completion of Parts Editing A3 30 Please use this page freely...


