

21
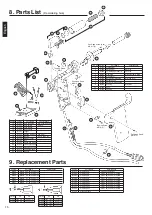
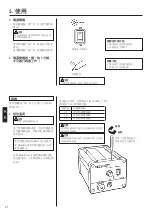
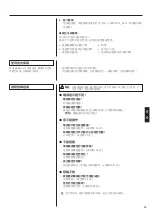
電源指示燈不亮
1. 電線組件是否連接妥當 ?
2. 保險絲是否熔斷 ?
吸嘴不熱
1. 電線組件是否連接妥當 ?
2. 發熱元件是否斷裂 ?
電源指示燈著亮
吸嘴發熱
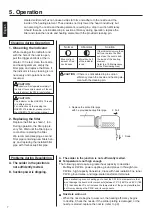
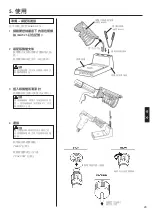
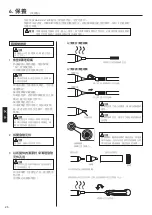
5 電源開關
. 電源開關按 " 關 " 時 , 才可將插座通
電源。
注意
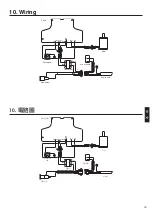
整臺吸錫槍都選用導電材料製成 , 因此
各部件都應接地。
. 電源開關按 " 開 " 時 , 電源指示燈會
著亮。
. 電源開關按 " 開 " 時 , 吸嘴開始發熱。
6 電源開關按 " 開 " 後 3 分鐘 ,
才可進行吸錫工作。
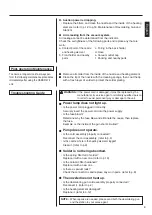
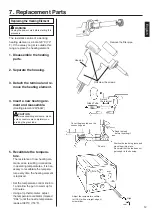
5. 使用
吸錫
電源開關按 " 開 " 後 3 分鐘 , 才可開始
吸錫工作。
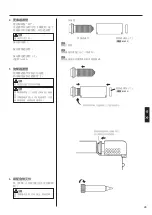
1 設定溫度
注意
工作時 , 應儘量調低溫度。
. 為了更精確調節溫度 , 先用焊鐵溫度
計測量吸錫溫度 , 然後依此調節溫控
鈕的溫度。
我們建議使用 HAKKO 191 溫度計 ,
或 HAKKO 192 焊鐵測試器 , 以測
量吸嘴溫度。
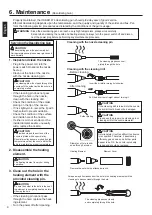
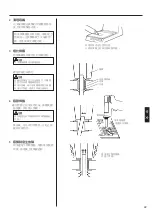
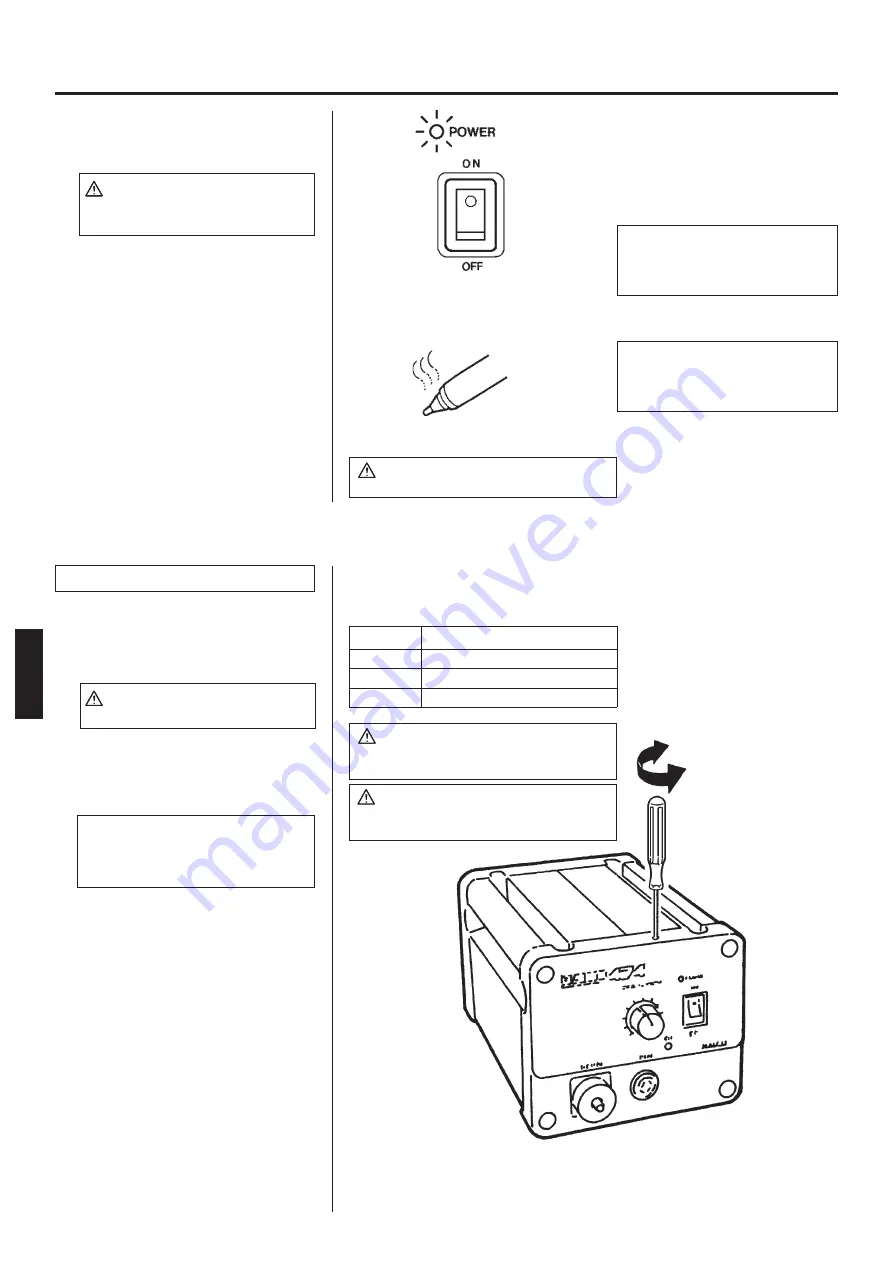
. 拴緊 HAKKO 474 控制臺頂端的溫控
定位螺絲夾 ( +字帽螺絲 ), 以鎖定溫
控鈕。
鎖緊
鬆開
使用十字帽螺絲起子 ,
拴緊溫控定位螺絲夾。
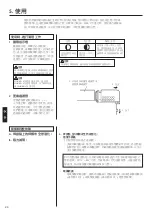
溫控鈕的溫度 , 可調節在 380 至 480℃之間。
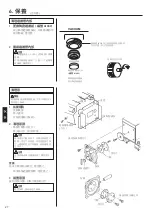
請參照下表 , 調節溫控鈕 :
注意
不使用吸錫槍時 , 應插入吸錫槍支架內。
注意
切勿將清潔針插入溫控定位螺絲夾的孔徑裡 ,
這會損壞吸錫槍。
注意
切勿將清潔針插入溫控定位螺絲夾的孔徑裡 ,
這會損壞吸錫槍。
溫控鈕
1-2
3-4
5-6
印刷電路板
單面印刷電路板
穿孔印刷電路板
多層印刷電路板
中 文
Summary of Contents for 474
Page 19: ...3 18 1 2 M4 25 380 480 HAKKO...
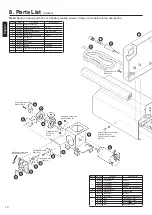
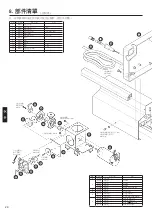
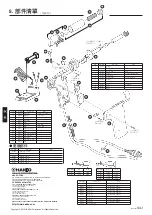
Page 21: ...20 5 B1094 B1095 HAKKO 474 1 M4 25 2 3 4 IRON VACUUM...
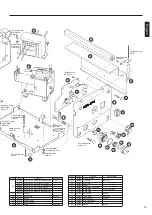
Page 22: ...21 1 2 1 2 5 6 3 5 3 1 HAKKO 191 HAKKO 192 HAKKO 474 380 480 1 2 3 4 5 6...
Page 23: ...22 2 3 4 5...
Page 24: ...23 1 HAKKO 475 HAKKO 475 HAKKO 475 2 1 3 3 2 1 A B A 70 80 25 25 5 25...
Page 25: ...24 HAKKO 474 B 25_26 20 25 26 24 20 28 a b c d e f...
Page 26: ...6 25 HAKKO 474 1 2 3...
Page 27: ...26 6 A1033 A1033 4 A1033 5...
Page 28: ...27 1 A1009 2 1 2 3 A1009 S20 6 VACUUM...
Page 29: ...28 7 23 2 4 1 2 3 4 24V 50W 5 1 3 CAL 380 CAL...


