43
7.2 Mount/Dismount
Cylinder
Broom
The cylinder broom is accessible from
the left side of the machine and is to
be dismounted as follows:
- Lower cylinder broom
- Pull ignition key and protect by en-
gaging parking brake
- Open lateral flap
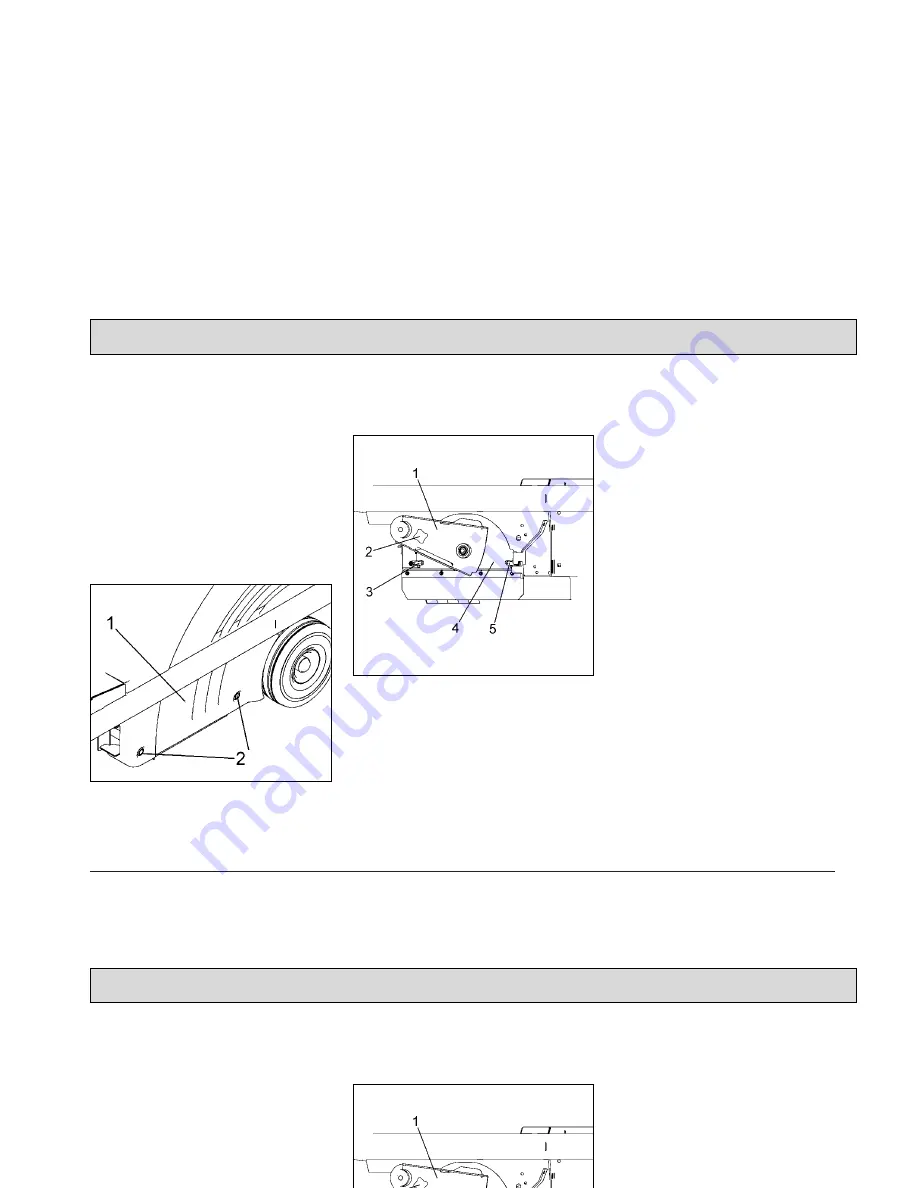
- Remove cover
Remove cover
- Open locks (Fig. 15/2) by enclosed
square spanner (counter-clockwise)
- Remove cover (Fig. 15/1)
Dismount cylinder broom
- Loosen star-shaped knob (Fig. 16/2)
and remove
- Remove cylinder broom seating
(Fig. 16/1)
- Turn handle (Fig. 16/3 and 5) up-
wards and unlock
- Remove plate with sealing strip (Fig.
16/4)
- Remove cylinder broom by pulling.
Before commencing any work on the
electric system disconnect the battery
plug.
7.3
Adjust Sweeping Track
An adjustment device allows adapta-
tion to the different sweeping condi-
tions. The cylinder broom has to be
adjusted for normal use and with
regard to a low degree of wearing as
described in the following.
Check the broom adjustment on level
ground as follows.
Maintenance/Service
Fig.15
Fig.16


