134
06-1491-00-12.fm
Attachments and Options
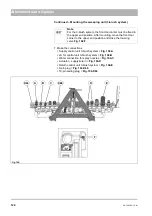
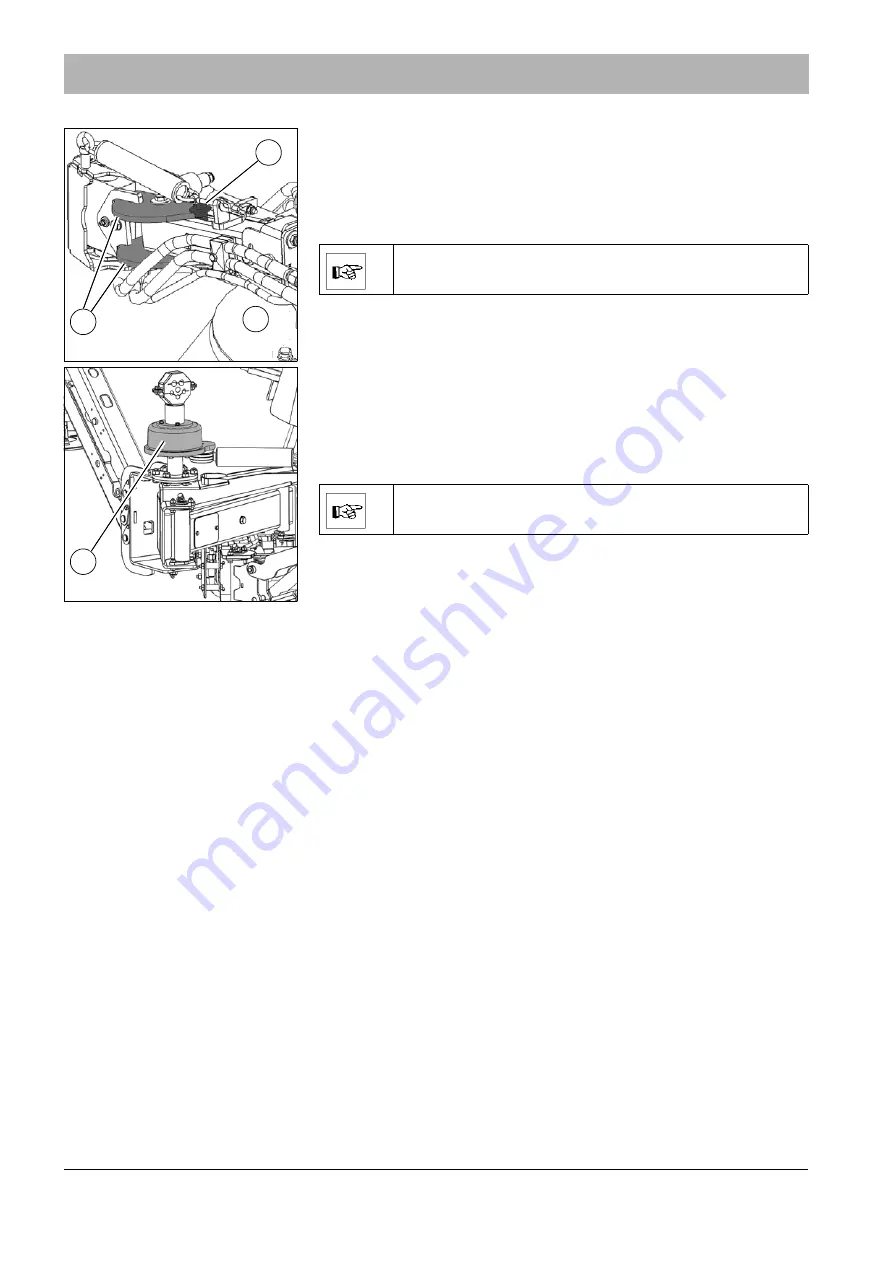
Checking the overload protection (2-brush system)
The overload protection device
Fig. 121-A
is located on the brush arm of
the sweeping unit
Fig. 121-12
and has the task of protecting the sweeping
unit in a collision. The overload protection device is unlocked in a collision.
Before you can carry on working, you must lock the brush arm again. To
do this, swing the brush arm until the overload protection device
Fig. 121-B
engages.
Checking the overload protection (3-brush system)
The overload protection device
Fig. 121-A
is located on the brush arm of
the sweeping unit and has the task of protecting the sweeping unit in a
collision. The overload protection device is unlocked in a collision. Before
you can carry on working, you must lock the brush arm again. To do this,
use the joystick to swing the brush arm until the overload protection
device engages.
Fig. 121:
B
A
Note
Check the sweeping unit for damage!
Fig. 122:
A
Note
Check the sweeping unit for damage!
Summary of Contents for Citymaster 1600
Page 22: ...22 01 1491 00 12 fm Safety Instructions G A B D E F Fig 3 C F C E C D G A B A...
Page 26: ...26 02 1491 00 11 fm Operation Fig 5 25 23 16 18 17 19 22 21 20 24 26 27...
Page 30: ...30 02 1491 00 11 fm Operation Fig 7 62 63 61 67 55 50 51 54 53 52 58 57 59 60 65 64 66 68 56...
Page 32: ...32 02 1491 00 11 fm Operation Fig 8 75 69 78 73 72 79 80 81 82 83 74 77 70 71 76 84...
Page 85: ...04 1491 00 11 fm 85 Technical Data 4 Technical Data Fig 80 3830 1600 941 1210 975 1964...
Page 146: ...146 06 1491 00 12 fm Attachments and Options 6 1 5 Technical data Fig 144 2215 4510 1580 2250...
Page 220: ...220 06 1491 00 12 fm Attachments and Options...

