


11
Starting Up
2
Starting Up
2.1
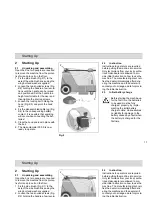
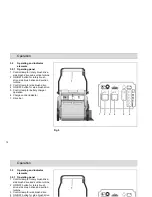
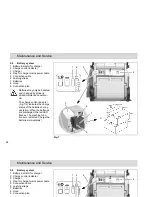
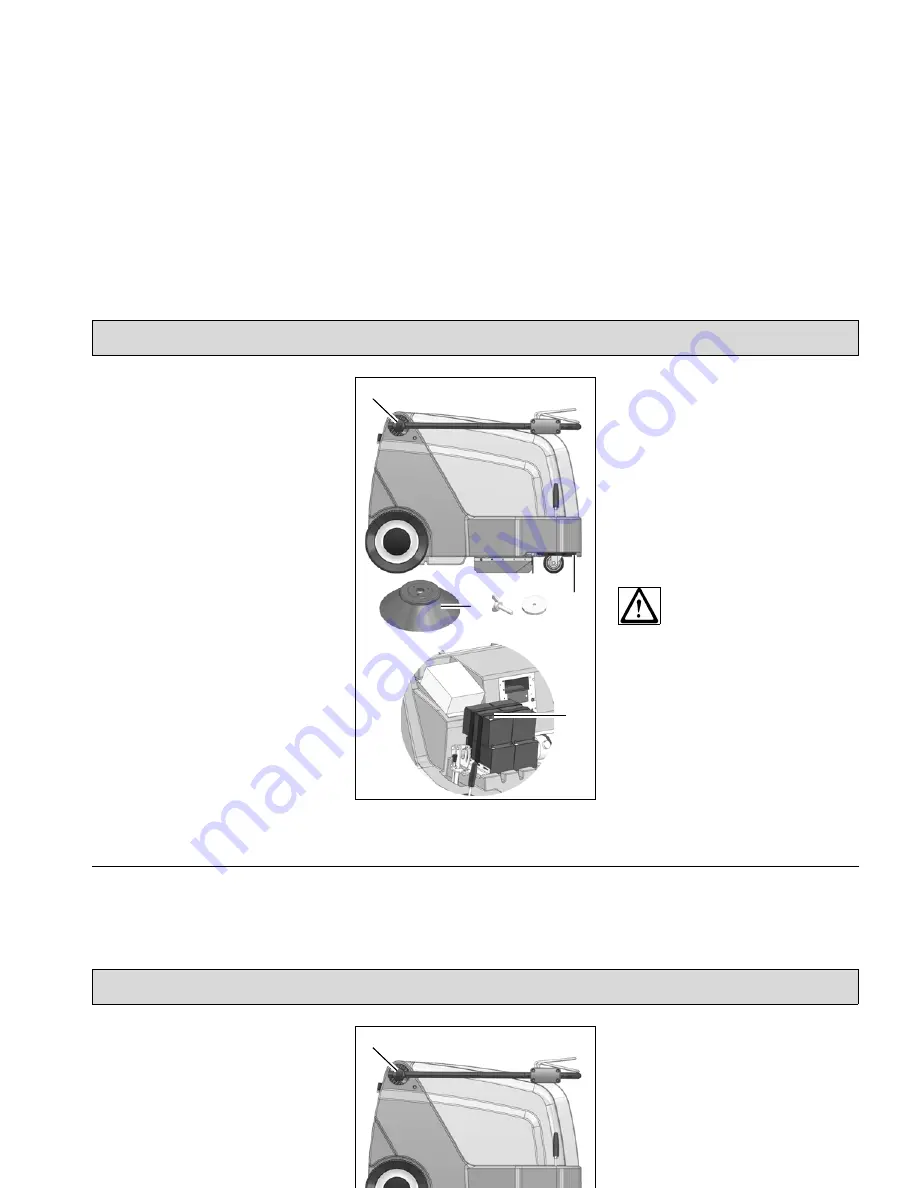
Unpacking and assembling
Open the box, two people are required
to remove the machine from the protec-
tive foil and place it on the floor.
1. Fix the side brush (Fig. 2/1) to the
axle of the side brush drive using the
wing bolt and washer supplied.
2. Loosen the two knurled screws (Fig.
2/2) holding the handle a few revolu-
tions until the handle can be raised
and positioned. Set the handle to a
height comfortable for the user and
then tighten the knurled screws.
3. Loosen the locking bolt holding the
hood (Fig. 2/3) and pivot the hood
open.
4. Fix the disassembled cable lug (Fig.
2/4) to the corresponding battery
contact. It is possible that sparking
will occur when connecting the bat-
teries!
5. Close the hood and lock in place with
the bolt.
6. The Hako Hamster 500 E is now
ready to operate.
Fig.2
2.2
Instruction
Instructions to operators are required
before putting the machine into service.
Only technicians from your local, autho-
rized Hako dealer are allowed to pro-
vide initial instruction on how to use the
machine. The manufacturing plant noti-
fies the dealer immediately after deliv-
ering the machine and the dealer will
contact you to arrange a date for provid-
ing the initial instruction.
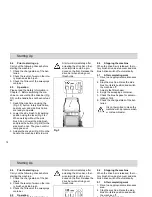
2.3
Initial battery charge
Before starting the machine up
for the first time, the batteries
to be used must be fully
charged, properly, by imple-
menting the initial battery
charge routine. Hako assumes
no liability for damage to the
battery caused by a fault when
the battery is charged for the
first time.
4
1
2
3
11
Starting Up
2
Starting Up
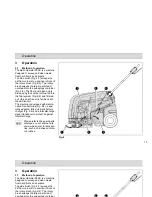
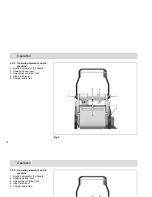
2.1
Unpacking and assembling
Open the box, two people are required
to remove the machine from the protec-
tive foil and place it on the floor.
1. Fix the side brush (Fig. 2/1) to the
axle of the side brush drive using the
wing bolt and washer supplied.
2. Loosen the two knurled screws (Fig.
2/2) holding the handle a few revolu-
tions until the handle can be raised
and positioned. Set the handle to a
height comfortable for the user and
then tighten the knurled screws.
3. Loosen the locking bolt holding the
hood (Fig. 2/3) and pivot the hood
open.
4. Fix the disassembled cable lug (Fig.
2/4) to the corresponding battery
contact. It is possible that sparking
will occur when connecting the bat-
teries!
5. Close the hood and lock in place with
the bolt.
6. The Hako Hamster 500 E is now
ready to operate.
Fig.2
2.2
Instruction
Instructions to operators are required
before putting the machine into service.
Only technicians from your local, autho-
rized Hako dealer are allowed to pro-
vide initial instruction on how to use the
machine. The manufacturing plant noti-
fies the dealer immediately after deliv-
ering the machine and the dealer will
contact you to arrange a date for provid-
ing the initial instruction.
2.3
Initial battery charge
Before starting the machine up
for the first time, the batteries
to be used must be fully
charged, properly, by imple-
menting the initial battery
charge routine. Hako assumes
no liability for damage to the
battery caused by a fault when
the battery is charged for the
first time.
4
1
2
3


