background image

12

Starting Up

2.4

Prior to starting up

Carry out the following checks before 
starting the machine:
1. Check the charge status of the bat-

teries.

2. Check the levels of wear on the rota-

ry brush and side brush.

3. Check the fill level of the sweepings 

container.

2.5

Operation

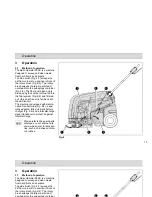
Please read the Safety Information in 
Chapter 1. Before switching the ma-
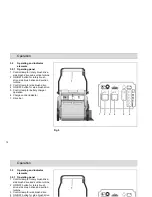
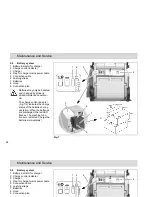
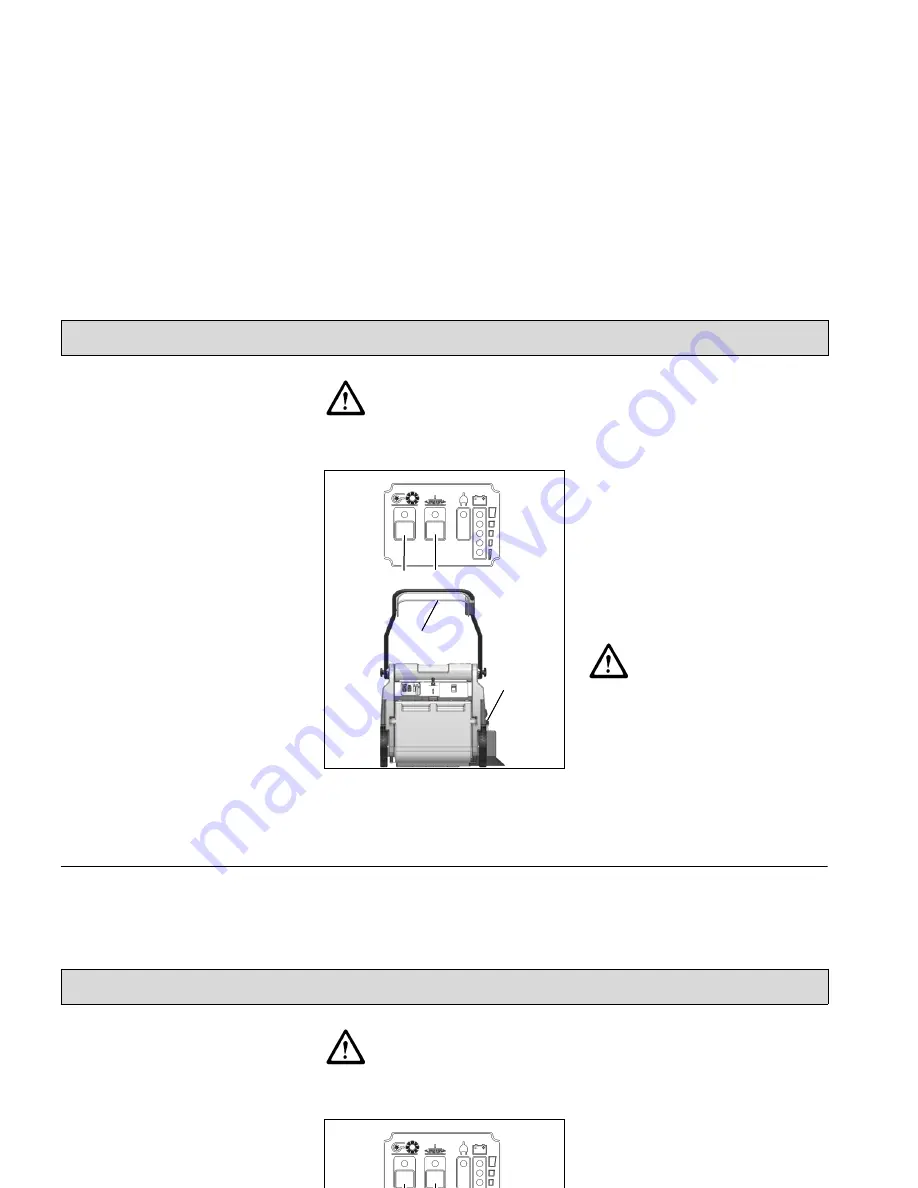
chine on, ensure that the drive bar (Fig. 
3/3) on the handle has not been actuat-
ed. 
1. Switch the machine on using the 

(Fig. 3/1) button: rotary brush drive, 
dust vacuum and side brush drive 
are ready to operate.

2. Lower the side brush to its working 

position using the lever (Fig. 3/4). 
When working without the side 
brush: do not lower the side brush 
and press the button (Fig. 3/2) for the 
side brush once. The green control 
lamp goes out.

3. Actuate the drive bar (Fig. 3/3) on the 

handle: the machine starts to work.

Start work immediately after 
actuating the drive bar, other-
wise imprints could be pro-
duced on the floor. Release the 
drive bar when driving over 
thresholds.

Fig.3

2.6

Stopping the machine

When the drive bar is released, the ro-
tary brush drive, dust vacuum and side 
brush drive switch off automatically.

2.7

After completing work

1. Drive to an appropriate maintenance 

area.

2. Stop the machine. Raise the side 

brush to its idle position and switch 
the machine off. 

3. Actuate the filter shaker.
4. Empty the sweepings container.
5. Check the brush space for accumu-

lations of dirt.

6. Check the charge status of the bat-

teries.

It is not permitted to clean the 
machine with a pressure wash-
er or steam blaster.

2

1

3

4

Summary of Contents for Hamster 500 E

Page 1: ...Instruction manual Hako Hamster 500 E 6258 20...

Page 2: ...y use beyond this is regarded as improper use The manu facturer is not considered liable for any damage resulting from improper use the user is solely responsible for all the risks Intended use also i...

Page 3: ...the machine immediately on de livery for signs of transport damage Replacement will be made when confir mation is provided immediately by the German Federal Railways Deutschen Bahn AG or freight carr...

Page 4: ...emoving the batteries 27 5 4 5 Inserting the batteries 27 5 4 6 Disposing of batteries 27 5 5 Side brushes 28 5 5 1 Changing the side brush 29 5 5 2 Setting the sweeping pattern 29 5 6 Rotary brush 30...

Page 5: ...tuation caused by misuse inaccurate adherence of instructions or pre scribed work routine CAUTION the machine important information on handling the machine in order to maintain operability Ecological...

Page 6: ...with all adjust ment operating and control ele ments as well as their respective function It is too late to do this when the machine is actually in operation Always wear heavy duty non slip footwear...

Page 7: ...es sary training and in accordance with the electrical engineering regula tions The machine s electrical equipment must be inspected checked at regu lar intervals Defects such as loose connections and...

Page 8: ...symbol with the crossed out bin these batteries must not be disposed of in domestic waste The return and recycling of batteries must be agreed on with Ha ko s authorized dealers in accor dance with 8...

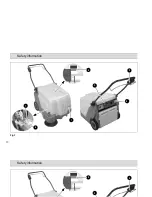
Page 9: ...and observe the operating manual Fig 1 4 Maximum permissible gradient Fig 1 5 Wear compensator for side brush Fig 1 6 Wear compensator for rotary brush Fig 1 7 Safety information 1 7 Labels on the ma...

Page 10: ...10 Safety information Fig 1 1 7 6 2 4 3 5 Safety information 2 3 5...

Page 11: ...struction on how to use the machine The manufacturing plant noti fies the dealer immediately after deliv ering the machine and the dealer will contact you to arrange a date for provid ing the initial...

Page 12: ...the drive bar is released the ro tary brush drive dust vacuum and side brush drive switch off automatically 2 7 After completing work 1 Drive to an appropriate maintenance area 2 Stop the machine Rai...

Page 13: ...back into the ambient air The machine is equipped with mainte nance free batteries Fig 4 5 a spe cially adapted fully automatic battery charger Fig 4 6 and a total discharge signal transducer to prot...

Page 14: ...brush drive 4 ON OFF button for side brush drive 5 Control lamp for battery charger operation 6 Charge control indicator 7 Drive bar Fig 5 2 1 3 4 5 6 7 Operation 3 2 Operating and indicator elements...

Page 15: ...Charge control indicator Fig 5 6 During the charging process the ma chine s electronics system controls the machine is not switched on inadvertent ly and indicates the charge status The battery charg...

Page 16: ...le 2 Shaking device lever 3 Sweepings container lock 4 Side brush lever 5 Charger cable flap Fig 6 1 2 3 4 5 1 Operation 3 2 2 Operating elements on the machine 1 Knurled screws for the handle 2 Shaki...

Page 17: ...to remove the sweepings container Side brush lever Fig 6 4 Use the lever to lower or raise the side brush Charger cable flap Fig 6 5 The battery charger cable is located be hind the flap to the right...

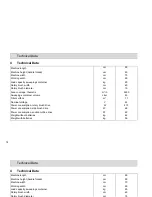
Page 18: ...Sweepings container volume Liter 40 Filter surface m 1 1 Nominal voltage V 24 Power consumption rotary brush drive W 210 Power consumption side brush drive W 48 Power consumption suction turbine drive...

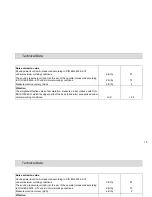
Page 19: ...bration The weighted effective value of acceleration measured in accordance with DIN EN ISO 5349 to which the upper parts of the body hand arm are exposed under normal working conditions m s 2 5 Techn...

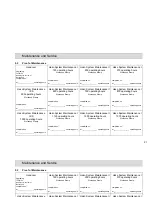
Page 20: ...ainte nance instructions in the operating manual daily and weekly The driver operator receives proper instruction when the machine is delivered Hako system maintenance I every 125 operating hours Comp...

Page 21: ...Maintenance I 875 operating hours Workshop Stamp completed on at _________________ operating hours Hako System Maintenance III S 1000 operating hours Workshop Stamp completed on at _________________...

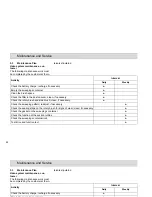
Page 22: ...rush and side brush clean if necessary o Check the sweeping pattern readjust if necessary o Check the sealing strips on the rotary brush for signs of wear clean if necessary o Check the gasket on the...

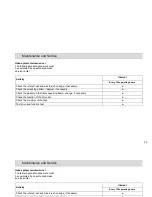
Page 23: ...weeping pattern readjust if necessary o Check the gasket on the filter supporting frame change if necessary o Check the function of the drive bar o Check the condition of the tires o Test drive and fu...

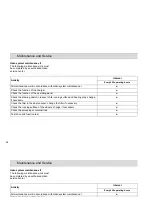
Page 24: ...he steering castor in respect of its running surface and bearing play change if necessary o Check the filter in the dust vacuum change the filter if necessary o Check the running surface of the wheels...

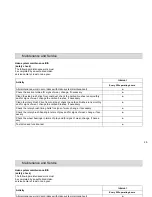
Page 25: ...n brushes if necessary o Clean the rotary brush drive from coal dust check the carbon brushes run smoothly and for signs of wear change the carbon brushes if necessary o Check the rotary brush timing...

Page 26: ...ance person nel The charge control indicator Fig 7 2 indicates the charge status of the batteries during operation When the batteries are discharged the red LED flashes The machine func tions are rest...

Page 27: ...1 Install the two lower batteries in the battery holder in accordance with Figure 7 2 Lay the rubber mat on the batteries 3 Place the other two batteries on the rubber mat 4 Tighten the lashing straps...

Page 28: ...Side brushes 2 Wing bolt 3 Carrier 4 Hood 5 Adjusting bolt 6 Counternut 7 Locking bolt Fig 8 1 3 2 5 4 6 7 Maintenance and Service 5 5 Side brushes 1 Side brushes 2 Wing bolt 3 Carrier 4 Hood 5 Adjust...

Page 29: ...brush to run while standing still for a short time 5 Switch the machine off raise the front a little and pull it back 6 Check the sweeping pattern com paring it with a clock viewed driving forward Whe...

Page 30: ...ealing strips 5 Sweeping pattern adjusting lever 6 Timing belt 7 Hood 8 Locking bolt Fig 9 2 3 1 4 4 4 4 5 6 7 8 Maintenance and Service 5 6 Rotary brush 1 Rotary brush 2 Fillister head self tapping s...

Page 31: ...hanged in the case of wear 1 Switch the machine off and lay it on its side 2 Remove all four sealing strips Fig 9 2 with holders 3 Loosen the screws in the holders and remove the damaged sealing strip...

Page 32: ...um 1 Filter 2 Sealing strip 3 Filter support frame 4 Shaking device 5 Wing bolts 6 Holder Fig 10 1 6 3 4 5 2 Maintenance and Service 5 7 Dust vacuum 1 Filter 2 Sealing strip 3 Filter support frame 4 S...

Page 33: ...f and remove the sweepings container 2 Unscrew the wing bolts Fig 10 5 Pivot the filter support frame Fig 10 3 down and remove it 3 Remove the filter from the filter sup port frame 4 Insert the correc...

Page 34: ...d Service 5 8 Sweepings container 1 Sweepings container 2 Locking mechanism 3 Seal 4 Handle Fig 11 1 3 2 4 Maintenance and Service 5 8 Sweepings container 1 Sweepings container 2 Locking mechanism 3 S...

Page 35: ...cking mechanism Fig 10 2 on the sweepings container Fig 10 1 up wards 2 Pull the sweepings container Fig 10 3 to the rear and out of the ma chine using the handle Fig 10 4 3 Pull the seal on the sweep...

Page 36: ...th hazard Never allow batteries to pollute the environment Risk of con taminating the ground and water In ac cordance with the symbol with the crossed out bin these batteries must not be disposed of i...

Page 37: ...ainer Bavendiek Director R D Name of the authorized person who compiles technical documents for Hako Ludger L ttel EC Declaration of Conformity corresponds to EC Directive 2006 42 EC Hako Werke GmbH H...

Page 38: ...re Umwelt Superior technology for a cleaner and better environment Hako Werke GmbH Stammwerk und Hauptverwaltung HeadquarterV Hamburger Str 209 239 D 23843 Bad Oldesloe 04531 806 0 Fax 04531 806 338 8...

Reviews: