27
Maintenance and Service
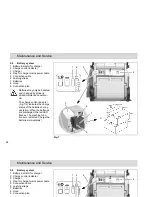
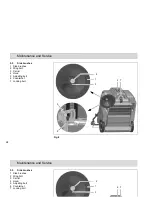
5.4.1 Charging batteries
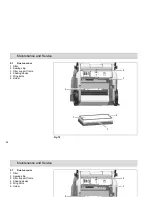
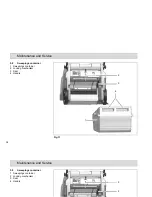
The charge control indicator (Fig. 7/2)
indicates the charge status of the bat-
teries during operation. The batteries
must be charged immediately the red
LED lights up. The batteries (Fig. 7/7)
are charged using the integrated bat-
tery charger (Fig. 7/3). The charger is
connected by means of the power cable
(Fig. 7/4). While the battery is being
charged, the battery indicator on the
charger (Fig. 7/1) lights up.
Before starting the machine up
for the first time, the batteries
to be used must be fully
charged, properly, by imple-
menting the initial battery
charge routine. Hako assumes
no liability for damage to the
battery caused by a fault when
the battery is charged for the
first time.
5.4.2 Total discharge signal trans-
ducer (TSG)
The machine is equipped with a total
discharge signal transducer to protect
the batteries against total discharge.
The total discharge signal transducer is
integrated in the electronics.
5.4.3 Servicing the driving batteries
Never leave discharged batteries lying
around; recharge them immediately!
For information on servicing driving bat-
teries, refer to operating manual 88-60-
2556.
5.4.4 Removing the batteries
1. Park the machine on a level area of
floor.
2. Switch off the machine.
3. Loosen the locking bolt holding the
hood (refer to Figure 2/3) and pivot
the hood open.
4. Slacken the lashing straps (Fig. 7/6).
5. Disconnect the connection cable
(Fig. 7/5) from the batteries and re-
move the batteries.
5.4.5 Inserting the batteries
Only the special batteries ap-
proved by Hako may be in-
stalled at the prescribed posi-
tion.
1. Install the two lower batteries in the
battery holder in accordance with
Figure 7.
2. Lay the rubber mat on the batteries.
3. Place the other two batteries on the
rubber mat.
4. Tighten the lashing straps (Fig. 7/6).
5. Connect the battery poles to the con-
nection cables in accordance with
the connection plan (Fig. 7/9).
It is possible that sparking will occur
when connecting the batteries! Check a
firm fit!
6. Close the hood (Fig. 7/8) and lock in
place with the locking bolt on the
frame.
5.4.6
Disposing of batteries
Used batteries with the recycling sym-
bol contain reusable commodities. In
accordance with symbol with the
crossed out bin, these batteries must
not be disposed of in domestic waste.
Return and recycling must be agreed
on with Hako's authorized dealer in ac-
cordance with § 8 BattV (Battery Direc-
tive)!

