7. Mechanical components
Sheet 73
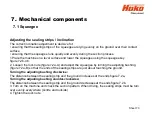
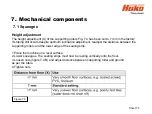
Adjusting the sealing strips / inclination
The correct inclination adjustment is decisive for:
• ensuring that the sealing strips of the squeegee are lying evenly on the ground over their contact
surface
• ensuring that the squeegee runs quietly and evenly during the suction process.
1.Place the machine on a level surface and lower the squeegee using the squeegee key
figure 7.2b -46.
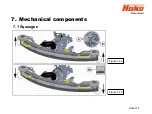
2. Loosen the lock nuts (figure 7.2a-A) and adjust the squeegee by turning the adjusting bushing
(figure 7.2a-B) so that the ends of the sealing strips are just about touching the ground.
Turning the adjusting bushing clockwise:
The distance between the sealing strip and the ground increases at the ends figure 7.2a.
Turning the adjusting bushing counter-clockwise:
The distance between the sealing strip and the ground decreases at the ends figure 7.2b.
3. Turn on the machine and check the suction pattern. When driving, the sealing strips must be turn
over evenly everywhere (centre and outside).
4. Tighten the lock nuts.
7.1 Squeegee
Summary of Contents for Scrubmaster B175 R
Page 37: ...3 Technical Data Sheet 37...
Page 38: ...3 Technical Data Sheet 38...
Page 39: ...3 Technical Data Sheet 39...
Page 40: ...3 Technical Data Sheet 40...
Page 41: ...3 Technical Data Sheet 41...
Page 42: ...3 Technical Data Sheet 42...
Page 43: ...3 Technical Data Sheet 43...
Page 44: ...3 Technical Data Sheet 44...
Page 46: ...4 1 Hako System Maintenance customer Sheet 46...
Page 47: ...4 1 Hako System Maintenance customer Sheet 47...
Page 48: ...4 2 Hako System Maintenance I Sheet 48...
Page 49: ...4 2 Hako System Maintenance I Sheet 49...
Page 50: ...4 2 Hako System Maintenance I Sheet 50...
Page 51: ...4 3 Hako System Maintenance II Sheet 51...
Page 52: ...4 4 Hako System Maintenance III S Safety Check Sheet 52...
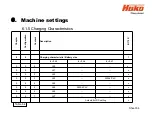
Page 65: ...6 Machine settings 6 1 6 Charging characteristics for integrated charger Sheet 65...
Page 74: ...7 Mechanical components Figure 7 2a Figure 7 2b Sheet 74 7 1 Squeegee...
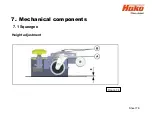
Page 76: ...7 Mechanical components Height adjustment Figure 7 4 Sheet 76 7 1 Squeegee...
Page 104: ...9 Drive 9 2 4 Steering angle sensor Figure 9 5 180 130 170 150 120 Folie 104...
Page 113: ...11 Battery charger 11 1 Operating manual Sheet 113...
Page 114: ...11 Battery charger Sheet 114 11 1 Operating manual...
Page 115: ...11 Battery charger Sheet 115 11 1 Operating manual...
Page 116: ...11 Battery charger Sheet 116 11 1 Operating manual...
Page 123: ...13 Notes Sheet 123...
Page 124: ...Sheet 124 13 Notes...

