


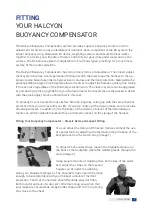


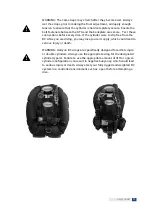

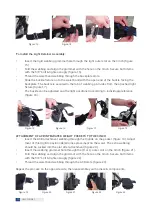

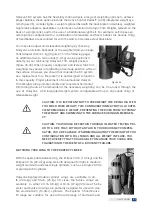

To finalize the fit of the harness shoulder straps, loosen the
straps enough to allow easy movement of the backplate.
Position the backplate for proper tank position, with the top
of the backplate high enough to touch by reaching behind
your head with either hand; if you can touch the backplate,
you should be able to reach your valves when your rig is fully
assembled (see image on the left). With the backplate in
position, tighten up the arm straps until you are able to fit two
or three fingers underneath the strap. You should be able to
easily slide the straps off of either shoulder. Be careful not to
leave excessive slack in the harness straps. An exceedingly
loose- fitting harness will allow the backplate to ride low on
your back, making it nearly impossible to reach your valves.
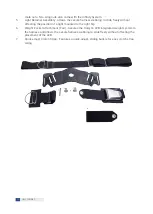
The crotch strap should be comfortable and allow you to reach your tanks. The waist belt
should fit as snug as is comfortable. Do not overtighten the waist belt so much as to restrict
breathing. When adjusting the waist belt, make sure to set the buckle so that it is off to your
right side. With the buckle in this position, the crotch strap is unable to accidentally open the
buckle. The waist belt buckle (and/or another buckle) can be used to hold your primary light
canister in place.
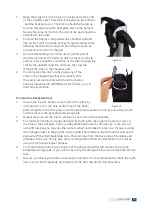
To adjust the crotch strap, buckle the waist strap without running it through the crotch strap.
Now pull the crotch strap up to the waist belt. Set the length so that the top of the crotch strap
loop extends a half-inch (12mm) over the top of the waist belt.
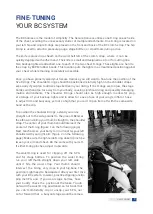
While standing on land, your BC should be snug but not uncomfortably tight. In the water your
harness should be snug enough to prevent notable motion of the cylinder as you change orien-
tation, but not too tight so as to bind or restrict your complete range of shoulder and arm move-
ment.
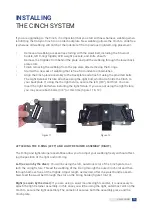
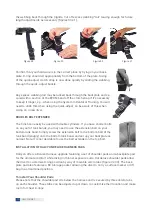
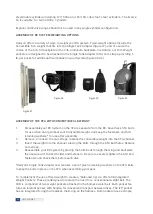
FITTING YOUR BUOYANCY COMPENSATOR - CINCH QUICK-ADJUST DESIGN
Adjustment of the Secure Harness while wearing the Cinch is quick and easy. Following similar
guidelines, begin your first sizing in the exposure suit you will be diving in. Once finished, check
placement of the D-rings as noted in the previous section and be sure to trim the extra webbing
after you’ve determined the best size range for your Cinch harness and quick adjust crotch
strap.
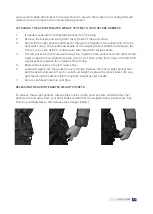
•
To Tighten the Harness: While using both hands, grasp the ends of the waist band
webbing and pull up and outward (at roughly 45 degrees) from the body.
•
To Loosen the Harness: Grasp the webbing at the shoulder straps just above the waist.
Push the harness out and up slightly from your waist.
Detailed information on sizing and adjustment of the Cinch design can be found later in this
text.
8
HALCYON.NET
Summary of Contents for TRAVELER
Page 1: ...BUOYANCY COMPENSATOR OWNER S MANUAL 2019...
Page 34: ...NOTES 34 HALCYON NET...
Page 35: ...NOTES 35 HALCYON NET...


