Page
84
SmartFOAM
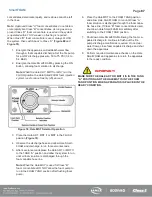
4. Change injection rates.
a. Use the INCREASE/DECREASE buttons on
the operation screen OR press the HOME
button to go back to the preset screen and
choose another preset.
5. Read total water/foam usage.
a. Read the total displays on the operation
page.
6. Reset totalized values.
a. Press the MENU button to go to the main
menu and press the reset water/foam total
button(s).
7. End foam injection.
a. Press the OFF button on the operation
screen. The system will stop the foam
pump and the display borders will change to
gray to indicate the system is OFF.
SIMULATED FLOW OPERATION
The Simulated Flow mode of the Hale SmartFOAM system
allows operation of the foam pump without discharging water
through a foam capable discharge or when the flow sensor
is not functioning.
The simulated flow mode is used for draining the foam tank
for:
❑
Cleaning
❑
Checking calibration of the feedback sensor
❑
Verifying foam pump operation
❑
Manually controlling foam injection if the flow sensor
malfunctions.
The factory default simulated flow rate is 150 GPM
(568 LPM). The foam concentrate injection percentage rate
is set by the rate adjustment buttons on operation screen of
the SmartFOAM controller.
The simulated flow function provides manual operation of the
foam injection system required by NFPA standards.
CAUTION!
WHEN OPERATING THE HALE SMARTFOAM IN S IMU-
LATED FLOW MODE AN OUTLET FOR THE FOAM CON-
CENTRATE MUST BE PROVIDED TO PREVENT EXCES-
SIVE PRESSURE BUILDUP IN DISCHARGE PIPING OR
HOSES.
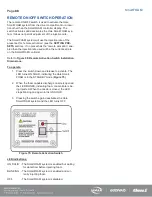
SIMULATED FLOW SEQUENCE
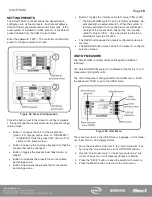
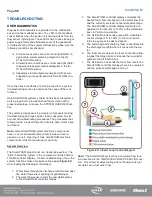
for image steps of how to start simulated
water flow.
1. Uncoil and place the end of the bypass hose into a
suitable container to collect the foam concentrate.
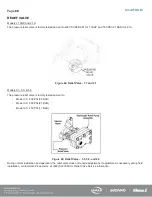
2. Place the BYPASS valve in the
BYPASS
position.
3. Energize the apparatus electrical system.
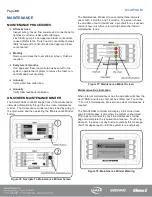
4. Place the system in simulated flow mode:
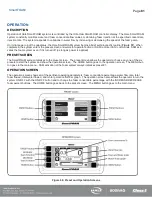
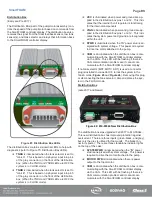
a. Press the MENU button.
b. In the menu select the “simulated water flow”
button.
c. In the simulated water flow screen press the
ON/OFF button to toggle simulated water
flow. The icon indicates the current state.
d. Set the simulated flow to the desired rate by
using the INCR/DECR buttons.
e. Press the MENU button to return to the
menu.
f.
Press the RETURN button to return to the
operation screen.
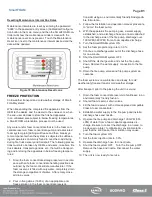
5.
Press the ON
button on the operation screen. The
SmartFOAM system begins operation and the dis-
play border change from gray to green, yellow, or
red (depending on the tank selected).
6. Foam concentrate flows out of the end of the bypass
hose.
TO END SIMULATED FLOW
1. First press the OFF
button on the operation screen
to STOP the foam pump.
2. Take the system out of simulated flow mode:
a. Press the MENU button.
b. In the menu select the “simulated water flow”
button.
c. In the simulated water flow screen press the
ON/OFF button to toggle simulated water
flow. The icon indicates the current state.
d. Press the MENU button to return to the
menu.
e. Press the RETURN button to return to the
operation screen.
3. De-energize the apparatus electrical system.
4. Place the bypass valve to the INJECT position.
5. Secure bypass hose in the appropriate compart-
ment.
6. Return apparatus to normal ready condition.
Summary of Contents for MiniCAFS 2.1A
Page 3: ...Page 2 SmartFOAM NOTES...
Page 16: ...Page 15 SmartFOAM SYSTEM DIAGRAM Figure 6 Typical Hale SmartFOAM 2 1A and 1 7AHP System...
Page 17: ...Page 16 SmartFOAM Figure 7 SmartFOAM 3 3 5 0 6 5 Single Tank System with In line Strainer...
Page 18: ...Page 17 SmartFOAM Figure 8 SmartFOAM 3 3 5 0 6 5 Single Tank withMSTandIn lineStrainer...
Page 19: ...Page 18 SmartFOAM Figure 9 SmartFOAM 3 3 5 0 6 5 Single Tank withMSTandFSSeriesStrainer...
Page 20: ...Page 19 SmartFOAM Figure 10 SmartFOAM 3 3 5 0 6 5 Dual Tank withMDTIIandIn lineStrainers...
Page 21: ...Page 20 SmartFOAM Figure 11 SmartFOAM 3 3 5 0 6 5 Dual Tank withMDTIIandFSSeriesStrainer...
Page 22: ...Page 21 SmartFOAM Figure 12 SmartFOAM 3 3 5 0 6 5 Dual Tank withADTandIn lineStrainers...
Page 23: ...Page 22 SmartFOAM Figure 13 SmartFOAM 3 3 5 0 6 5 Dual Tank withADTandFSSeries Strainers...
Page 48: ...Page 47 SmartFOAM Figure 28 Typical 4 Inch Check Valve Installation Midship Pump...
Page 59: ...Page 58 SmartFOAM Figure 43 ADT Option Air Hose Connections Part 2...
Page 68: ...Page 67 SmartFOAM Figure 55 Top Mount Low Level Sensor Assembly...
Page 77: ...Page 76 SmartFOAM NOTES...
Page 90: ...89 Page 89 SmartFOAM NOTES...

