85
Page
85
SmartFOAM
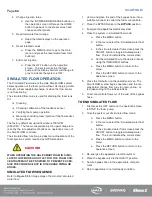
DUAL TANK SYSTEM SELECTION
The following procedures are provided for operation with the
Hale ADT or MDT II Selectors.
CAUTION!
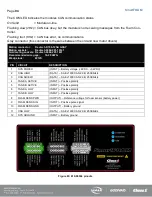
UNLESS ENGAGED IN CLASS “B” FOAM OPERATIONS,
THE HALE SMARTFOAM ADT TOGGLE SWITCH OR
HALE SMARTFOAM MDT II SELECTOR HANDLE MUST
BE IN THE TANK “A” POSITION. IF THE TOGGLE
SWITCH OR SELECTOR HANDLE IS IN THE FLUSH PO-
SITION WHEN THE FOAM PUMP IS STARTED, THE
FOAM PUMP RUNS FOR ONLY TWENTY (20) SECONDS,
THEN SHUTS DOWN.
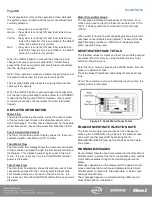
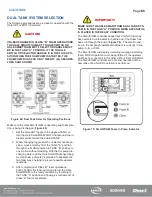
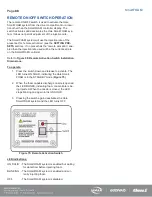
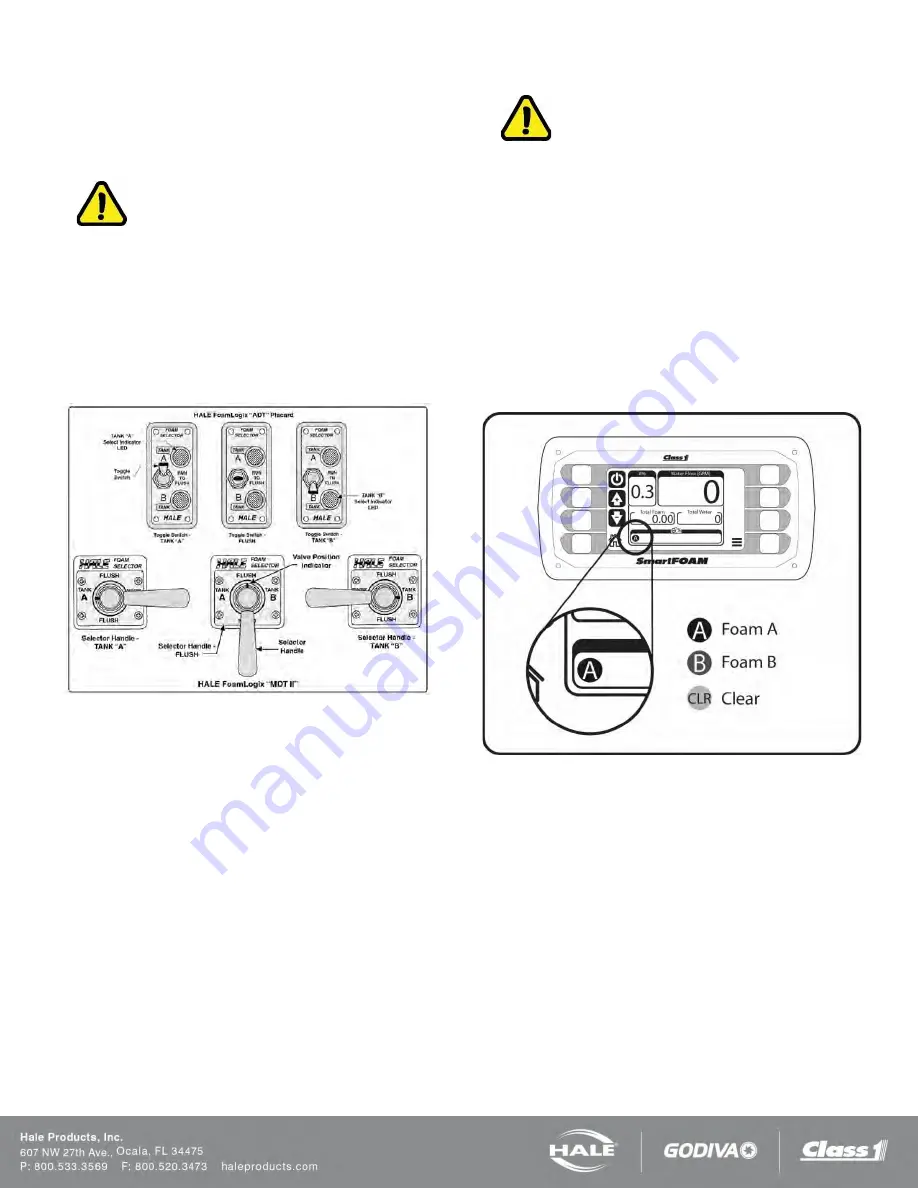
Figure 69: Dual Tank Selector Operating Positions
Make sure the Hale SmartFOAM is operating and foam solu-
tion is being discharged (
1. Set the Hale ADT toggle to the desired TANK, or
turn the Hale SmartFOAM MDT II handle until the in-
dicator points toward the desired TANK.
2. When changing toggle switch or selector handle po-
sition, move smoothly from the TANK
“
A” position
through the FLUSH position to TANK “B” position in
one motion without stopping. With the fire pump dis-
charging water and the Hale SmartFOAM operating,
a small volume of water is provided to separate the
two foam types helping to prevent possible adverse
reactions.
3. After completion of Class “B” foam operations,
briefly FLUSH the foam pump and return the Hale
SmartFOAM to the ready condition by returning to
the TANK “A” position and flowing a small amount of
Class “A” foam concentrate.
IMPORTANT!
MAKE SURE THE HALE SMARTFOAM DUAL TANK SYS-
TEM IS IN THE TANK “A” POSITION WHEN APPARATUS
IS PLACED IN THE READY CONDITION.
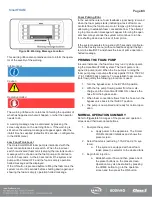
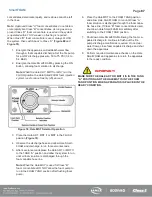
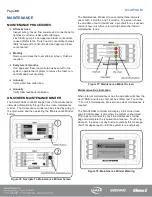
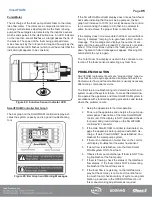
The SmartFOAM controller keeps track of which foam has
been selected via the selector handle and if that foam has
been run through the pump (
). The small round
icon in the bar graph indicates what foam is currently in the
pump: A, B, or CLR.
The SmartFOAM will display a warning message indicating
that a FLUSH operation must be performed if the operator
switches from one tank to the other without first FLUSHING.
The SmartFOAM controller will not allow operation of the
new tank until a FLUSH operation is performed.
Figure 70: SmartFOAM Foam in Pump Indicator
Summary of Contents for MiniCAFS 2.1A
Page 3: ...Page 2 SmartFOAM NOTES...
Page 16: ...Page 15 SmartFOAM SYSTEM DIAGRAM Figure 6 Typical Hale SmartFOAM 2 1A and 1 7AHP System...
Page 17: ...Page 16 SmartFOAM Figure 7 SmartFOAM 3 3 5 0 6 5 Single Tank System with In line Strainer...
Page 18: ...Page 17 SmartFOAM Figure 8 SmartFOAM 3 3 5 0 6 5 Single Tank withMSTandIn lineStrainer...
Page 19: ...Page 18 SmartFOAM Figure 9 SmartFOAM 3 3 5 0 6 5 Single Tank withMSTandFSSeriesStrainer...
Page 20: ...Page 19 SmartFOAM Figure 10 SmartFOAM 3 3 5 0 6 5 Dual Tank withMDTIIandIn lineStrainers...
Page 21: ...Page 20 SmartFOAM Figure 11 SmartFOAM 3 3 5 0 6 5 Dual Tank withMDTIIandFSSeriesStrainer...
Page 22: ...Page 21 SmartFOAM Figure 12 SmartFOAM 3 3 5 0 6 5 Dual Tank withADTandIn lineStrainers...
Page 23: ...Page 22 SmartFOAM Figure 13 SmartFOAM 3 3 5 0 6 5 Dual Tank withADTandFSSeries Strainers...
Page 48: ...Page 47 SmartFOAM Figure 28 Typical 4 Inch Check Valve Installation Midship Pump...
Page 59: ...Page 58 SmartFOAM Figure 43 ADT Option Air Hose Connections Part 2...
Page 68: ...Page 67 SmartFOAM Figure 55 Top Mount Low Level Sensor Assembly...
Page 77: ...Page 76 SmartFOAM NOTES...
Page 90: ...89 Page 89 SmartFOAM NOTES...

