11
the label travels past the printhead and the FEED.
NOTE:
Print density is not always solved by increasing burn temperature or slowing the motor
down. If the printing process is running too hot, the print will start to look washed out and
the outer edges of each character will look darker than the inside of each character. In this
case, using less temperature on the printhead can increase the print quality.
SAVING LABEL LAYOUT DESIGNS
1.
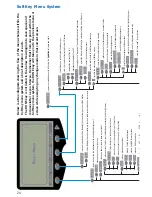
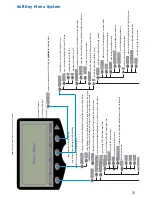
From the Main Menu, press the LABEL SoftKey.
2.
Press the NEXT SCREEN SoftKey to scroll to the next menu screen.
3.
Press the SAVE SoftKey and enter the name for your layout in the “Save Current Design”
screen.
4.
Press the DONE SoftKey to accept the filename.
NOTE:
A total of 38 layout designs can be stored in the printer at one time. If more jobs
need to be created and saved, they can be stored on a PC using the optional Spirit
™
2100
com-
munications cable and software package. Refer to the SPIRITLINK section on pages 16-21.
OPENING A LABEL LAYOUT DESIGN
1.
From the Main Menu, press the LABEL SoftKey.
2.
Press the NEXT SCREEN SoftKey to scroll to the third menu screen.
3.
Press the RECALL SoftKey and select a label from the list of previously saved or down-
loaded jobs. You can jump to the top or to the bottom of the list with the use of the
SoftKeys
DELETING LABEL LAYOUT DESIGNS
1.
From the Main Menu, press the SYSTEM SoftKey.
2.
Press the NEXT SCREEN SoftKey twice to scroll to the third menu screen over.
3.
Press the FILES SoftKey.
4.
Press the DELETE SoftKey and the screen will prompt you to delete a specific file from the
list.
5.
Move the indicator to the file you wish to delete and press the DONE SoftKey.
NOTE
: If you have more than one file to delete, repeat steps 4-6 as needed or use the option-
al communications cable and software package. Refer to the SPIRITLINK section on pages 16-
21.
MAINTAINING YOUR PRINTER
The printer requires no lubrication and only minimal maintenance. General cleaning of the
exterior surfaces with regu lar cleaning of the printhead and rollers are all that is required.
Exterior surfaces can be cleaned with a damp cloth moistened in a mild detergent and water
soltion. Commercial cleaners designed for electronic equipment may also be used.
CLEANING THE PRINTHEAD
1.
Open the printhead cover by releasing the latch on the side of the printer.
2.
Remove the label spindle and the ribbon cartridge exposing the printhead.
3.
Be careful not to touch the printhead with fingers or any objects other than the tip of the
cleaning pen or cleaning card (part no. 2100CARD).
4a.
Using a cleaning pen, lightly place the tip of the pen onto the printhead and rub back
and forth several times to pull up any ribbon and ink particles.
4b.
Using the cleaning card, thread the edge over the label shield and over the platen roller.
Close the printer hood and pull the card out by hand ONLY. Do not press the FEED key
for this function. Do this after every 4 or 5 rolls of labels.
5.
Allow to dry for a few moments and replace the ribbon and labels.

