4: Sample Experiments
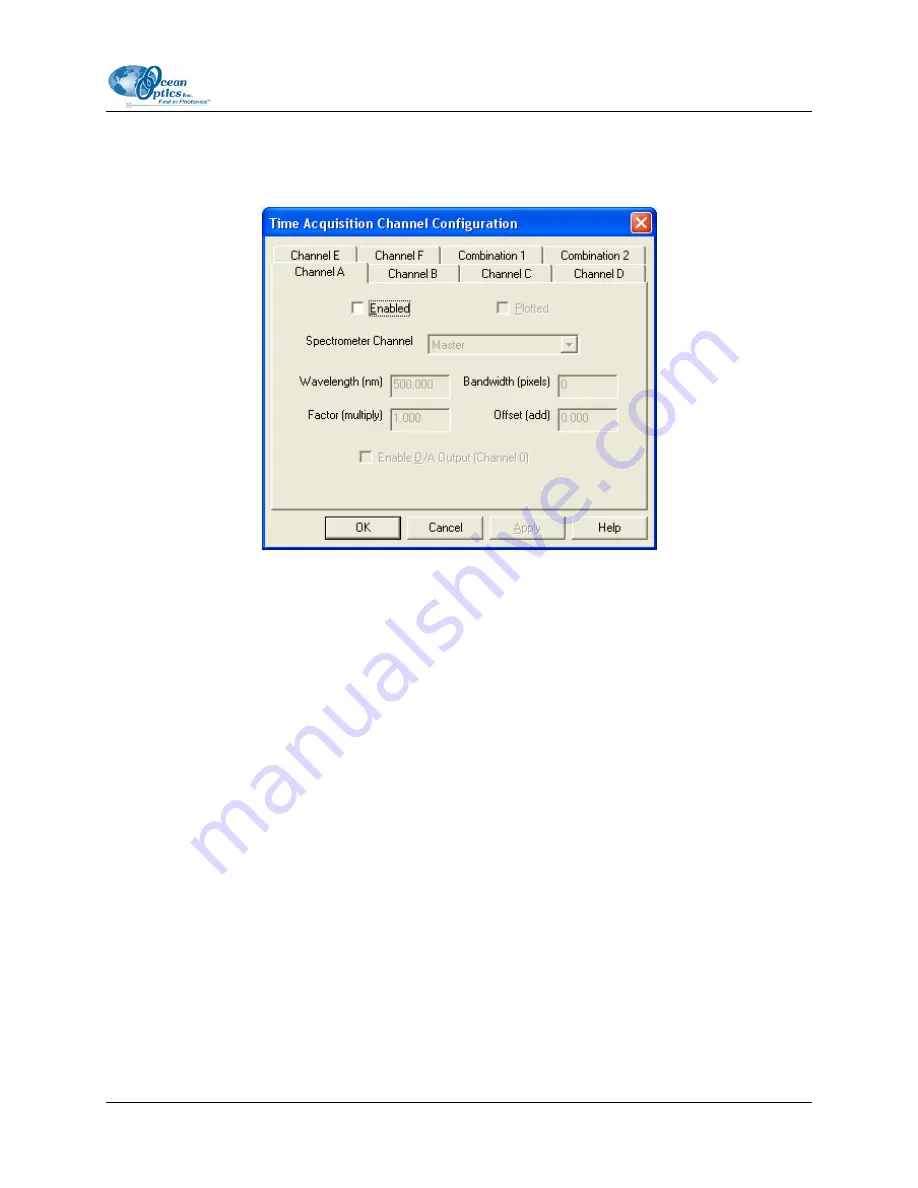
Configuring the Time Acquisition Channel Configuration
Screen
►
Procedure
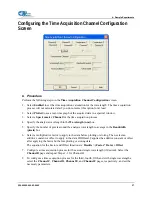
Perform the following steps on the
Time Acquisition Channel Configuration
screen:
1. Select
Enabled
to set the time acquisition calculation for the wavelength. The time acquisition
process will not calculate data if you do not select this option for at least
2. Select
Plotted
to see a real-time graph of the acquired data in a spectral window.
3. Select
a
Spectrometer Channel
for the time acquisition process
4. Specify the analysis wavelength in the
Wavelength (nm)
box.
5. Specify the number of pixels around the analysis wavelength to average in the
Bandwidth
(pixels)
box.
6.
Select a multiplicative factor to apply to the data before plotting or storing. Then, select an
additive constant or offset to apply to the data. OOIBase32 applies the additive constant or offset
after applying the factor but before plotting or storing data.
The equation for the Factor and Offset functions is:
Results = (Factor * Data) + Offset
7.
Configure a time acquisition process for the second single wavelength (if desired). Select the
Channel B
page and repeat Steps 1-3 for Channel B.
8.
To configure a time acquisition process for the third, fourth, fifth, and sixth single wavelengths,
select the
Channel C
,
Channel D
,
Channel E
, and
Channel F
pages, respectively, and set the
necessary parameters.
220-00000-000-02-0605
27


