Page 5
97631C (REV. D - 06/17)
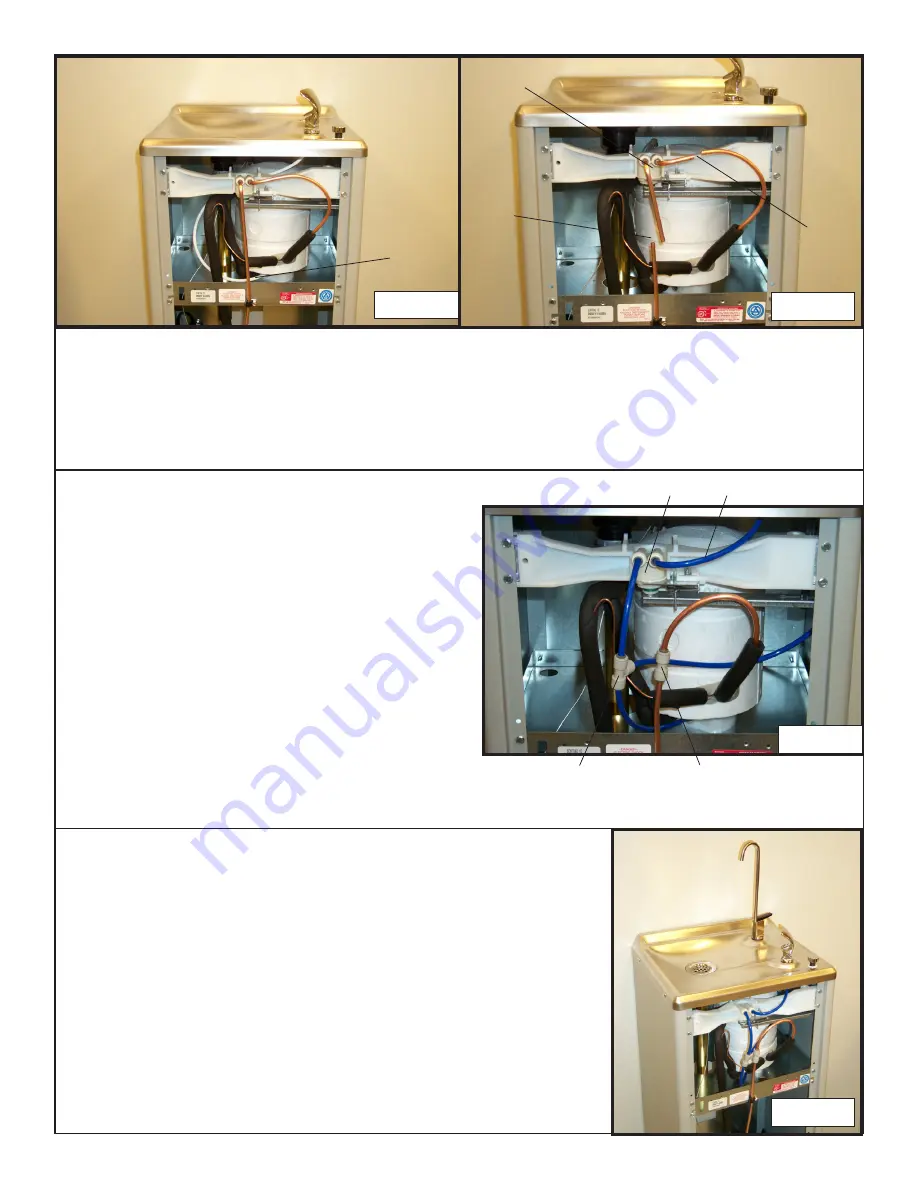
STEP 3
Cut and Remove Internal Plumbing
• Remove tank to bubbler tube (A).
• Disconnect bubbler tube at chilled tank water outlet.
• Cut supply tubes at locations (B) and (C).
• Remove and discard bent tubes from water regulator (D).
• Refer to details “Operation of Quick Connect Fittings” for removing tubes.
STEP 4
Reconnect Internal Plumbing
• Connect water inlet line to chiller inlet.
• Using (Item 3) reconnect tubes cut at (B) and (C)
in step 3.
• Connect chiller outlet to tee.
• Cut a 8 inch long piece of (Item 1).
Install into the chiller water outlet. Connect end
to tee (Item 4).
• Connect tee to regulator and glass filler supply tube.
• Cut a 6 inch long piece of (Item 1).
• Connect one end of tube to tee (Item 4) and
other end to water regulator inlet (A).
• Cut a 12 inch long piece of (Item 1).
• Connect to tee (Item 4) and to Glass Filler Nipple
(Item 2), not shown.
• Connect bubbler tube to regulator.
• Use tank to bubbler tube, removed in Step 3, cut length of tube to 10 inches and connect to regulator outlet.
A
B
D
C
STEP 5
Reassemble Unit
• Connect Bubbler and Glass Filler.
• Using one gasket below the basin and one gasket
above the basin assemble the bubbler and glass
filler (Item 6) to the basin.
• Reassemble the unit and leak check.
• Turn on water supply. Run water through bubbler
and glass filler. Check all connections for water
leaks.
• Reconnect electrical supply.
• Replace front panel.
A
Item 4
Bubbler Tube
Step 3(A)
Step 3(B)
Step 4
Step 5
Item 3


