18
4.6
CONDENSATE CONNECTION
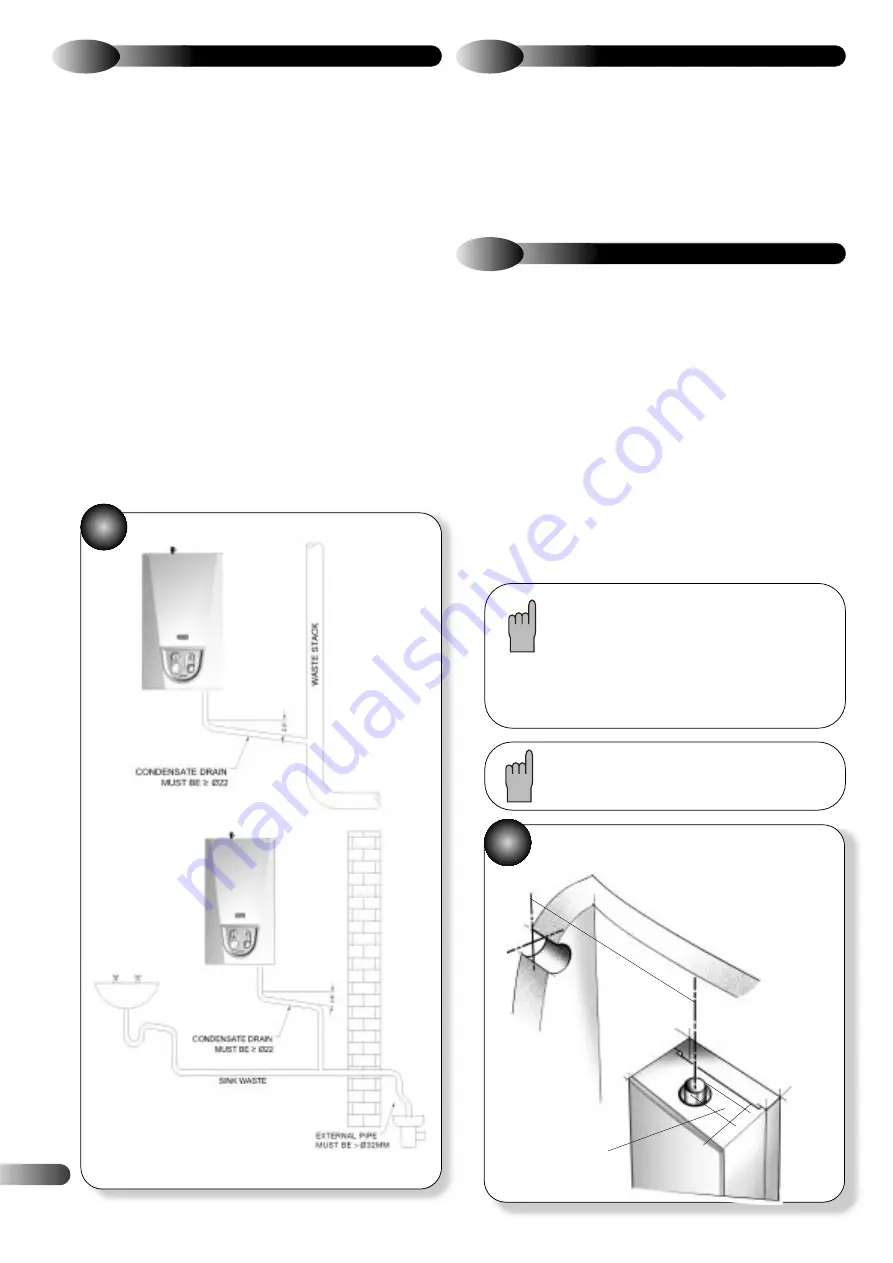
Refer to Figur
e 16
Connect pr
eferably a 22 mm plastic push fit or adhesive overflow pipe to
the condensate outlet. It should be piped to drain, preferably within the
building, maintaining a continuous 2° fall away from the appliance.
Note; if an additional “U” trap is fitted between the appliance and the
discharge point, then a visible air break is necessary between the
appliance and trap, because a trap is already provided within the
appliance. 32 mm pipe should be used for external pipe work, or if the
appliance is installed in a garage. If the drain is routed externally to a
drain or soak away, then the external length should be kept as short as
possible and not exceed 3000 mm. Protection from freezing in cold
weather conditions is also advisable. Ensure that the condensate
discharge system complies with any local regulations in force.
The drain pipe material should be resistant to acid with a pH less than
6.5. Suitable materials for the condensate drainage pipe are PVC, UPVC,
ABS, PP or PVC-C.
In exceptional circumstances, such as when a boiler is installed in a
basement without drainage, it may be necessary to install a condensate
pump to carry condensate up to ground/drain level. Such products are
available from Grundfos Pumps Ltd on: 01525 850000 and Pump
House on: 0115 922 2211.
4.7
PRESSURE RELIEF VALVE CONNECTION
The safety valve is located at the bottom RHS of the appliance.
Connect 15mm copper pipe using the male flanged nut and olive
provided, to the safety valve outlet, and then continue the discharge
pipe using no less than 15mm diameter copper pipe to the outlet. The
pipe outlet should be positioned so that the discharge of water or
steam can be noticed, but cannot create a hazard to the occupants of
the premises or damage electrical components or wiring.
4.8
AIR / FLUE DUCT INSTALLATION
For cor
rect flue installation please refer to the installation instructions
that are provided with the individual flue kit as described in sections
2.5 – 2.7.
a)
Measur
e the required flue length as shown in Figure 17. Refer to
section 2.5 to determine whether any extension kits are required.
Installations using only the standard ducts or standard ducts with
straight extensions are described in this section. Installation instructions
for all other flue systems are included in the various flue kits.
b)
Ensur
e that all (inner and outer tube) sealing rings are provided
and assemble the air/flue ducts as shown in the flue instructions.
c)
Constr
uct the correct flue length by building the flue out from the
appliance.
Ensur
e that the flue and air seals are correctly fitted
before assembly and that each section is fully engaged.
16
The flue length is measured from the centreline of the
appliance flue outlet to the inside of the external wall-
sealing ring. In most cases it will be possible to achieve
the required flue length without cutting the ducts, however
where necessary the plain ends of the extension ducts
may be cut. Never cut the swaged end, and always
ensure that the cut is square and free of burrs or debris.
NOTE IT IS ESSENTIAL THA
T THE TERMINAL
IS FITTED THE CORRECT WAY UP
See flue kit Instructions (i.e. rain shield at the top).
MEASURING THE EXACT FLUE LENGTH
F
AN OUTLET
EXTERNAL
Dia. 60mm
•
TOT
AL FLUE LENGTH FROM
FLUE OUTLET CENTRE TO
OUTSIDE WALL FACE:
= LENGTH
L
W
ALL
L
•
•
•
•
17


