background image

18

Title/chapter (DVD)/track (audio CD and VCD)

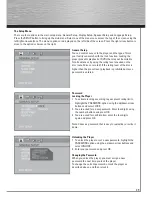
To directly access a title, chapter (DVD) or a track (audio CD and VCD), press the INFO button, press OK. Select the 

Title(TT), Track(TRK) or Chapter(CH) icon and enter a number directly with the numeric buttons. Press OK again to 

confi rm.

Note: Many discs only have one title.

Time display

To access the Time Display, press the INFO button on the remote. Press the up/down buttons repeatedly to display:

DVD: Chapter elapsed time, Chapter remaining time, Title elapsed time and Title remaining time.

VCD and audio CD: Track elapsed time, track remaining time, disc elapsed time, disc remaining time.

To directly access a location on the disc which does not correspond to the start of a title or chapter, highlight the Time 

Display icon using the arrow buttons and press OK, then enter a time with the number buttons (hh:mm:ss).

Note: This function may not be available on all discs.

Audio (DVD, VCD)

Some discs have several audio tracks used for different languages or different audio formats.

To change the language or audio format during playback:

1.   Press the INFO button twice.

2.   Use the left/right arrow buttons to select the Audio icon, or press the AUDIO button on the remote control.

3.   Choose a language or an audio format with the up/down arrow buttons.

Notes:

This option is only available if the disc offers dialog languages or audio formats.

When you change the dialog language using the Info menu, it only changes the dialog language of the disc being

played. When you eject the disc or switch off the player, the language will revert to the one you selected in the

Language Setup menu.

Subtitles (DVD)

Subtitles are turned off by default. Turn on Subtitles as follows:

1.   While the disc is playing, press the INFO button twice, then select the Subtitles icon using the left/right arrow 


buttons.

2.   Select a language using the up/down arrow buttons.

3.   To turn subtitles off, select the Off option or press the SUBTITLE button on the remote.

Notes:

When you change the language of the subtitles using the Info menu, it only applies to the disc currently being played. 

When you eject the disc and switch off the player, the subtitles will default to the subtitle language you selected in the 

Languages menu. This function may not be available on all discs.

Camera Angle (DVD)

Some discs offer different camera angles for specifi c scenes.

1.   To change the camera angle, press the ANGLE button on the remote or press the INFO button twice and select the 


Camera angle icon with the left/right buttons.

2.   Choose the angle with the up/down arrow buttons.

Note: If the disc was recorded using a single camera angle, this function is not available.

00055455bda2.indd   Abs2:18

00055455bda2.indd   Abs2:18

07.08.2007   15:07:15 Uhr

07.08.2007   15:07:15 Uhr

Summary of Contents for 55455

Page 1: ...from the equipment that is receiving interference Plug the unit into a different wall outlet so that the unit and the equipment receiving interference are on different branch circuits If these measure...

Page 2: ...YOU OF D A N G E R O U S VOLTAGE INSIDE THE PRODUCT CAUTION TO REDUCE THE RISK OF ELECTRIC SHOCK DO NOT REMOVE COVER O R B A C K NO USERSERVICEABLE PARTS INSIDE REFER SERVICING TO QUALIFIED SERVICE PE...

Page 3: ...e 13 Remote control functions in TUNER mode 14 Using the remote to Navigate through On Screen Menus 14 Inserting batteries in the remote control 14 Playing Discs Basic Functions Compatible discs 14 Co...

Page 4: ...Radio Manual Tuning 22 Storing radio stations 22 USB and mp3 Player Connecting Disconnecting USB devices to the Main Unit 23 Connecting Disconnecting the mp3 Player to the Main Unit 23 Selecting USB o...

Page 5: ...de Time 30 Default 30 Display Setup 30 Display Type 30 Dark Level 30 Video 31 Speaker Setup 31 Night Mode 31 Distance 31 Test Tone 32 Language Setup 32 Player Menu 32 Audio 32 Subtitles 32 Disc Menu 3...

Page 6: ...expose it to rain or splashing water The apparatus should not be exposed to dripping or splashing and no objects lled with liquids such as vases should be placed on the apparatus Moving the unit from...

Page 7: ...ed for home use only unless otherwise authorized by Macrovision Corporation Reverse engineering or disassembly is prohibited Front panel controls OPEN CLOSE Opens and close the disc tray SUBWOOFER Tog...

Page 8: ...b Pr jacks provide optimum picture quality by separating the video signal into three parts To ensure maximum picture quality use three videograde cables for the connection You can also buy bundled com...

Page 9: ...larities speaker wire to on the receiver of speaker wires and terminals match If the cords are reversed the sound will be distorted Do not ground the output line it will damage the speaker Positioning...

Page 10: ...quency drivers of the three front speakers should be as close as possible to the same height This often requires placing the center speaker directly on top A or beneath B the TV set Preferred surround...

Page 11: ...r for balancing the channels As the signal travels from channel to channel adjust the level controls until each channel plays at the same loudness level Level adjustment and surround channel level exp...

Page 12: ...u VOL Adjusts the sound volume CH Directly accesses the next or previous chapter DVD or track CD Selects programmed stations in TUNER mode REV Starts reverse accelerated play or reverses slow motion w...

Page 13: ...at is highlighted Inserting batteries in the remote control Do not mix different types of batteries or new and old batteries Do not use rechargeable batteries In order to avoid any risk of explosion o...

Page 14: ...sure it is in place 4 When you re nished loading discs press OPEN CLOSE the disc tray closes Playing discs Load a disc or discs as shown above and press the OPEN CLOSE button The disc tray closes The...

Page 15: ...atically Accelerated play While the disc is playing press the REVERSE or FORWARD button one or more times to vary the speed and direction of the accelerated play Press PLAY to resume normal playback P...

Page 16: ...r audio language subtitles and camera angle 3 Press the INFO button a third time for play mode bookmark and sleep timer 4 Use the left right arrow buttons on the remote to select an icon 5 Use the up...

Page 17: ...age or an audio format with the up down arrow buttons Notes This option is only available if the disc offers dialog languages or audio formats When you change the dialog language using the Info menu i...

Page 18: ...o create a program list press the INFO button three times Highlight the Play Mode option and press the down arrow to select the Program option 2 Press OK The Program screen is displayed 3 The rst spot...

Page 19: ...a disc 3 To start playback from a bookmark press the PLAY button on the remote 4 To delete a bookmark highlight it and press clear Sleep 1 Press the INFO button twice for CD VCD and three times for D...

Page 20: ...buttons to select a le Press OK or PLAY to start playback Mp3 WMA le the player begins playing the selected le then all the les and subfolders contained in the same folder The player then plays the c...

Page 21: ...e to Mono mode This will reduce the background noise Storing radio stations The player can store up to 30 radio stations in its memory You can enter every single radio station yourself or the player c...

Page 22: ...p3 player into the RCA MP3 PLAYER of the main unit 3 Unplug the mp3 player to disconnect Selecting USB or the Lyra mp3 Player Press USB on remote to switch between USB device or the Lyra mp3 Player No...

Page 23: ...yer the Lyra mp3 Player or your USB device USB Note CD Ripping function does not support ripping les to Mulit Card Reader via USB port Start Ripping CD Highlight START and press OK to start ripping No...

Page 24: ...s saved in a folder named CDRECORD with le name as CDTKxx01 CDTKxx02 etc Deleting Files In USB or mp3 player mode select the unwanted les by pressing the up down arrow buttons Press and hold CLEAR on...

Page 25: ...play mode press once to starts and pause music playback In stop mode press once to turn off the unit Press once to stop music playback Skips to the previous song or the beginning of the current song...

Page 26: ...layback The total number of tracks is display Press in stop mode to turn the unit off Skipping Tracks To skip to the next track press and release the button To go to the previous track press and relea...

Page 27: ...LAT BASS POP ROCK JAZZ The current selection shows brie y on the display Play modes During playback press M repeatedly to select among the following playback modes Normal playback Repeat Track Repeat...

Page 28: ...rating level of the disc is higher than the preset level playback is prohibited unless a password is entered Password Locking the Player 1 To activate locking according to your preset rating limits h...

Page 29: ...can choose the picture format aspect ratio best suited to the format of your TV screen 4x3 PS reproduces a 4x3 picture without distortion 4x3 LB gives best reproduction of pictures recorded in this f...

Page 30: ...e acoustic conditions in your listening room and to make the sound more effective you may need to delay the signal coming from some of the speakers Channel delay compensates for center or surround spe...

Page 31: ...ss OK Audio Select the dialog language using up down arrow buttons and press OK To change the language during playback display the audio icon by pressing the AUDIO button Note If the selected language...

Page 32: ...t video setting selected The picture is of poor quality with snow or lines Check the connections There is no sound or the sound is of poor quality Check the connections Make sure the speakers are conn...

Page 33: ...otected and you don t have the proper rights license to play the les Check the website and or application help system of the music download service provider from where the content was purchased from f...

Page 34: ...her business purpose constitutes or could constitute a violation of copyright law Cleaning Use a soft dry clean cloth Regularly dust the vents at the back or sides Using solvents abrasive or alcohol b...

Page 35: ...ove the disc and insert it again Do not use its full capacity CD Rs should be preferably used instead of CD RWs rewritable CDs as in certain cases CD RW playback may be faulty Use reliable good qualit...

Page 36: ...al built in sound enhancement systems Dolby Digital The Dolby Digital mode lets you enjoy full digital surround from software processed in the Dolby Digital format Dolby Digital provides better sound...

Reviews: