6
TREND
Decreasing
6.5. Using and searching for moon phases
The weather station has a display for moon phases and a
corresponding search feature.
The following eight moon ph
ases are displayed:
Display
Meaning
New moon
Waxing crescent
First quarter
Waxing half moon
Full moon
Waning half moon
Last quarter
Waning crescent
To display the moon phase on a specific day, proceed as follows:
•
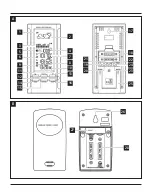
Press the button (19) or the button (20) in the battery
compartment to switch to moon phase search mode and select
your desired date.
Note
In this mode, the date is displayed day by day. You can go up to
39 days forward or back. The relevant moon phase is displayed
immediately.
•
The unit returns to the previous display mode if you do not press
the button (19) or button (20) in the battery compartment
to switch to moon phase search mode and select your desired
date.
6.6. Maximum and minimum temperature and humidity
values
The base station automatically stores the maximum and minimum
outdoor/indoor temperature values.
•
Press the MEM button (21) to switch between the current
temperature, minimum temperature (MIN) and maximum
temperature (MAX).
•
Press and hold the MEM button (21) for approx. 3 seconds to
reset the stored maximum and minimum values.
•
If you press the MEM button (21) again, the minimum and
maximum values displayed remain unchanged until the next
update.
6.7. Comfort level – Display
The comfort level display is based on the following weather conditions:
Display
Temperature range
Humidity range
The corresponding weather
conditions
COM
(pleasant)
20° C to 25° C
(68° F to 77° F)
40% to 70% relative humidity
Optimum temperature and humidity
WET
(too moist)
-5° C to +50° C
(23° F to 122° F)
Above 70% relative humidity
Excessively wet conditions
DRY
(too dry)
-5° C to +50° C
(23° F to 122° F)
Under 40% relative humidity
Excessively dry conditions
No symbol
Below 20° C (68° F) or
above 25° C (77° F)
40% to 70% relative humidity
No weather information
6.8. Changing the temperature warning settings
•
Press the TEMP AL. button (12) to select the upper or lower
limit value for the temperature warning.
•
Then hold down the TEMP AL. button (12) for 2 seconds.
•
Use the arrow buttons (11) or (13) to set the selected limit
value for the temperature warning.
•
Press the TEMP AL. button (12) again to complete the process.


