5
Subject to change without notice
S p e c i f i c a t i o n s
4 -Digit programmable Multimeter HM 8012
Valid at 23 °C after a 30 minute warm-up period
DC voltage
Measurement ranges:
500 mV, 5 V, 50 V, 500 V, 600 V
Resolution:
10 μV, 100 μV, 1m V, 10m V, 100m V
Accuracy:
5 V, 500 V, 600 V:
±(0.05 % of r0.002 % of full scale)
500 mV, 50 V:
±(0.05 % of r 0.004 % of full scale)
Overload protection:
V/Ω/T°/dB/
to COM and to chassis:
850 V
p
at max. 60 Hz or 600 V
DC
COM against chassis:
250 V
rms
at max. 60 Hz or 250 V
DC
Input resistance:
50 V, 500 V, 600 V:
10 MΩ II 90 pF
500 mV, 5 V:
› 1 GΩ II 90 pF
Input current:
10 A
CMRR
1)
:
≥
100 dB (50/60Hz ± 0.5 %)
SMRR
2)
:
≥
60 dB (50/60 Hz ± 0.5 %)
dB Mode
Accuracy:
±(0.02 dB+2 digits) (display › -38.7 dBm)
Resolution:
0.01 dB above 18 % of rating
DC current
Measurement ranges:
500 μA, 5 mA, 50 mA, 500 mA, 10 A
Resolution:
10 nA, 100 nA, 1 μA, 10 μA, 1 mA
Accuracy:
0.5-500 mA:
±(0.2 % of r 0.004 % of full scale)
10 A:
±(0.3 % of r 0.004 % of full scale)
Voltage drop:
10 A range:
0.2 V max.
500 mA range:
2.5 V max.
other ranges:
0.7 V max.
AC voltage
Measurement ranges:
500 mV, 5 V, 50 V, 500 V, 600 V
Resolution:
10 μV, 100 mV, 1 mV, 10 mV, 100 mV
Accuracy 0.5-50 V:
40 Hz-5 kHz:
± (0.4 % of r 0.07 % of full scale)
20 Hz-20 kHz:
± (1 % of r 0.07 % of full scale)
Accuracy 500 V and 600 V:
40 Hz-1 kHz:
± (0.4 % of r 0.07 % of full scale)
20 Hz-1 kHz:
± (1 % of r 0.07 % of full scale)
Overload protection:
V/Ω/T°/dB/
to COM and to chassis:
850 V
p
at max. 60 Hz or 600 V
DC
COM against chassis:
250 V
rms
at max. 60 Hz or 250 V
DC
Input impedance
AC mode:
1 MΩ II 90 pF
AC + DC mode:
10 MΩ II 90 pF
Bandwidth at –3 dB:
80 kHz typical
dB mode:
20 Hz - 20 kHz
Accuracy
–23.8 dBm to 59.8 dBm:
±0.2 dBm
Resolution:
0.01 dB above 9 mV
CMRR
1)
:
≥
60 dB (50/60 Hz ± 0.5 %)
Crest factor:
7 max.
3
4
AC current
Measurement ranges:
500 μA, 5 mA, 50 mA, 500 mA, 10 A
Resolution:
10 nA, 100 nA, 1 μA, 10 μA, 1 mA
Accuracy:
0.5 - 500 mA:
±(0.7 % of r 0.07% of f.s.)40 Hz - 5 kHz
10 A:
±(1 % of r 0.07 % of full scale)
AC + DC measurements
As shown for AC + 25 digits
Resistance
Measurement ranges:
500 Ω, 5 kΩ, 50 kΩ, 500 kΩ, 5 MΩ, 50 MΩ
Resolution:
10 mΩ, 100 mΩ, 1 Ω, 10 Ω, 100 Ω, 1 kΩ
Accuracy:
500 Ω to 500 kΩ:
±(0.05 % of r 0.004 % of f.s.+50 mΩ)
5 MΩ to 50 MΩ:
±(0.3 % of r 0.004 % of full scale)
Input protection max. 300 V
rms
Measurement current:
500 Ω-5 kΩ range:
1 mA
50 kΩ range:
100 μA
500 kΩ range:
10 μA
5-50 MΩ range:
100 nA
Measurement voltage:
10 V typical for open inputs, depending on the
value of resistance to be measured. Negative polarity of measurement
voltage is across common terminal.
Temperature
2-wire resistance measurement
with linearization for PT100 sensors as
per standard EN60751
Range:
–200° C to +500° C
Resolution:
0.1° C
Measurement current:
approx. 1 mA
Display:
in ° C, ° F
Accuracy:
± 0.1° C from – 200° C to + 200° C
± 0.2° C from 200° C to 500° C
(exception: sensor tolerance)
Temperature coefficient: (reference 23°C)
V = 500 mV, 50 V
30 ppm/° C
600 V range
80 ppm/° C
other ranges
20 ppm/° C
V ~ 600 V range
80 ppm/° C
other ranges
50 ppm/° C
mA all ranges
200 ppm/° C
mA~all ranges
300 ppm/° C
Ω
5 MΩ, 50 MΩ ranges
200 ppm/° C
other ranges
50 ppm/° C
Miscellaneous
Power supply (from mainframe):
+ 5 V
300 mA
~26 V
140 mA
Operating temperature:
+ 10° C to + 40° C
Max. relative humidity:
80 % (without condensation)
Dimensions ( W x H x D) (without 22-pole flat plug):
135 x 68 x 228 mm
Weight:
approx. 0.5 kg
1)
Common mode rejection ratio
2)
Serial mode rejection ratio
Accessories supplied:
Operator’s Manual, HZ15 PVC test leads, HM8012: +
Software CD and interface cable
Optional accessories:
HZ10 Silicone test leads, HZ812 PT100 Temperature Sensor
HM8012E/140705/ce · Subject to alterations · © HAMEG Instruments GmbH · ® Registered Trademark · DQS-certified in accordance with DIN EN ISO 9001:2000, Reg.-No.: DE-071040 QM
HAMEG Instruments GmbH · Industriestr. 6 · D-63533 Mainhausen · Tel +49 (0) 6182 800 0 · Fax +49 (0) 6182 800 100 · www.hameg.com · info
@
hameg.com
A Rohde & Schwarz Company
w w w . h a m e g . c o m
Summary of Contents for HM 8012
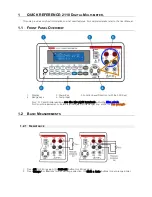
Page 1: ...Service Manual 4 D i g i t M u l t i m e t e r H M 8 0 1 2...
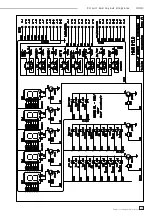
Page 9: ...9 Subject to change without notice C i r c u i t a n d l a y o u t d i a g r a m s...
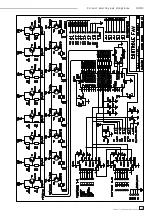
Page 10: ...10 Subject to change without notice C i r c u i t a n d l a y o u t d i a g r a m s...
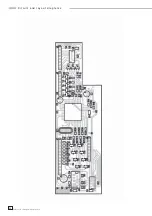
Page 11: ...11 Subject to change without notice C i r c u i t a n d l a y o u t d i a g r a m s...
Page 12: ...12 Subject to change without notice C i r c u i t a n d l a y o u t d i a g r a m s...
Page 13: ...13 Subject to change without notice C i r c u i t a n d l a y o u t d i a g r a m s...
Page 14: ...14 Subject to change without notice C i r c u i t a n d l a y o u t d i a g r a m s...
Page 15: ...15 Subject to change without notice C i r c u i t a n d l a y o u t d i a g r a m s...
Page 16: ...16 Subject to change without notice C i r c u i t a n d l a y o u t d i a g r a m s...
Page 17: ...17 Subject to change without notice C i r c u i t a n d l a y o u t d i a g r a m s...
Page 18: ...18 Subject to change without notice C i r c u i t a n d l a y o u t d i a g r a m s...
Page 19: ...19 Subject to change without notice C i r c u i t a n d l a y o u t d i a g r a m s...
Page 20: ...20 Subject to change without notice C i r c u i t a n d l a y o u t d i a g r a m s...
Page 21: ...21 Subject to change without notice C i r c u i t a n d l a y o u t d i a g r a m s...
Page 22: ...22 Subject to change without notice C i r c u i t a n d l a y o u t d i a g r a m s...
Page 23: ...23 Subject to change without notice C i r c u i t a n d l a y o u t d i a g r a m s...
Page 24: ...24 Subject to change without notice C i r c u i t a n d l a y o u t d i a g r a m s...
Page 25: ...25 Subject to change without notice C i r c u i t a n d l a y o u t d i a g r a m s...
Page 26: ...26 Subject to change without notice N o t e s...
Page 27: ...27 Subject to change without notice N o t e s...


