background image

13

12

Troubleshooting 

(cont.)

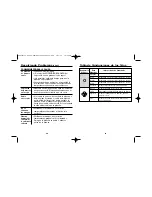
PROBLEM

PROBABLE CAUSE

Iron is too
hot/not hot
enough

• Check Temperature Control Dial and adjust 

to desired setting level. Let iron cool down 
5 minutes before continuing.

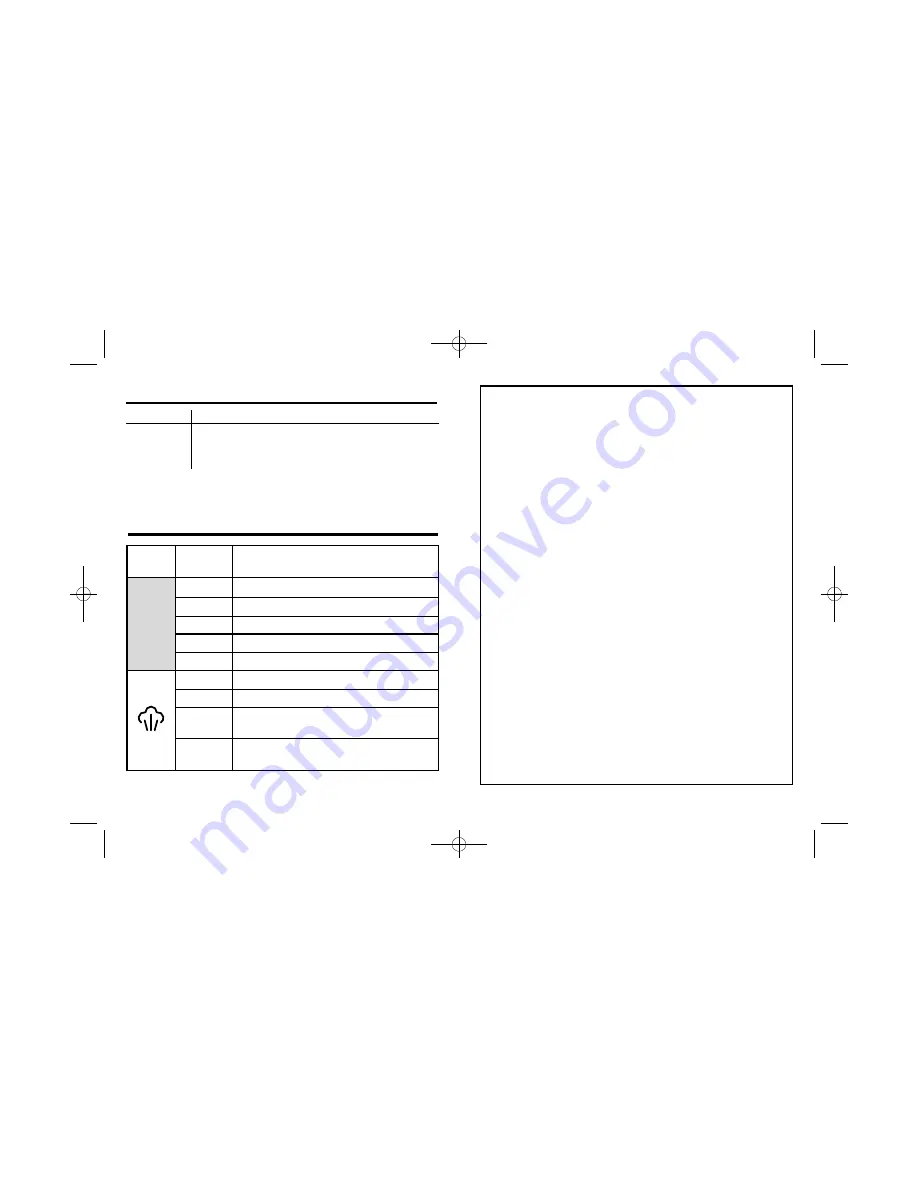
Fabric Setting Chart

To Iron

Off

Nylon

Acrylic

Silk

Polyester

Rayon

Wool

Cotton

Linen

Ironing Instructions

Steam

Setting

Dry iron on the wrong side of the fabric.

Dry iron on the wrong side of the fabric.

Dry iron on the wrong side of the fabric.

Iron with fabric still damp.

Iron on the wrong side of fabric.

Steam iron on the wrong side of fabric.

Iron while still damp using steam 
and/or spray.

Iron on wrong side of fabric while still
damp.

O

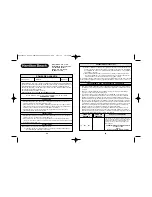
LIMITED WARRANTY

This warranty applies to products purchased and used in the U.S. and
Canada. This is the only express warranty for this product and is in lieu 
of any other warranty or condition.
This product is warranted to be free from defects in material and
workmanship for a period of one (1) year from the date of original
purchase. During this period, your exclusive remedy is repair or
replacement of this product or any component found to be defective, 
at our option; however, you are responsible for all costs associated with
returning the product to us and our returning a product or component
under this warranty to you. If the product or component is no longer
available, we will replace with a similar one of equal or greater value.
This warranty does not cover glass, filters, wear from normal use, use 
not in conformity with the printed directions, or damage to the product
resulting from accident, alteration, abuse, or misuse. This warranty extends
only to the original consumer purchaser or gift recipient. Keep the original
sales receipt, as proof of purchase is required to make a warranty claim.
This warranty is void if the product is used for other than single-family
household use or subjected to any voltage and waveform other than as
specified on the rating label (e.g., 120V ~ 60 Hz).
We exclude all claims for special, incidental, and consequential damages
caused by breach of express or implied warranty. All liability is limited to
the amount of the purchase price. 

Every implied warranty, including any

statutory warranty or condition of merchantability or fitness for a
particular purpose, is disclaimed except to the extent prohibited by
law, in which case such warranty or condition is limited to the
duration of this written warranty.

This warranty gives you specific legal

rights. You may have other legal rights that vary depending on where you
live. Some states or provinces do not allow limitations on implied
warranties or special, incidental, or consequential damages, so the
foregoing limitations may not apply to you.
To make a warranty claim, do not return this appliance to the store. 
Please call 1.800.851.8900 in the U.S. or 1.800.267.2826 in Canada or 
visit hamiltonbeach.com in the U.S. or hamiltonbeach.ca in Canada. 
For faster service, locate the model, type, and series numbers on your
appliance.

840164302 ENv01.qxd:840144500 Ev02.qxd  1/11/12  10:47 AM  Page 12

Summary of Contents for 14975 - Professional Iron

Page 1: ...d licieuses recettes nos conseils et pour enregistrer votre produit en ligne Espa ol 28 En M xico 01 800 71 16 100 Visite www hamiltonbeach com mx para obtener nuestra l nea completa de productos y l...

Page 2: ...ere might be hot water in the reservoir IMPORTANT SAFEGUARDS OTHER CONSUMER SAFETY INFORMATION This appliance is intended for household use only WARNING Shock Hazard This appliance has a polarized plu...

Page 3: ...tically shut off and the green light will blink Move iron upright to vertical position to turn back on Water Fill Cover Steam ON OFF Control Spray and Blast Buttons Self Clean Button Swivel Power Cord...

Page 4: ...ntrol to O Dry Iron 3 Turn Temperature Control Dial to desired temperature Allow 2 minutes for iron to reach desired temperature 4 To turn iron OFF turn Temperature Control Dial to OFF and unplug iron...

Page 5: ...pins metal rivets or snaps since these may scratch the soleplate 2 To clean occasional buildup on the soleplate wipe with a sudsy cloth Do not use abrasive cleansers or metal scouring pads 3 Always st...

Page 6: ...ial is set to correct fabric Twisted cord Troubleshooting cont Wrinkles are not removed 11 10 Caring and Cleaning cont Self Clean To keep the steam vents clear of any buildup follow these instructions...

Page 7: ...glass filters wear from normal use use not in conformity with the printed directions or damage to the product resulting from accident alteration abuse or misuse This warranty extends only to the origi...

Page 8: ...des 3 Toujours mettre le fer sur ARR T avant de le brancher ou d brancher de la prise lectrique Ne jamais tirer sur le cordon pour d connecter le fer de la prise lectrique au lieu de cela saisir la fi...

Page 9: ...outon d autonettoyant Cordon d alimentation enroulant Talon d appui Cadran de contr le de la temp rature Voyant de remise en marche de l arr t automatique VERT et Voyant de courant en position MARCHE...

Page 10: ...l ouverture du r servoir d eau jusqu atteindre la ligne de remplissage MAX Fermer le couvercle de l orifice de remplissage d eau Ne pas remplir le fer directement sous le robinet 3 Brancher le fer su...

Page 11: ...les faux plis Ne pas appuyer sur le bouton plus qu une fois toutes les 5 secondes 4 Pour arr ter le fer r gler le contr le de vapeur MARCHE ARR T en position O repassage sec Ramener le cadran de cont...

Page 12: ...uvent encore sortir des orifices de sortie de vapeur 22 Rangement du fer repasser 1 Vider le r servoir du fer repasser apr s chaque utilisation Tourner le cadran de contr le de la temp rature la posit...

Page 13: ...ROBABLE Fuite d eau Pas d mission de vapeur Le fer repasser laisse des taches Fer repasser branch Prise de courant op rationnelle Brancher une lampe sur la prise de courant pour v rifier Cadran de con...

Page 14: ...recte Cette garantie s applique seulement l acheteur original ou la personne l ayant re u en cadeau La pr sentation du re u de vente d origine comme preuve d achat est n cessaire pour faire une r clam...

Page 15: ...plancha debe seguir siempre las precauciones b sicas incluyendo las siguientes LEA TODAS LAS INSTRUCCIONES ANTES DE USARLA 1 Use la plancha s lo para su uso previsto 2 Verifique que el voltaje de su i...

Page 16: ...la plancha para planchar con vapor luego planche sobre un pa o viejo durante unos minutos mientras deja que la plancha produzca vapor Presione el bot n de golpe varias veces para limpiar los orificios...

Page 17: ...a lentamente vierta agua de la llave en la apertura del dep sito de agua hasta alcanzar la l nea de llenado MAX Cierre la tapa de llenado del agua No llene la plancha con agua directamente de la llave...

Page 18: ...las instrucciones en Cuidado y Limpieza AVISO No deje que la suela de la plancha haga contacto con las prendas de vestir delicadas cuando est caliente 34 5 Deje que transcurran 2 minutos hasta que la...

Page 19: ...maches met licos o broches ya que stos pueden rayar la suela 2 Para limpiar acumulaciones ocasionales en la suela limpie con un pa o jabonoso No use productos de limpieza abrasivos ni esponjillas met...

Page 20: ...cumulaciones en las salidas del vapor siga estas instrucciones cada vez que planche utilizando vapor 1 Fije el marcador de control de temperatura en OFF apagado Llene la plancha con agua hasta la mita...

Page 21: ...a permitido suficiente tiempo para que la plancha se precaliente La caracter stica de anti goteo no permitir la formaci n de vapor cuando la configuraci n de temperatura se encuentre en el rango seco...

Page 22: ...nte a una vivienda unifamiliar o se somete a cualquier voltaje o forma de onda diferente a la especificada en la etiqueta de clasificaci n ej 120V 60 Hz El consumidor puede solicitar que se haga efect...

Page 23: ...arco Elias Cailes No 1499 Zacahuitzco MEXICO 09490 D F Tel 01 55 5235 2323 Fax 01 55 5243 1397 CASA GARCIA Av Patriotismo No 875 B Mixcoac MEXICO 03910 D F Tel 01 55 5563 8723 Fax 01 55 5615 1856 Jali...

Reviews: