4
1.
Place base on a stable, flat surface.
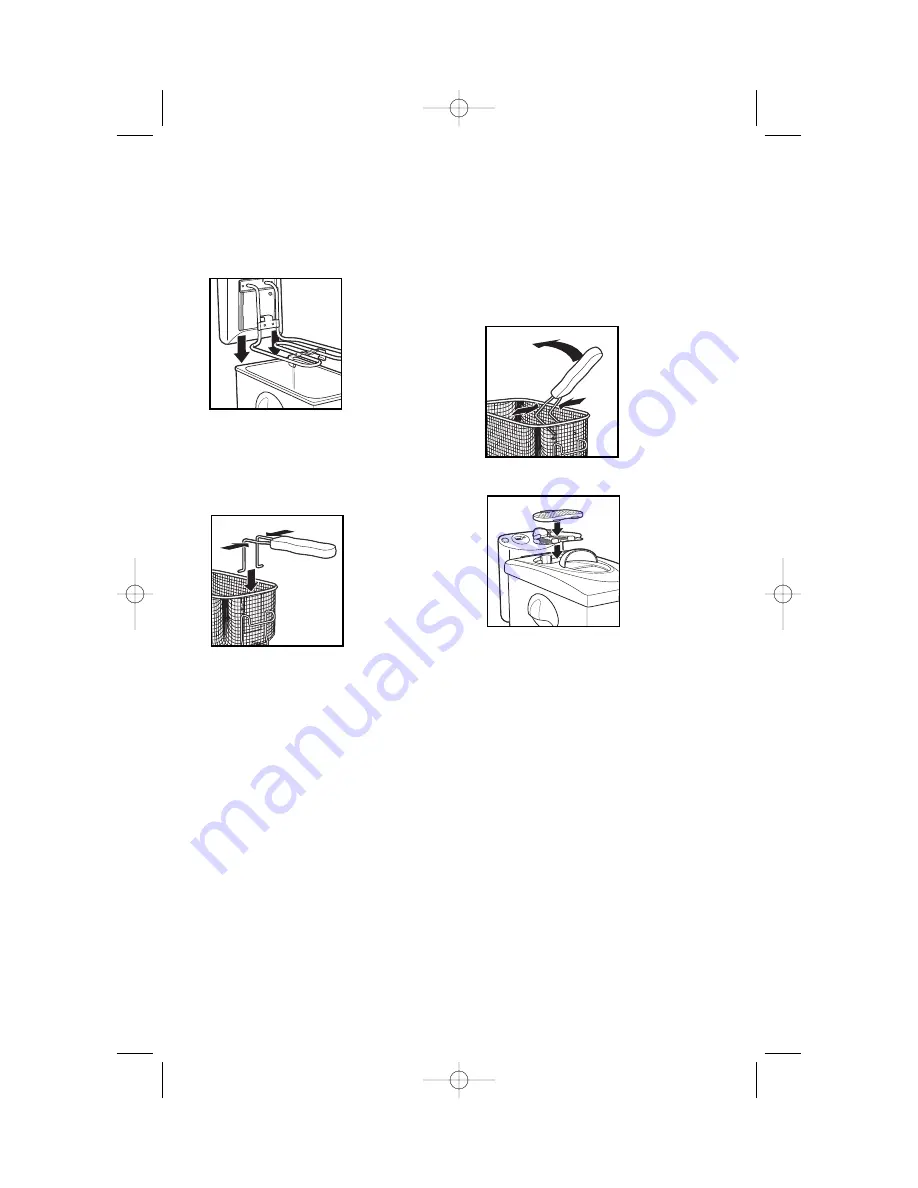
2.
Insert oil pot into base.
3.
Align the grooves of the Heating
Element
Assembly with
grooves on the
base. Push
down on the
Heating
Element
Assembly to
connect it to
the base.
NOTE:
The heater cannot be
switched on unless correctly
installed on base.
4.
To assemble the handle, squeeze the
tines of the
handle togeth-
er.
5.
Align tines with round holes on the
metal bracket of the basket.
6.
Release tines to allow them to
spread and lock into the metal
bracket.
For storage, squeeze the tines
together and
then rotate
handle into
basket.
7.
Align the grease screen and vent of
the lid toward
the Heating
Element
Assembly.
8.
Make sure that the grease screen is in
the vent. The lid snaps into place.
How to Assemble the Fryer
How the Timer Works
1.
The fryer’s timer counts down. It can
be set for any time between 1 to 99
minutes.
2.
To set the timer, press timer button
until the LCD display shows “00.”
Continue pressing the button to
advance the timer by one minute per
press. To advance the timer faster,
press and hold the button down.
3.
The timer will start counting down
the selected time shortly after you
stop pressing the button. During the
countdown time, the display will
flash.
4.
The timer can be reset to zero or be
turned off while it counts down.
Press the button to reset the LCD
display until it shows “00.”
5.
The timer will beep when it reaches
zero and will beep again after
approximately 30 seconds. The timer
will turn off automatically.
NOTE:
The timer DOES NOT turn off
the fryer.
840150300 ENv02.qxd 5/18/06 11:23 AM Page 4


