background image

5

Sensor Speed™ Guide

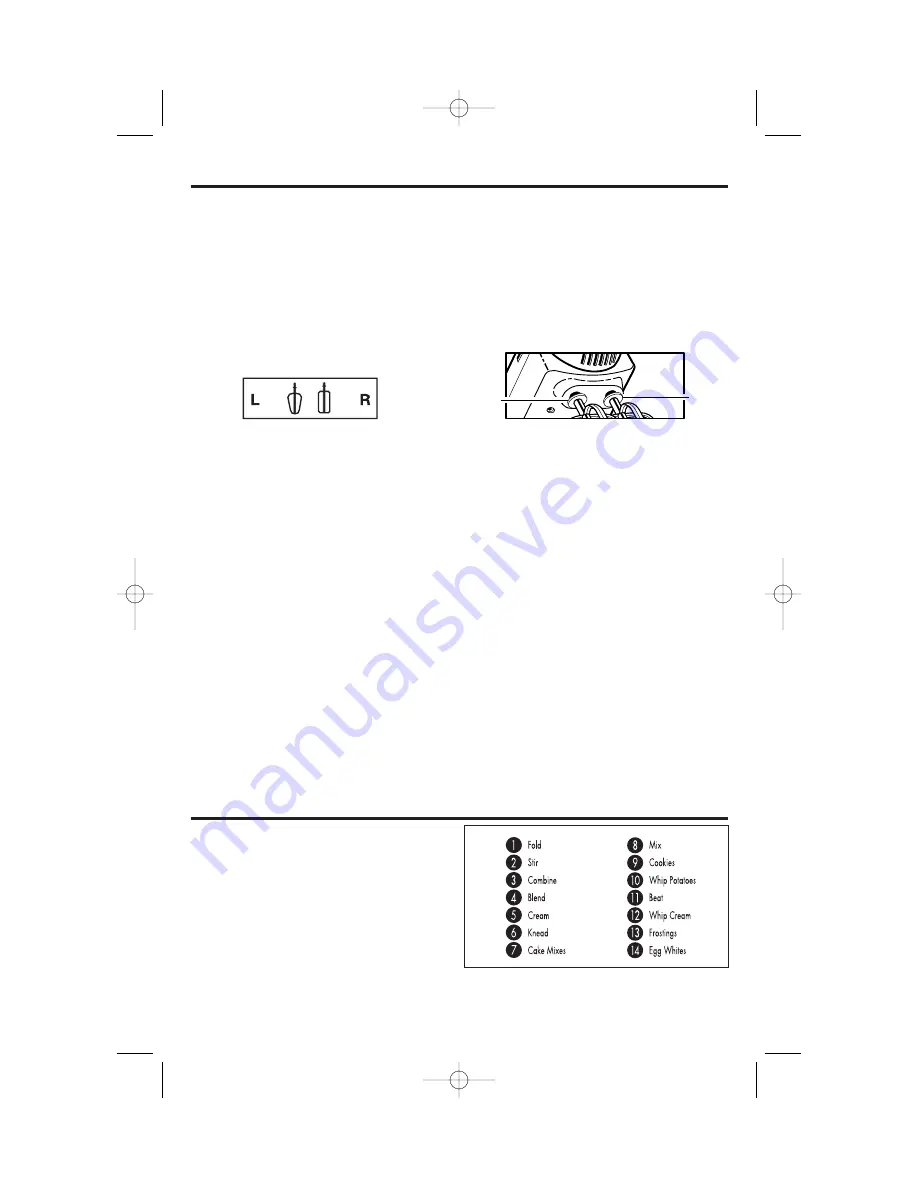
This is an illustration of the Sensor 
Speed Guide on your Mixer. The guide 
may help you select a speed for most 
mixing tasks. These guides are 
recommendations. Please adjust Mixer 
speed as needed.

How to Insert Attachments

Right

Left

1.

Before using, wash bowls and
attachments in hot, soapy water.
Rinse and dry.

2.

Make sure the Mixer is turned to 
OFF and unplugged.

3.

Place small post on bottom of
Turntable in hole on Mixer Base that
matches bowl to be used.

4.

Press the Mixer Release button and
raise the Mixer Head up.

5.

The beaters and dough hooks must
be inserted into specific holes in the
Mixer Head. See “How to Insert
Attachments.”

6.

Place bowl onto Turntable. To 
lower Mixer Head, first raise Mixer

Mixer Head Graphics

How To Use Your Stand Mixer

Each set of attachments must be
inserted into the proper hole in the
Mixer Head. They are not interchange-
able; there is a right and a left. Beneath
the collar is etched a small R or L. This
indicates the correct hole to place
attachment. The “RIGHT” side of the
Mixer is the side with the Sensor Speed
control. The beater marked R, with 

the flat bottom, should be placed in the
hole on the right side of the Mixer first.
Insert attachment into hole and turn
slowly until tabs slip into slots in hole.
Push in until attachment locks in place.
Then insert the beater marked L, with
the rounded bottom. If difficult to insert,
turn beater one quarter turn and try
again.

Head slightly and press Mixer
Release button to release. Lower
into bowl. When lowered, the 
Mixer Head automatically locks 
into place.

7.

Plug cord into electrical outlet.
Select desired speed. Prepare
recipe according to instructions.

8.

When finished, turn Sensor Speed
Control to OFF. Unplug from outlet.

9.

Press Mixer Head release button,
raise Mixer Head until locked into
place.

10.

Press Beater Eject Button to
remove attachments.

840082000 Ev01.qxd  2/22/01  9:57 AM  Page 5

Summary of Contents for 60695

Page 1: ...0082000 Stand Mixer Stand Mixer Safety 3 Know Your Stand Mixer 4 How to Use Your Stand Mixer 5 To Clean 6 Recipes 6 10 Customer Service 11 In USA 1 800 851 8900 840082000 Ev01 qxd 2 22 01 9 57 AM Page...

Page 2: ...2 840082000 Ev01 qxd 2 22 01 9 57 AM Page 2...

Page 3: ...surfaces including stove 11 Do not place on or near a hot gas or electric burner or in a heated oven 12 Check that control is off before plugging cord into wall outlet To disconnect turn control to O...

Page 4: ...d it also locks it in the upright position Hold the Mixer Head when lowering it into the bowl Do not press the Mixer Release Button and let Mixer Head fall into bowl 4 Sensor Speed Control 5 2 Positio...

Page 5: ...ad They are not interchange able there is a right and a left Beneath the collar is etched a small R or L This indicates the correct hole to place attachment The RIGHT side of the Mixer is the side wit...

Page 6: ...eb site at www hamiltonbeach com for more recipes A Few Words About Baking Bread All of our recipes were tested using all purpose flour Bread flour can also be used Most of these recipes call for shap...

Page 7: ...ough of remaining flour and Knead 6 until dough forms a smooth ball that is slightly sticky to the touch Place dough in large greased bowl Cover and let rise 30 minutes or until double Punch down and...

Page 8: ...ntil mixed Add enough of remaining flour until dough forms a smooth ball that is slightly sticky to the touch Place dough in large greased bowl Cover and let rise until double in size Punch down dough...

Page 9: ...te Walnut Cake Cake 8 ounces semi sweet baking chocolate 5 eggs separated 1 cup 2 sticks butter or margarine 1 cup sugar 2 tablespoons flour 3 tablespoons unsweetened baking cocoa 1 cup finely ground...

Page 10: ...ake at 375 F for 12 minutes or until lightly browned Do not overbake Cool on a wire rack before cutting Makes about 4 dozen bars Brown Sugar Butterscotch Cookies 1 cup butter room temperature 1 cup wh...

Page 11: ...l purposes or any use not in conformity with the printed directions This warranty gives you specific legal rights and you may also have other legal rights which vary from state to state or province to...

Page 12: ...s www hamiltonbeach com HAMILTON BEACH PROCTOR SILEX INC PROCTOR SILEX CANADA INC 263 Yadkin Road Southern Pines North Carolina 28387 Picton Ontario K0K 2T0 2 01 840082000 840082000 Ev01 qxd 2 22 01 9...

Reviews: