


4
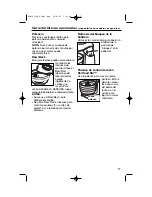
Optional Attachments
(available on select models)
Before first use: wash beaters or attachments in warm, sudsy water; rinse and dry.
Always unplug mixer from electrical outlet before inserting or removing attachments.
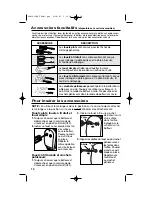
This mixer comes with 1 or more of the following attachments:
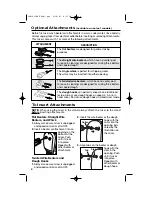
DESCRIPTION
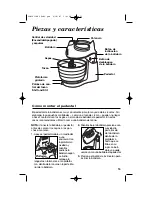
The
flat beaters
are designed for general mixing
purposes.
The
straight wire beaters,
which have no center post
for ease in cleaning, are designed for mixing thick batters
and cookie dough.
The
single whisk
is perfect for whipping cream.
The whisk may be inserted into either opening.
The
twisted wire beaters,
which have no center post
for ease in cleaning, are designed for mixing thick batters
and cookie dough.
The
dough hooks
can perfectly knead a one loaf bread
recipe. Always use dough hooks on speed 4, 5, or 6 in
hand mixer. Do not use dough hooks in stand mixer mode.
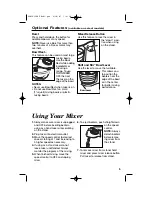
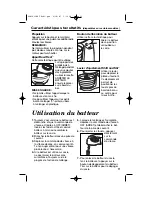
ATTACHMENT
Flat Beaters, Straight Wire
Beaters, and Whisk
1.
Always make sure mixer is unplugged
and speed control is set to OFF.
2.
Insert a beater or attachment into an
opening on the
bottom of the
mixer. Push
until it clicks
into place.
Repeat with
other beater or
attachment.
Twisted Wire Beaters and
Dough Hooks
1.
Always make sure mixer is unplugged
and speed control is set to OFF.
2.
Insert the wire beater or the dough
hook with the
collar into the
opening indi-
cated by the
illustration on
the mixer.
3.
Align tabs on the beater or dough
hook with the
slots in the
opening. Push
until it clicks
into place.
Repeat with
other beater or
dough hook.
To Insert Attachments
Collar
Tab
Slot
NOTE:
When using the mixer in the stand, always attach the mixer to the stand
before
inserting attachments.
840163500 ENv03.qxd 4/30/07 4:25 PM Page 4


