background image

12

(Cleaning in a dishwasher)

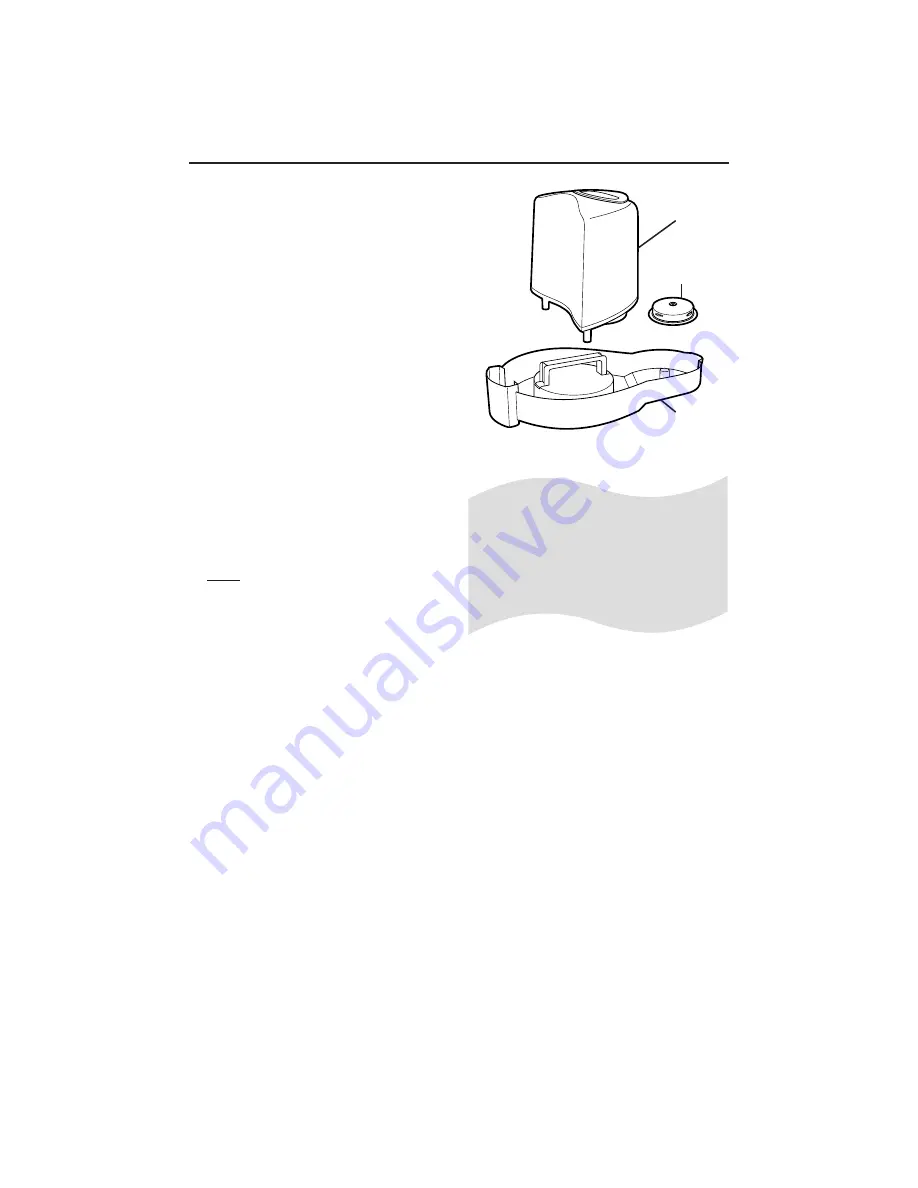
The parts shown on the right are 
dishwasher-safe for easy cleaning.
These parts are a transparent smoke
color for easy identification. 

NOTES: 

Always wash humidifier parts 
separately from dishes. 

Always use a heated water wash
cycle. 

• 

If your dishwasher has a heated dry
cycle, it should be turned OFF.

Do not use rinse aid while cleaning
humidifier parts.

ALWAYS remove the filler cap from 
the water tank before placing the 
tank in the dishwasher.

1.

Place the filler cap in the dishwasher’s
silverware basket. This small part 
must be secured in the silverware
basket to prevent it from being 
damaged by the dishwasher.

2. 

Place water tank in the dishwasher
with the tank opening facing down if
possible. This position will trap the
least amount of water in the tank. 

Filler
Cap

Water
Tank

Water
Tray

Preferred Cleaning Method

Tip!

If the water tank won’t stand up in your
dishwasher, try moving the silverware
basket to another area in the dishwasher
and place the tank in the silverware 
basket recess.

Summary of Contents for 840074800

Page 1: ...Humidifier 840074800 Humidifier Safety 2 Know Your Humidifier 4 How to Assemble and Use 5 How to Clean 11 Troubleshooting Guide 14 Customer Service 16 In USA 1 800 851 8900 In Canada 1 800 267 2826...

Page 2: ...unplug and empty humidifier and tank when it is not in use 11 Never tilt or attempt to move the humidifier or supporting surface while it is operating or full of water Turn off and unplug the humidifi...

Page 3: ...it will not drape over the coun tertop or tabletop where it can be pulled on by children or accidentally tripped over Do Not Over humidify Do not over humidify The suggested level for the best health...

Page 4: ...d Features Fan Enclosure 1 Control Panel 2 Exhaust Grille 3 Cord Wrap see page 6 4 Air Intake Grilles Water Tank Assembly 5 Carrying Handle 6 Water Tank 7 Gasket 8 Filler Cap Base Assembly 9 Filter 10...

Page 5: ...sy use and maintenance Make sure that the water tray and filter are properly installed before filling the tank and operating the humidifier DO NOT USE THE HUMIDIFIER WITHOUT THE FILTER IN PLACE Select...

Page 6: ...base 4 Set the fan enclosure onto the humidifier base Make sure that the filter lines up with the fan cover 2 Place the filter on the water tray as shown 3 Slide the cord through the notch at the bott...

Page 7: ...eplace the filler cap and turn clockwise until the LOCK arrows line up with the ridges on the tank opening Return the tank to an upright position When carrying the tank use the carry handle and suppor...

Page 8: ...is necessary to move the humidifier make sure it is unplugged and remove the water tank first Plugging in the Humidifier WARNING To reduce the risk of electrical shock never plug in the humidifier wh...

Page 9: ...e that the humidifier is on Setting the fan speed Turn the fan speed knob to the desired setting To increase the humidity in a room more quickly set the knob to HI For quiet nighttime operation or for...

Page 10: ...isplay will show LO If it is higher than 90 HI will be displayed Press the and buttons to adjust the humidity level The humidifier will then turn on automatically whenever the current room humidity dr...

Page 11: ...lowing cleaning and maintenance procedures must be followed Failure to follow the recommended care and maintenance instructions could lead to a buildup of micro organisms including algae bacteria and...

Page 12: ...om the water tank before placing the tank in the dishwasher 1 Place the filler cap in the dishwasher s silverware basket This small part must be secured in the silverware basket to prevent it from bei...

Page 13: ...to wet all inside surfaces 3 Empty the tank rinse tank and filler cap thoroughly with water until no bleach smell is noticeable Dry with a clean cloth or paper towel Storing the Humidifier 1 Unplug th...

Page 14: ...ne up with the ridges on the fill neck Is something trapped under the edge of the rubber seal in the center of the filler cap Check for debris under the edge of the seal or for damage to the seal If t...

Page 15: ...if it has not been seated on the base for a long period of time Press the button in the center of the filler cap to relieve the vacuum Apply 100 pure petroleum jelly to the filler cap gasket Wipe off...

Page 16: ...u have a claim under this warranty DO NOT RETURN THE APPLIANCE TO THE STORE Please call our CUSTOMER SERVICE NUMBER For faster service please have model series and type numbers ready for operator to a...

Reviews: