background image

2

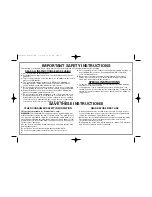
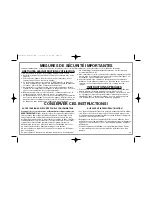
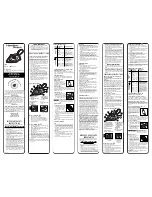
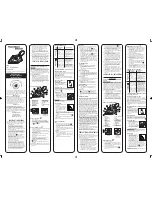
SAVE THESE INSTRUCTIONS!

IMPORTANT SAFETY INSTRUCTIONS

READ ALL INSTRUCTIONS BEFORE USING

1.

Use iron only for its intended use.

2.

Verify that the voltage in your home corresponds to that of your
appliance.

3.

To protect against risk of electric shock, do not immerse the iron in
water or other liquids.

4.

The iron should always be turned to OFF before plugging or
unplugging from outlet. Never yank cord to disconnect from 
outlet; instead, grasp plug and pull to disconnect.

5.

Do not allow cord to touch hot surfaces. Let iron cool completely
before putting away. Loop cord loosely around iron when storing.

6.

Always disconnect iron from electrical outlet when filling with
water or emptying and when not in use.

7.

Do not operate iron with a damaged cord or if the iron has been
dropped or damaged. To avoid the risk of electric shock, do not
disassemble the iron. Call our toll-free customer service number
for information on examination and  repair. Incorrect reassembly
can cause a risk of electric shock when the iron is used.

8.

Close supervision is necessary for any appliance being used by or
near children. Do not leave iron unattended while connected 
or on an ironing board.

9.

Burns can occur from touching hot metal parts, hot water, or
steam. Use caution when you turn a steam iron upside down –
there may be hot water in the reservoir.

SPECIAL INSTRUCTIONS

1.

To avoid a circuit overload, do not operate another high wattage
appliance on the same circuit.

2.

If an extension cord is absolutely necessary, a 15-ampere cord
should be used. Cords rated for less amperage may overheat. Care
should be taken to arrange the cord so that it cannot be pulled or
tripped over.

When using your flatiron, basic safety precautions should always be followed, including the following:

OTHER CONSUMER SAFETY INFORMATION

This product is intended for household use only.
WARNING!

Shock Hazard: This appliance has a polarized plug (one

wide blade) that reduces the risk of electric shock. The plug fits only
one way into a polarized outlet. Do not defeat the safety purpose of
the plug by modifying the plug in any way or using an adaptor. If the
plug does not fit, reverse the plug. If it still does not fit, have an elec-
trician replace the outlet. 
Use the iron on an ironing board. Ironing on any other surface may
damage that surface.
Do not iron or vertical steam clothes that are being worn.
Do not use vertical steam in the direction of people or pets.

• Steam vents should be cleaned before first use. Prepare iron for

steam ironing, then iron over an old cloth for a few minutes while
letting the iron steam. This will clean the vents.

• Many irons spit or sputter during the first few uses with tap water.

This happens as the steam chamber becomes conditioned. 
This will stop after a few uses.

• During first use of the iron, it may appear to smoke. This will stop

and does not indicate a defect or hazard.

READ BEFORE FIRST USE

840172600 ENnv05.qxd  7/15/08  11:28 AM  Page 2

Summary of Contents for Easy Touch 14413

Page 1: ...01 800 71 16 100 Le invitamos a leer cuidadosamente este instructivo antes de usar su aparato Visit hamiltonbeach com for delicious recipes tips and to register your product online Consulter hamiltonb...

Page 2: ...circuit overload do not operate another high wattage appliance on the same circuit 2 If an extension cord is absolutely necessary a 15 ampere cord should be used Cords rated for less amperage may ove...

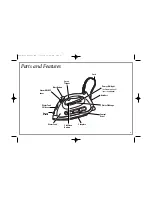
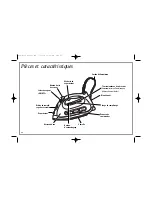
Page 3: ...Fill Area Water Tank Cord Self Clean Button Soleplate Spray Nozzle Blast Button Spray Trigger Steam ON OFF Lever Control Panel Power ON Light will remain on until iron is unplugged Water Fill Gauge 84...

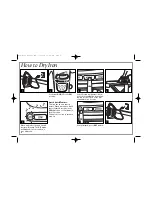
Page 4: ...otionless the Auto Shutoff feature will engage The OFF button will flash and on select models a tone will sound 5 Auto Shutoff Feature This iron has an auto shutoff feature When motionless it will shu...

Page 5: ...ow hot soleplate to touch delicate garments When motionless the Auto Shutoff feature will engage The OFF button will flash and on select models a tone will sound 7 8 When finished press OFF button OR...

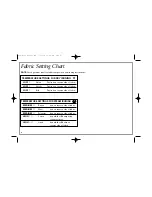
Page 6: ...heck garment label for fabric composition and ironing instructions TEMPERATURE SETTINGS FOR STEAM IRONING MEDIUM Rayon Iron on reverse side of fabric MEDIUM Wool Iron on reverse side of fabric MEDIUM...

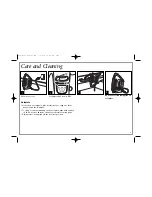
Page 7: ...4 Soleplate Never iron over zippers pins metal rivets or snaps as these may scratch the soleplate To clean occasional buildup on the soleplate wipe with a sudsy cloth Do not use abrasive cleansers or...

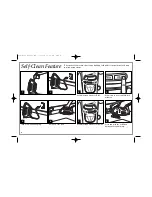
Page 8: ...uctions each time you iron using steam 1 2 3 4 Press and hold the Self Clean button until tank is empty Set Adjustable Steam to DRY Allow iron to heat on HIGH for 2 minutes Turn iron OFF and unplug Se...

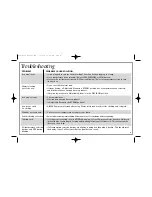
Page 9: ...have enough time to preheat If dry ironing make sure Adjustable Steam is in the DRY IRON position Check water level Has iron had enough time to preheat Is Adjustable Steam in the STEAM position ALWAY...

Page 10: ...askets clutches motor brushes and or agitators etc This warranty extends only to the original consumer purchaser and does not cover a defect resulting from abuse misuse neglect including failure to cl...

Page 11: ...aute puissance sur le m me circuit 2 Si vous devez absolument utiliser une rallonge choisissez en une de 15 amp res Une rallonge de moindre intensit pourrait sur chauffer Veillez s curiser la rallonge...

Page 12: ...n d alimentation Bouton d autonettoyage Semelle Vaporisateur Bouton de jet de vapeur G chette du vaporisateur Levier de vapeur ON OFF Panneau de commandes T moin lumineux de mise sous tension restera...

Page 13: ...e mise hors tension automatique s active Le bouton OFF clignotera et sur certains mod les un signal sonore retentira 5 Caract ristique de mise hors tension automatique Ce fer est dot d une caract rist...

Page 14: ...semelle chaude Pendant l immobilit du fer la caract ris tique de mise hors tension automatique s active Le bouton OFF clignotera et sur certains mod les un signal sonore retentira 7 8 Appuyer sur le b...

Page 15: ...our les caract ristiques de fabrication du tissu et les instructions de repassage R GLAGES DE TEMP RATURE POUR LE REPASSAGE LA VAPEUR MOYENNE Rayonne Repasser sur l envers du tissu MOYENNE Laine Repas...

Page 16: ...ermetures glissi re pingles rivets m talliques boutons pression car ils pourraient rayer la semelle Pour nettoyer les accumulations peu fr quentes de la semelle essuyer avec un chiffon mouill d eau sa...

Page 17: ...puyer et tenir enfonc le bou ton d autonettoyage jusqu ce que le r servoir soit vide Abaisser le niveau de vapeur DRY Positionner le degr de temp ra ture HIGH et laisser chauffer pendant environ 2 min...

Page 18: ...assurer que le r glage de vapeur est positionn DRY IRON V rifier le niveau d eau Est ce que le temps de chauffage du fer a t suffisant Est ce que le r glage de vapeur est en position STEAM TOUJOURS vi...

Page 19: ...e s tend qu l acheteur consommateur original et ne couvre aucune panne entra n e par un mauvais usage un usage abusif de la n gligence y compris une absence de nettoyer le produit r guli rement confor...

Page 20: ...ng n otro aparato de alto consumo de watts en el mismo circuito 2 Si es absolutamente necesario el usar un cable de extensi n se debe usar un cable de 15 amperes Cables con clasificaci n para un menor...

Page 21: ...Agua Cable Bot n de Auto Limpieza Placa Boquilla de Roc o Bot n de R faga Bot n de Roc o Palanca de Encendido de vapor Panel de Control Luz de ENCENDIDO Permanecer encendida hasta que la plancha sea...

Page 22: ...uto apagado Cuando est sin movimiento se apagar despu s de 30 segundos el la posi ci n HACIA ABAJO o 15 minutos en la posici n HACIA ARRIBA Levante o mueva la plancha para encenderla de nuevo 7 Cuando...

Page 23: ...oir un sonido 7 8 Cuando termine presione el bot n de OFF APAGADO O Caracter stica de Auto Apagado La plancha cuenta con una carac ter stica de auto apagado Cuando est sin movimiento se apagar despu s...

Page 24: ...ta de la prenda para ver la composici n de la tela y las instrucciones para planchado AJUSTES DE TEMPERATURA PARA PLANCHADO CON VAPOR MEDIO Ray n Planche por la parte interior de la tela MEDIO Lana Pl...

Page 25: ...4 Placa Nunca planche sobre cierres prendedores remaches met licos o broches ya que pueden tallar la placa Para limpiar la ocasional acumulaci n en la placa limpie con un pa o jabonoso No use limpiad...

Page 26: ...anche con vapor 1 2 3 4 Presione y mantenga presionado el bot n de Auto Limpieza hasta que el tanque est vac o Coloque el Vapor Ajustable en SECO Deje que la plancha se caliente en ALTO por 2 minutos...

Page 27: ...arse Si va a planchar en seco aseg rese que el Vapor Ajustable esta en posici n de PLANCHADO EN SECO Revise el nivel de agua Tuvo suficiente tiempo la plancha para calentarse Est el Vapor Ajustable en...

Page 28: ...el consumidor Esta garant a incluye los gastos de transportaci n del producto que deriven de su cumplimiento dentro de su red de servicio LIMITACIONES Esta garant a no ampara el reemplazo de piezas de...

Page 29: ...s se estar a dicho plazo El tiempo que duren las reparaciones efectuadas al amparo de la garant a no es computable dentro del plazo de la misma Cuando el bien haya sido reparado se iniciar la garant a...

Page 30: ...30 840172600 SPnv01 qxd 7 15 08 11 32 AM Page 30...

Page 31: ...31 840172600 SPnv01 qxd 7 15 08 11 32 AM Page 31...

Page 32: ...sticas El ctricas 14413 I71 120V 60Hz 1500W 14414 I71 120V 60Hz 1500W 14415 I71 120V 60Hz 1500W 7 08 840172600 Los n meros de modelo tambi n pueden estar seguidos del sufijo MX 840172600 SPnv01 qxd 7...

Reviews: